ASSEMBLY & ADJUSTMENTS
ASSEMBLING YOUR BAND SAW
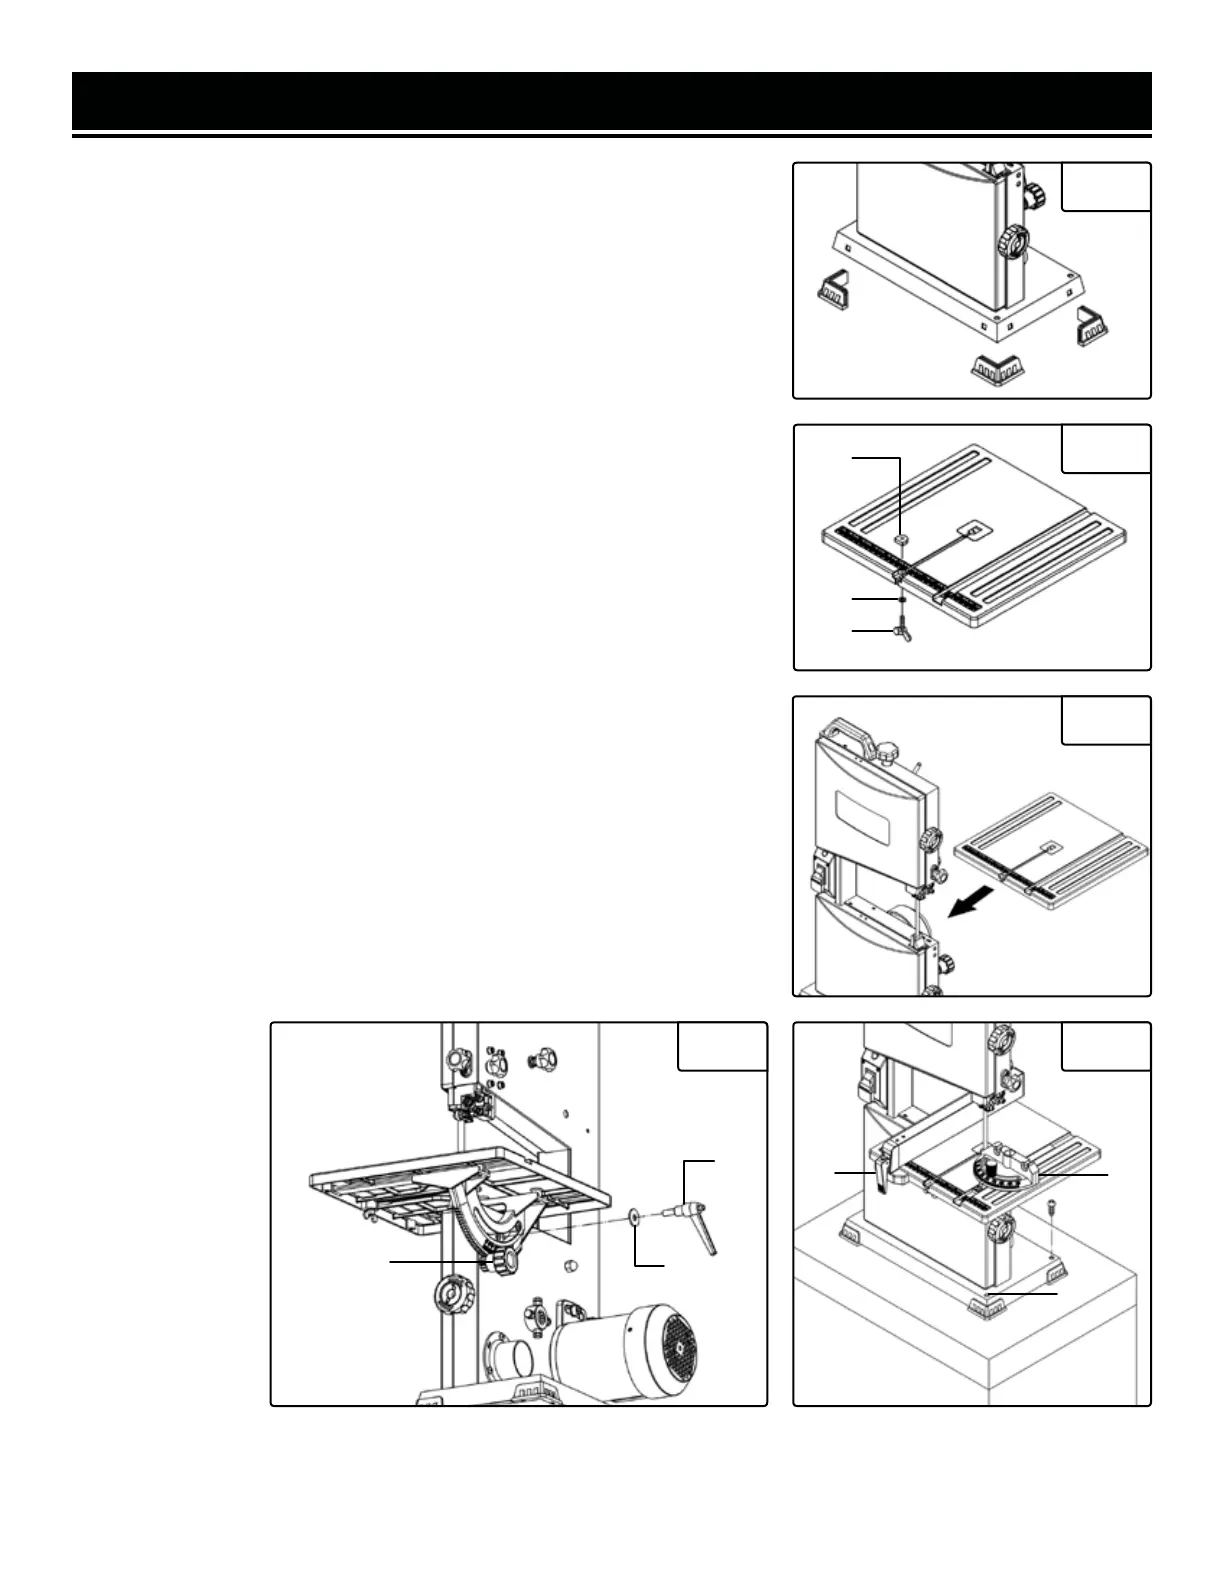
1. Attach the four feet to the base of the band saw (Fig. 2).
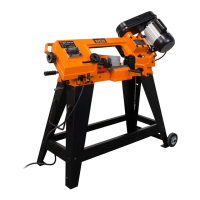
2. Remove the D-nut (Fig. 3 - 1), washer (Fig. 3 - 2), and wing screw (Fig.
3 - 3) from the saw’s table assembly (Fig. 3).
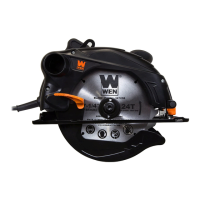
3. Remove the bevel locking handle (Fig. 5 - 1) and washer (Fig. 5 - 2)
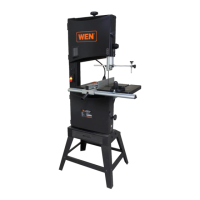
Slide the table onto the band saw, making sure the blade stays within the
table slot (Fig. 4). Pull back on the angle adjustment knob (Fig. 5 - 3) and
align the teeth on the table bracket with the teeth on the angle adjustment
knob. Release the knob.
4. Re-install the bevel locking handle and washer (Fig. 5).
NOTE: The locking handle is spring-loaded and can be re-positioned. To
re-position the handle, pull the handle body outwards, turn it to the de-
sired position, then let it spring back in.
5. Mount the saw to a workbench or other sturdy surface using the three
holes provided on the base (Fig. 6 - 1). Mounting hardware is not in-
cluded with the saw. Use M8 or 1/4” fasteners.
6. Place the miter gauge into the miter gauge slot (Fig. 6 - 2).
7. Pull up on the fence locking lever (Fig. 6 - 3) to release it. Place the
fence on the table, ensuring it is parallel to the blade. Push down on the
fence locking lever to lock the fence to the table.
Fig. 2
Fig. 3
Fig. 4
Fig. 5 Fig. 6
1
2
3
1
2
1
2
3
3
10