7
WARNING: For your own safety, read the instruction manual before operating the band saw.
1. Wear eye protection.
2. Do not wear gloves, a necktie, jewelry, or loose clothing.
3. Make sure the saw is on a firm, level surface and properly secured.
4. Use only the recommended accessories.
5. Use extra caution with very large, very small, or awkward workpieces.
6. Keep hands away from blade at all times to prevent accidental injury.
ASSEMBLY
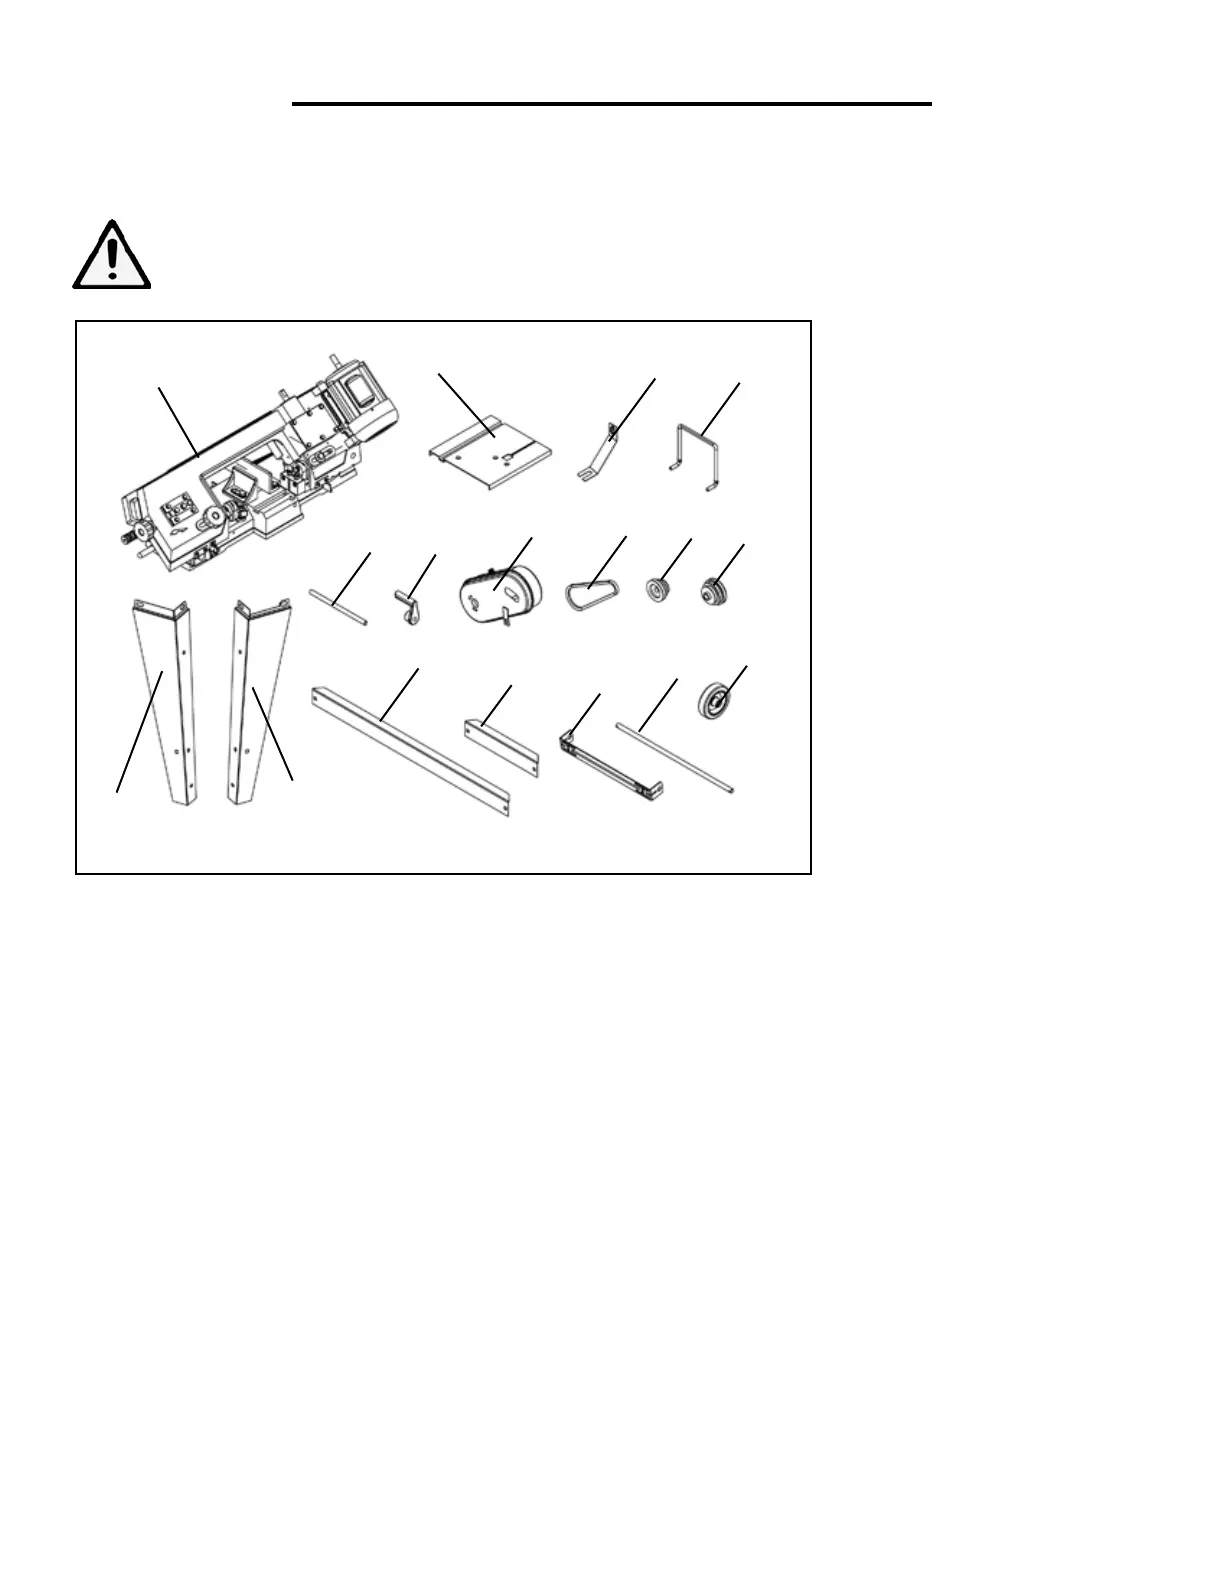
UNPACKING
Carefully unpack the band saw and all its parts, and compare against the list below. Do not discard the carton or
any packaging until the band saw is completely assembled.
WARNING: If any part is missing or damaged, do not plug in the band saw until the missing or dam-
aged part is replaced.
Tools Required for Assembly & Adjustments
The tools listed below are not included but are required for either assembly or adjustment.
Two 14mm Open End Wrenches
Two 10mm Open End Wrenches
2
3
1
4
5
6
7
8
9
10
11
12
13
14
15
16
17
TABLE OF LOOSE PARTS
1. Band Saw (1)
2. Stand Legs A (2)
3. Stand Legs B (2)
4. Table (1)
5. Table Support (1)
6. Transport Handle (1)
7. Work Stop Rod (1)
8. Work Stop (1)
9. Belt House (1)
10. V-Belt (1)
11. Motor Pulley (1)
12. Work Gear Pulley (1)
13. Long Brace (2)
14. Short Brace (2)
15. Wheel Mounting Bracket (1)
16. Shaft (1)
17. Wheels (2)
18. Hardware Bag (not shown)
NOTE: Key is tied to motor
shaft.
 Loading...