ALIGNING THE FENCE
1. Make sure that the tool is OFF and disconnected from the power
source.
2. Make sure that the table is aligned with the blade. See "ALIGNING
THE TABLE".
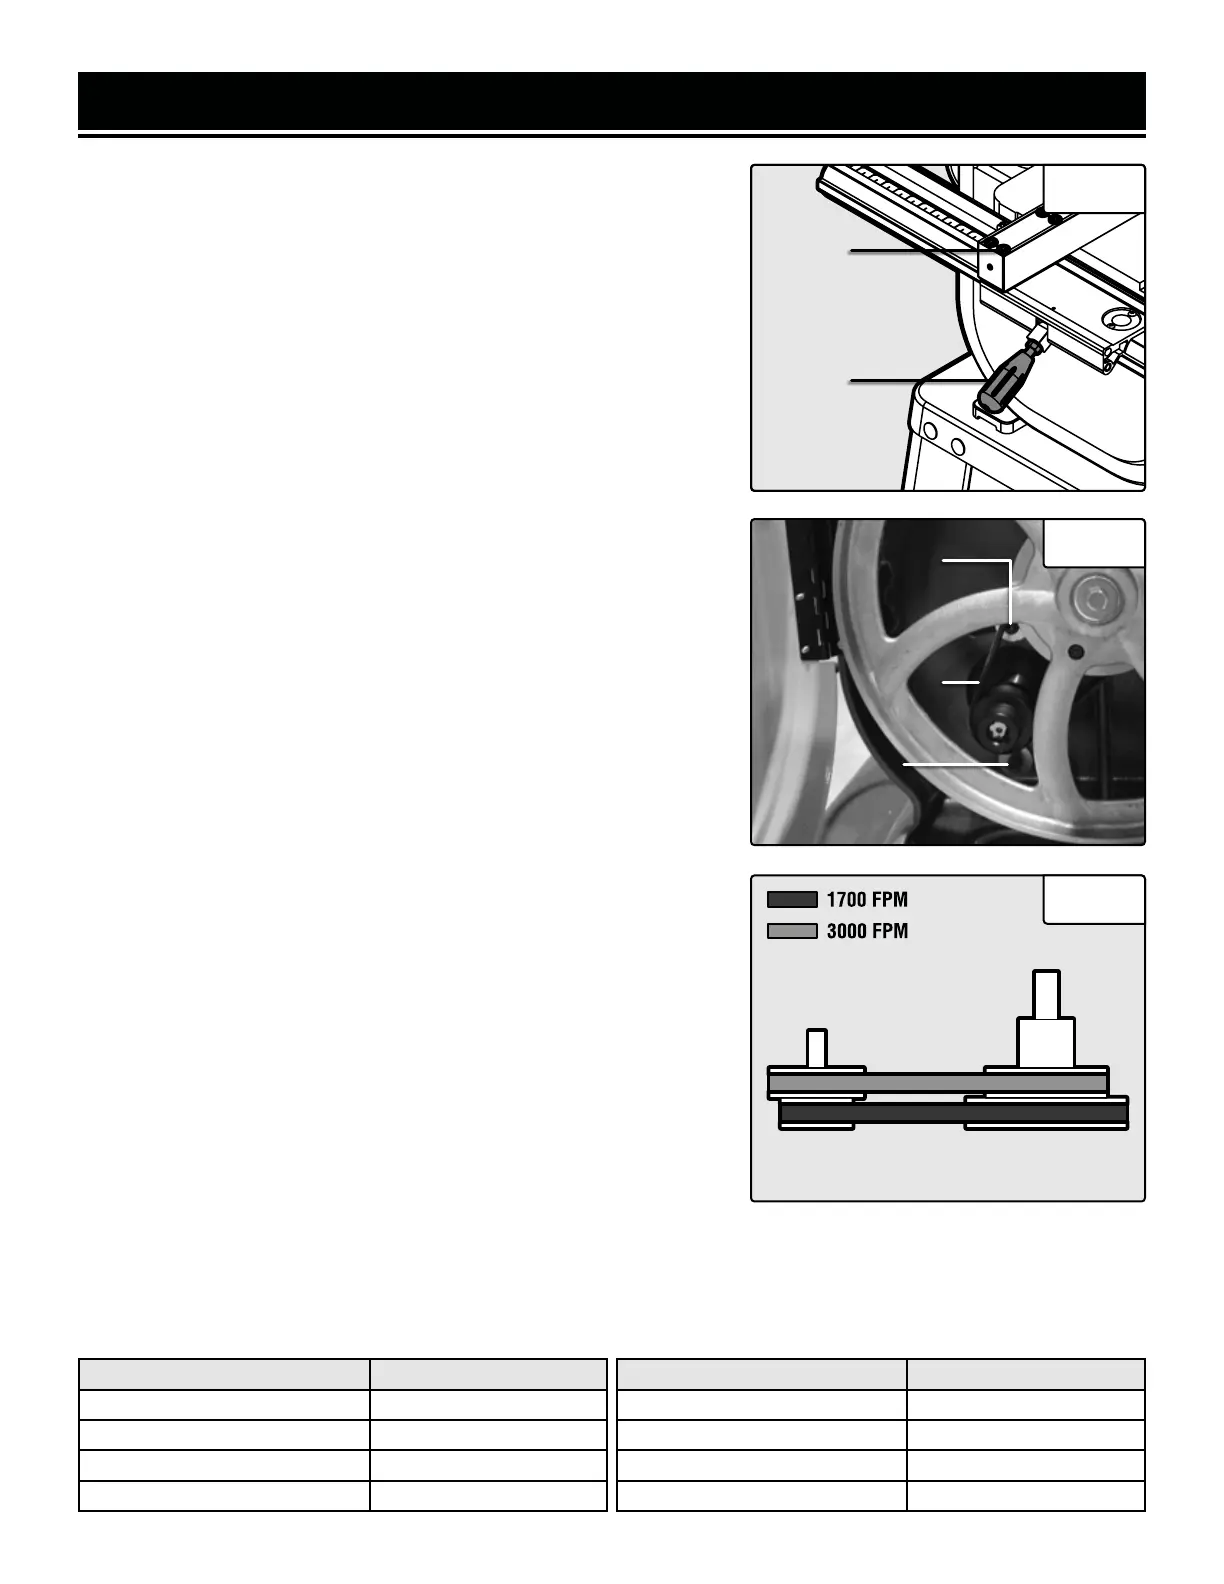
3. Install the fence on the right side of the blade and align it against
the miter gauge slot. Lock the fence in place using the fence lock lever
(Fig. 22 - 1).
4. If the fence is parallel with the miter gauge slot, no further adjust-
ments are needed. If the fence is not parallel with the miter gauge slot,
continue on to step 5.
5. Loosen the four fence adjustment cap screws (Fig. 22 - 2) and
adjust the fence parallel to the miter gauge slot. Retighten the fence
adjustment cap screws.
ADJUSTING THE BLADE SPEED
Your band saw can run with blade speeds of either 1700 or 3000 FPM.
Use the chart below to determine which speed setting is correct for
your operation:
To adjust the blade speed:
1. Make sure that the tool is OFF and disconnected from the power
source.
2. Open the lower wheel cover and loosen the motor mount adjust-
ment cap screw (Fig. 23 - 1).
3. Adjust the motor so that the motor adjustment cap screw slides to
the right of the slot. The tension on the ribbed v-belt (Fig. 23 - 2) will
be released.
NOTE: If the motor is difficult to move, loosen the pivot cap screw
(Fig. 23 - 3) slightly.
4. Place the v-belt on the pulleys based on your desired speed (Fig.
24). Make sure that the v-belt is properly seated in the grooves of the
pulleys before beginning operation.
ASSEMBLY & ADJUSTMENTS
Fig. 22
2
1
Fig. 23
Fig. 24
MOTOR WHEEL
1
3
2
Cutting Operation Blade Speed (FPM)
Most Species of Wood 3000
Dense Hardwood 1700
Fast or Average Feed Rate 3000
Slow Feed Rate 1700
Cutting Operation Blade Speed (FPM)
Rough Edges Acceptable 3000
Requires Smooth Edges 1700
Quick Cuts 3000
Detailed Cuts 1700
5. Reposition the motor so that the motor adjustment cap screw slides to the left of the slot, then tighten the screw
to secure tension on the belt. Lightly press the belt with a finger; it should deflect about 1/8" (3mm). If adjustments
are needed, repeat step 5.
6. Make sure all screws are tightened and the belt is properly tightened, then close the lower wheel cover.
18
 Loading...