OPERATION
USING THE MITER GAUGE
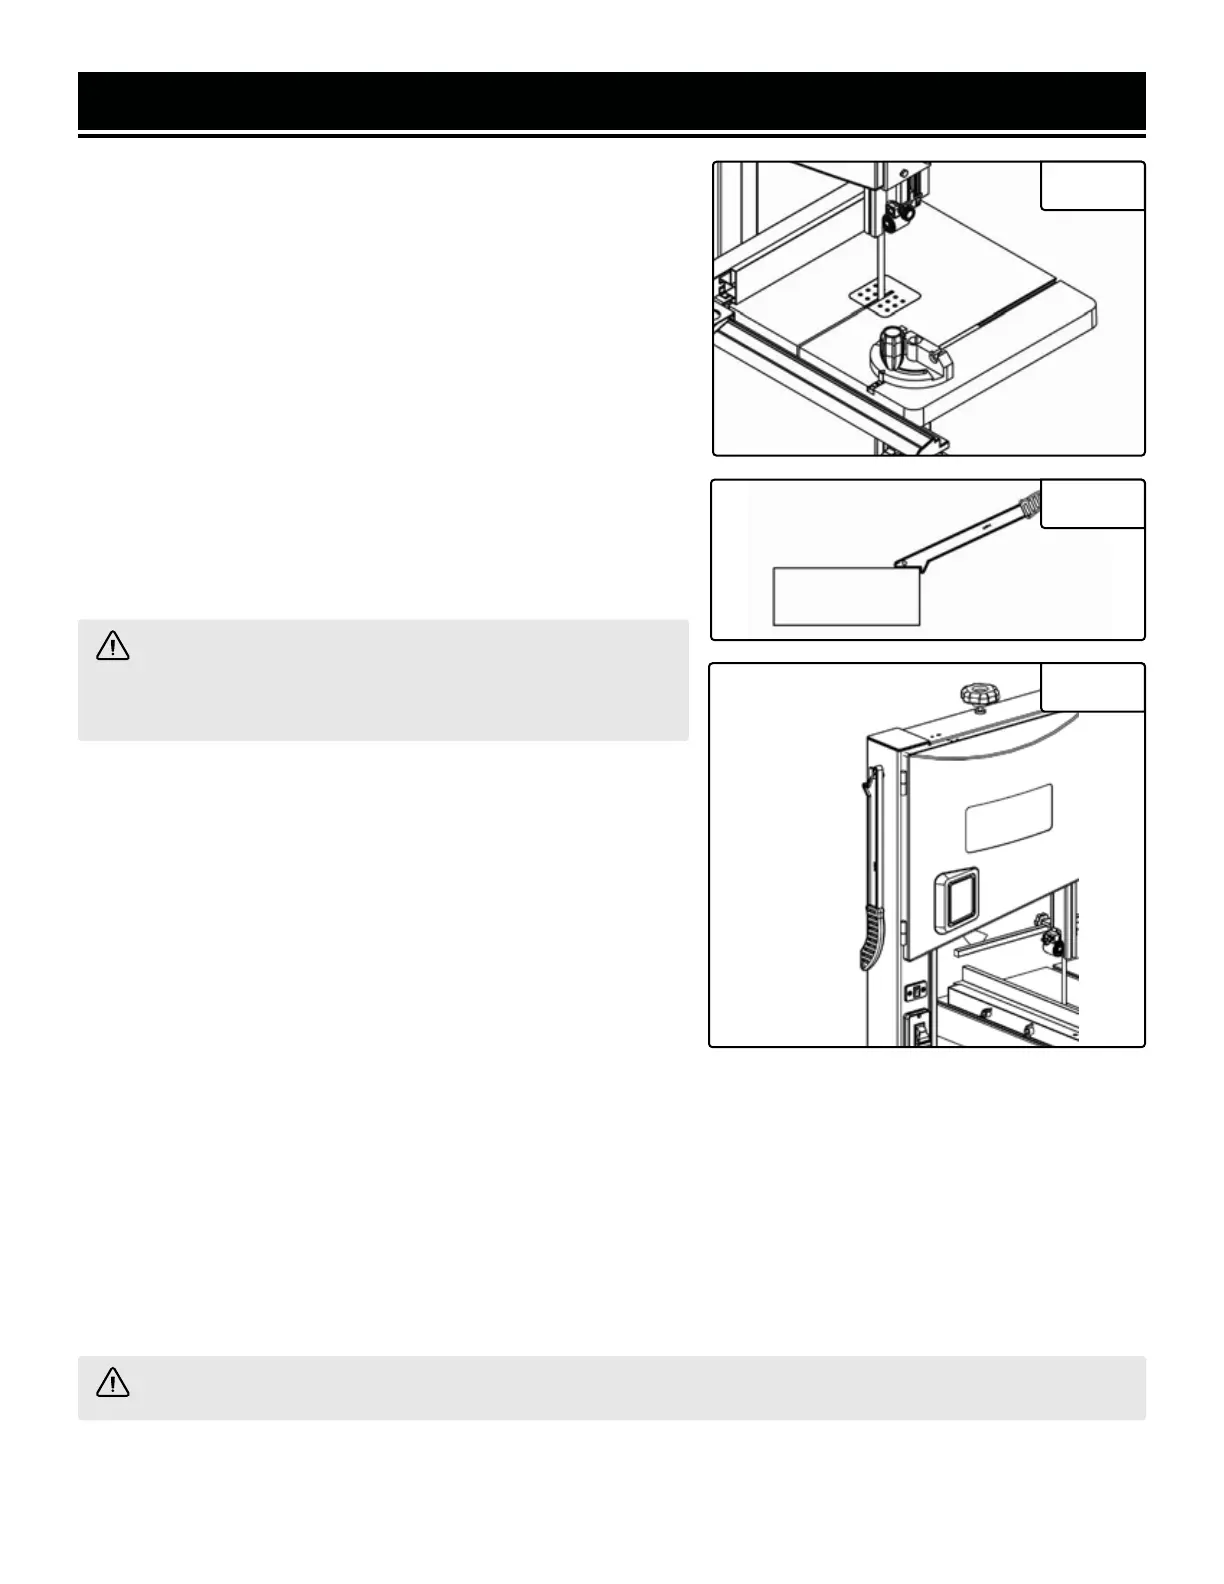
1. Place the miter gauge into the slot on the table. (Fig. 29)
2. Loosen the knob on the gauge to set a new miter angle (be-
tween 0 and 60 degrees).
3. Tighten the knob firmly before cutting begins.
USING THE PUSH STICK
The push stick serves as an extension of the hand and protects
against accidental contact with the saw blade. The push stick
must be used if the distance between the bandsaw blade and the
rip fence is less than 5.9 inches. When the push stick is not used,
it can be stored on the hook provided on the bandsaw frame (Fig.
31). Replace the push stick if damaged.
GENERAL CUTTING
Fig. 29
Fig. 30
Fig. 31
WARNING! Operating a band saw involves a certain
amount of hazard. Read the instructions and plan your work
before cutting a workpiece.
1. Use scrap lumber to check the settings and to get the feel of
operating the band saw before attempting regular work.
2. Do not turn the power on before all adjustments have been
made. Check to make sure the upper guard is in place. Always
keep the upper blade guard close to your work, approximately
1/8” (3.2 mm) above the workpiece.
3. Do not force the workpiece against the blade. Light contact
permits easier cutting and prevents unwanted friction and heat-
ing of the blade. Sharp saw blades need little pressure for cutting.
Steadily move the workpiece against the blade without forcing it.
4. It is recommended that a dust collection bag be connected to
the dust port when sawing wood.
5. Use the band saw for straight line operations such as cross-cutting, ripping, miter cutting, beveling, compound
cutting, and resawing.
6. To avoid twisting the blade, do not turn sharp corners; instead, saw around corners. A band saw is basically a
“curve-cutting” saw. It is not capable of doing intricate inside cutting as can be done with a scroll saw.
WARNING! Do not use this band saw to cut ferrous metals.
18