ASSEMBLY & ADJUSTMENTS
CHANGING THE SAW BLADE (CONT.)
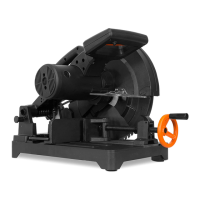
To remove the blade:
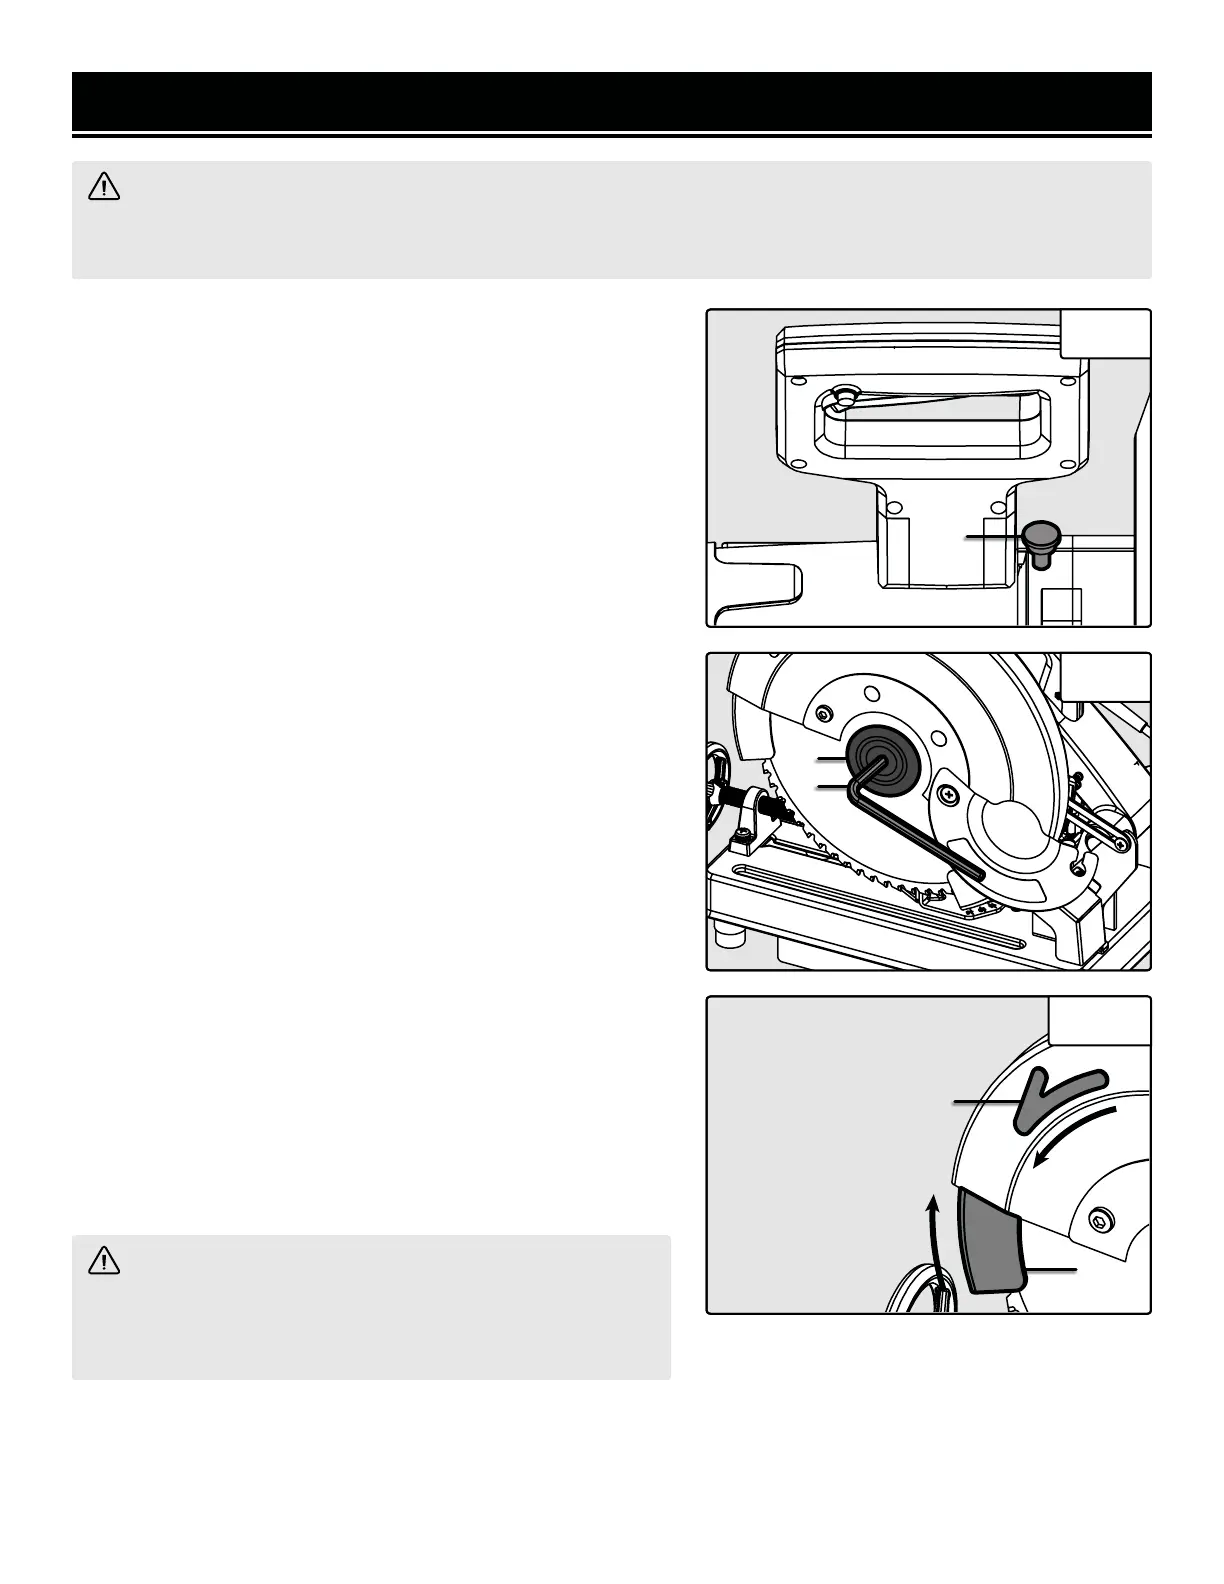
4. Lock the arbor by pushing down on the arbor lock (Fig. 8 - 1).
5. Use included 8 mm hex wrench (Fig. 9 - 1) to loosen (turn
counterclockwise) and remove the arbor screw, washer, and
outer flange (Fig. 9 - 2).
6. Rotate and retract the upper blade guard (Fig. 10 - 1) into the
blade housing by hand.
7. Carefully remove blade guard from the blade guard housing.
To install the blade:
1. Check to make sure that all packaging is removed from the
new blade and that the blade housing is free from debris and
cutting remnants.
2. Install the blade on the inner flange and arbor. Ensure that the
blade direction matches the direction on the blade housing (Fig.
10 - 2).
3. Lock the arbor by pushing down on the arbor lock.
4. Reassemble the outer flange, washer, and arbor bolt. Tighten
the bolt with the 8 mm hex wrench. Turn the bolt clockwise to
tighten.
5. Release the arbor lock and turn the blade gently to ensure that
the arbor lock has been disengaged.
6. Rotate the arbor cover into place and tighten the cross head
screw to secure the arbor cover.
7. Plunge the saw a few times without the saw being plugged
in to ensure that the blade guards operate properly and that the
saw is installed properly.
Fig. 8
1
Fig. 9
2
WARNING! Do not plug in or turn on the tool until it is fully assembled according to the instructions. Read
through and become familiarized with the following procedures of handling and adjusting your chop saw. Failure
to follow the safety instructions may result in serious personal injury.
WARNING! Run the saw for a few minutes after a new
blade is installed before cutting any material. This will help to
make sure that the blade is installed correctly and that there
are no flaws in the blade.
Fig. 10
1
1
2
13

 Loading...