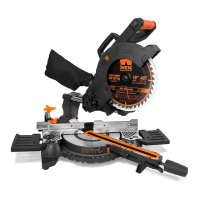
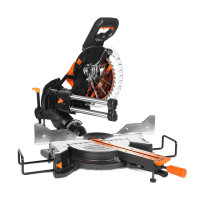
Fig. 2
1
2
3
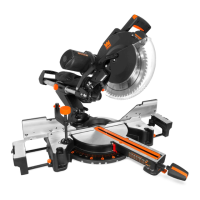
Fig. 3
13
GUARD OPERATION
NOTE: Keep hands clear of the blade when the operating
handle is lowered. Do not interfere with the proper move-
ment of the blade guard.
When the handle is lowered, the blade guard raises au-
tomatically. When the handle is raised, the blade guard
returns to its safety position, covering the blade.
RAISING/LOWERING THE SAW ARM
The saw arm needs to be raised up before operation and
locked down for transporting and storing.
To raise saw arm from the lower position:
1.Holding operating handle (Fig. 2 - 1), lightly press down
on the saw arm and pull out the release bolt (Fig. 2 - 2).
2. Slowly raise the saw arm to the upper position.
To lower saw arm from the upper position:
1. Holding the operating handle (Fig. 2 - 1), pull out the
release knob (Fig. 2 - 2).
2. Slowly lower the saw arm to the lower position and push
the release bolt into the hole.
ADJUSTING THE BEVEL ANGLE
The saw arm can bevel from 0° to 45° to the left and right.
1. As viewed from the rear of the saw, loosen the bevel lock
knob (Fig. 2 - 3) by turning it counterclockwise.
2. The miter saw is equipped with a bevel pin (Fig. B - 1)
that provides a positive bevel angle stop at 0-degrees. With
the bevel pin fully pushed in, the saw head is free to bevel
up to 45° to the left. To bevel to the right, bevel the head
slightly to the left and pull out the pin. To freely bevel the
head in either direction, fully pull out the bevel pin.
3. Tilt the saw arm until the bevel angle indicator points to
the desired angle on the bevel scale (Fig. 3 - 1).
NOTE: If the bevel pin is stuck, slightly bevel the saw head
in the opposite direction that you are trying to bevel and
pull out the pin.
4. Tighten the bevel lock knob by turning it clockwise. Be
sure to tighten firmly without over-tightening.
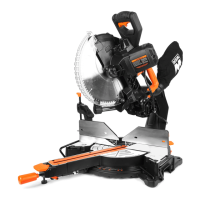
ASSEMBLY & ADJUSTMENTS
Fig. B
1
2
1
SETTING UP ARM SLIDE
The saw arm can be adjusted to different lengths using the slide bar, and can slide back and forth when cross-
cutting.
For sliding cuts: Loosen the sliding bar lock knob (Fig. B - 2) and slide the saw arm to desired position.
For non-sliding cuts and transportation: Tighten the sliding bar lock knob (Fig. B - 2) for non-sliding operations
and before transporting the miter saw.
 Loading...