English
|
15
3. INSTALL GENTENT FRAME
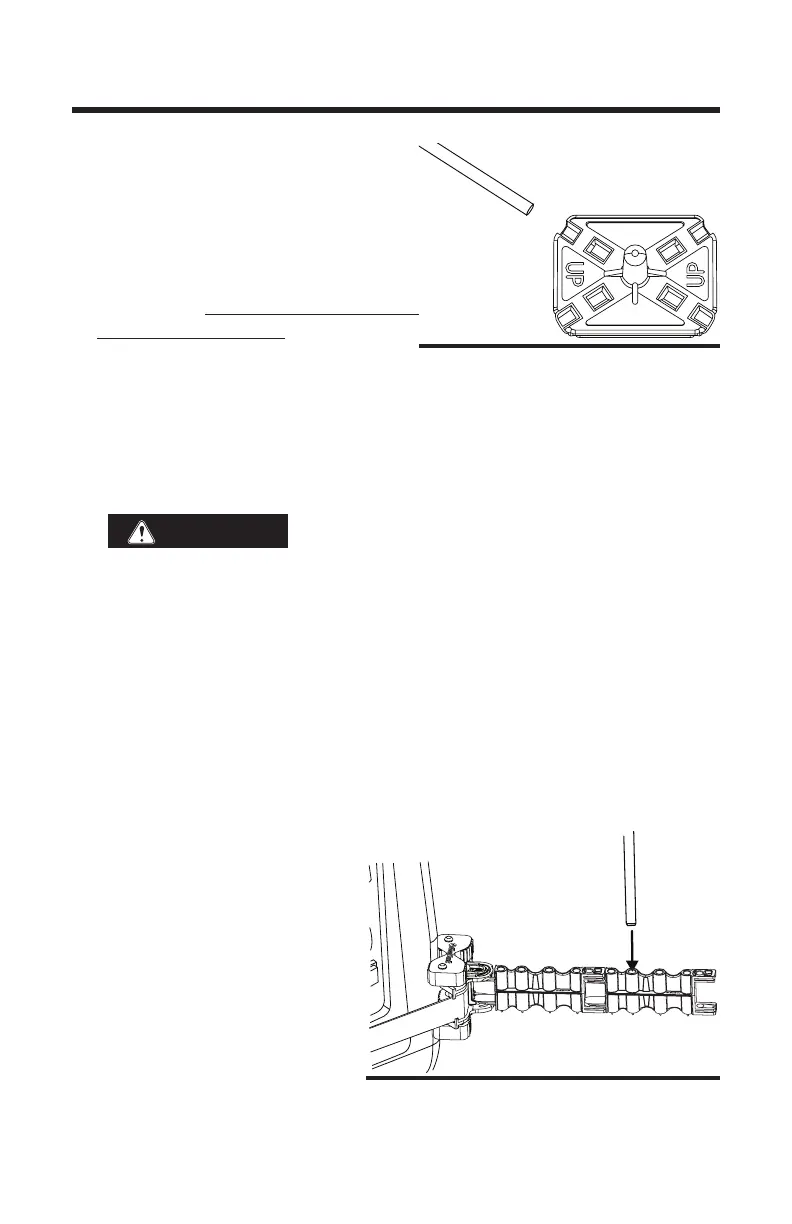
a. Orient the Center Connector with the
vent pin up and position the Center
Connector to match generator align-
ment, short and long sides, respective-
ly. Unless you are installing in parallel;
see page 19 “Installing the GenTent
with Parallel Units”.
b. Insert the rst Frame Rod into the
Center Connector, being sure it is seated all the way into the Center
Connector. (Fig. 3.1) Always insert the Frame Rod into the Center
Connector before inserting it into the Extender Arms.
c. Insert the other end of the frame rod fully into the corresponding Extender
Arm hole at the pre-measured locations. (Fig. 3.2)
CAUTION
Always grasp frame rods & center connector
rmly during installation to avoid the whipping motion that can occur if
a bent berglass rod is mistakenly released.
d. Install the Frame Rods into the Center Connector in a crisscross pattern.
Always be sure to grasp the free end of the frame rod rmly. Then bend
the free end towards the Extender Arm and insert fully into the correct
hole.
e. Repeat for remaining Frame Rods.
f. Check the Extender Arms; the Frame Rods should be fully seated into
the Frame Rod holes. (Fig. 3.2) The Extender Arms will exhibit a slight
upward lean; this is due to the force being applied to them by the ber-
glass rods.
g. If any Extender Arm assem-
blies exhibit twisting, move
the Extender Arm one po-
sition in the direction of the
twist on the Angle Brace, or
alternatively move the entire
Angle Brace in the direction
of the twist until the Extender
Arms straighten out.
Fig. 3.1
GenTent
Safety Canopies
U.S. Patent
8997769
ASSEMBLY
Fig. 3.2
 Loading...