COMPONENT ACCESS
3-8
n
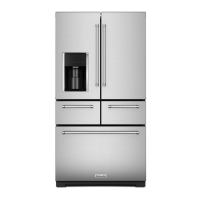
French-Door Boom Mount Refrigerator
Accessing Freezer Compartment Components
1. Loosen the four 1/4" screws. Li the freezer door o the
brackets and remove.
1. Remove the freezer door.
2. Remove either the le or right pan stop by exing out the
bracket assembly near the pan stop.
3. Slide the top pan assembly forward and remove,beginning
with the side with the pan stop removed.
1. Remove the freezer door.
2. Remove the top pan assembly.
3. Li the front of boom pan to release the front tab and
catch.
4. While holding the side rails push the boom pan.
5. Assembly back to release the remaining tabs and remove the
boom pan.
NOTE: During Installaon, hook the back tab under the lip of
the rail rst, then work your way forward, hooking one tab at
a me.
1. Remove the freezer door.
2. Remove the top pan assembly.
3. Remove the boom pan assembly.
4. Slide the bracket assembly forward.
5. Release the three tabs on either end of the rack sha and
slide out the gear collar.
6. Li the rack sha from the gear and pull to remove the other
end from the gear collar.
7. Remove the four 1/4" screws from each bracket assembly.
8. Slide the enre bracket assembly forward to disengage from
the liner posts, and remove the bracket assembly.
1. Remove the 1/4” screw mounng the ice maker to the top
liner.
2. Slide the Ice Maker forward to disengage from the plasc
posts in the top of the liner.
3. Disconnect the wiring connector and remove the ice maker.
1. Remove the freezer door.
2. Remove the top pan assembly.
3. Remove the boom pan assembly.
4. Remove the bracket assembly.
5. Remove the freezer ice maker.
6. Remove the four corner screws on the evaporator cover.
7. Pull the evaporator cover assembly away from the back liner,
disconnect the wiring connector, and remove.
1. Remove the evaporator cover assembly.
2. Disconnect the wiring connector.
3. Remove the two 1/4" screws and remove the icebox fan.
1. Disconnect the two wiring connectors, one at either end.
2. Unclip the defrost heater clips.
3. Remove the le and right air dam.
4. Remove the defrost heater.
1. Remove the icebox fan to gain access to the heater wire
assembly.
2. Disconnect the three wiring connectors and remove the
evaporator heater wire assembly.
Electrical Shock Hazard
Disconnect power before servicing.
Failure to do so can result in death or
electrical shock.
Replace all parts and panels before operating.