Unpack Your Furnace
The furnace is shipped in one carton containing the fur-
nace, installation instruction booklet and hardware bag.
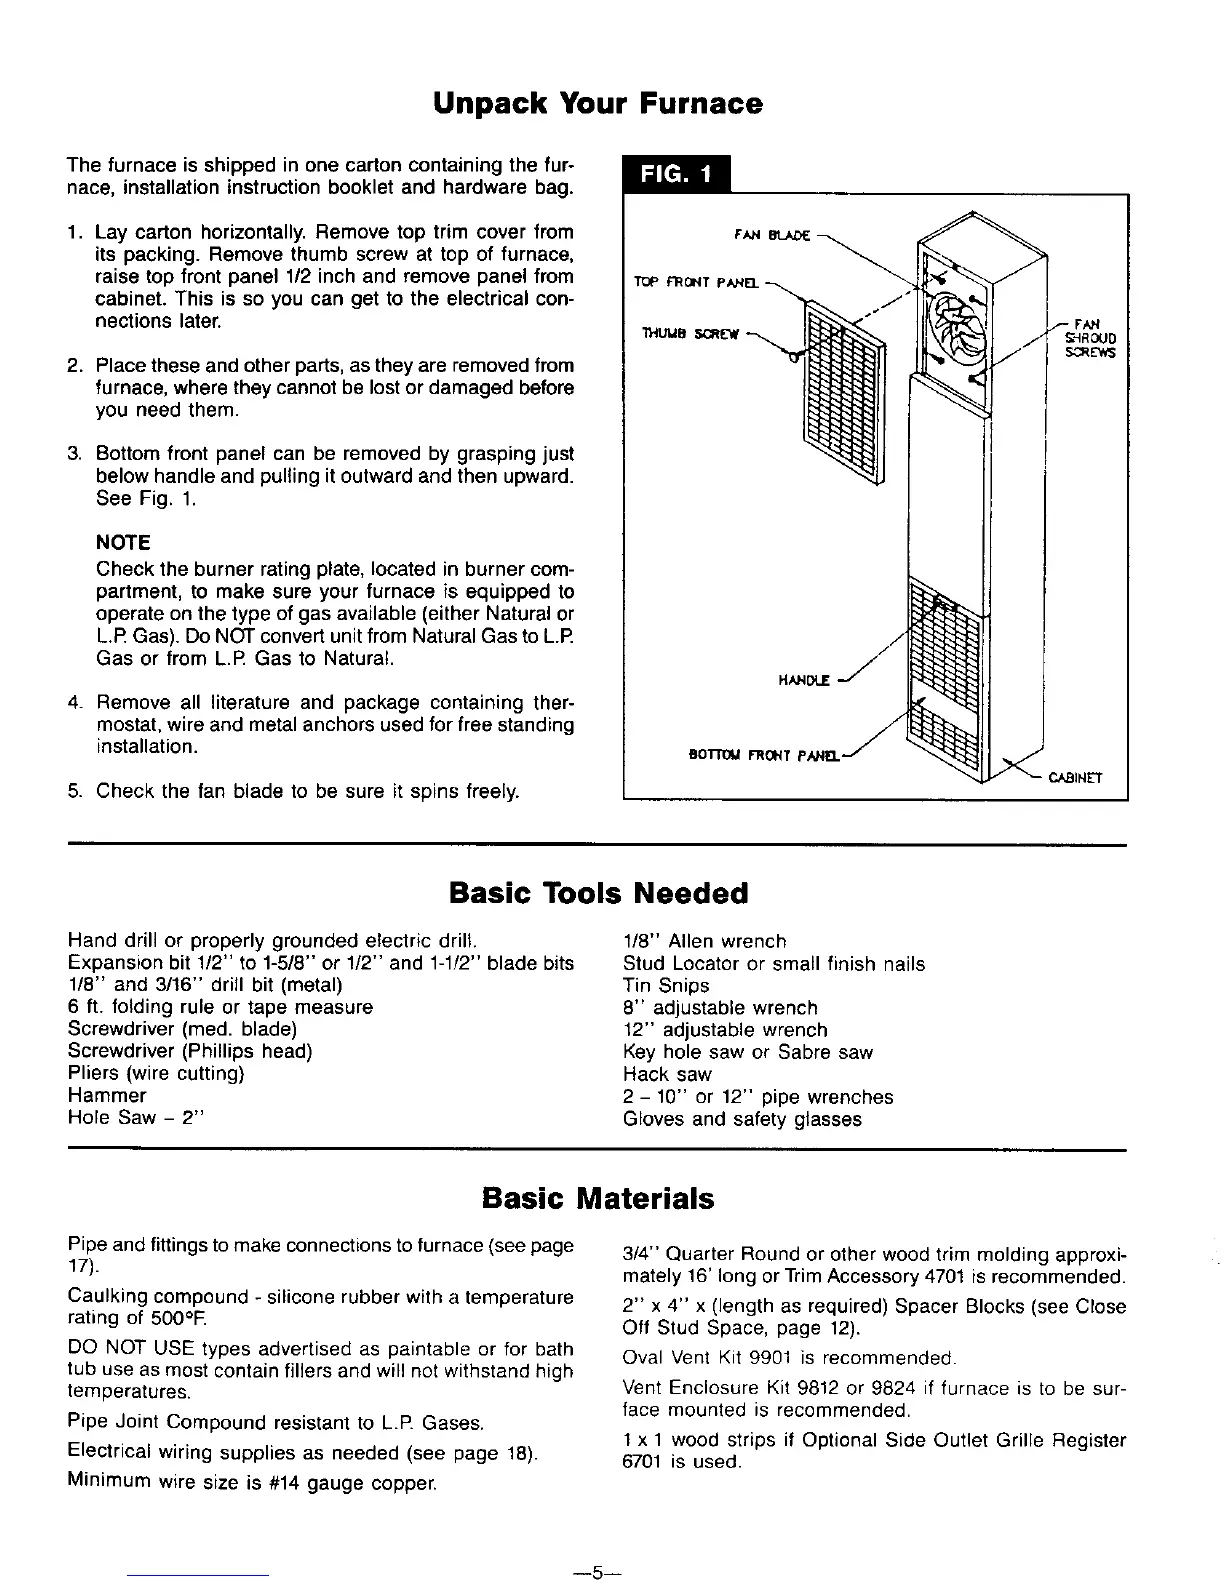
1. Lay carton horizontally. Remove top trim cover from
its packing. Remove thumb screw at top of furnace,
raise top front panel 1/2 inch and remove panel from
cabinet. This is so you can get to the electrical con-
nections later.
2. Place these and other parts, as they are removed from
furnace, where they cannot be lost or damaged before
you need them.
3. Bottom front panel can be removed by grasping just
below handle and pulling it outward and then upward.
See Fig. 1.
NOTE
Check the burner rating plate, located in burner com-
partment, to make sure your furnace is equipped to
operate on the type of gas available (either Natural or
L.IRGas). Do NOT convert unit from Natural Gas to L.IR
Gas or from L.F_ Gas to Natural.
4. Remove all literature and package containing ther-
mostat, wire and metal anchors used for free standing
installation.
5. Check the fan blade to be sure it spins freely.
Basic Tools Needed
Hand drill or properly grounded electric drill.
Expansion bit 1/2" to 1-5/8" or 1/2" and 1-1/2" blade bits
1/8" and 3/16" drill bit (metal)
6 ft. folding rule or tape measure
Screwdriver (med. blade)
Screwdriver (Phillips head)
Pliers (wire cutting)
Hammer
Hole Saw - 2"
1/8" Allen wrench
Stud Locator or small finish nails
Tin Snips
8" adjustable wrench
12" adjustable wrench
Key hole saw or Sabre saw
Hack saw
2- 10" or 12" pipe wrenches
Gloves and safety glasses
Basic Materials
Pipe and fittings tomake connections to furnace (see page
17).
Caulking compound - silicone rubber with a temperature
rating of 500°tE
DO NOT USE types advertised as paintable or for bath
tub use as most contain fillers and will not withstand high
temperatures.
Pipe Joint Compound resistant to L.P. Gases.
Electrical wiring supplies as needed (see page 18).
Minimum wire size is #14 gauge copper.
3/4" Quarter Round or other wood trim molding approxi-
mately 16' long or Trim Accessory 4701 is recommended.
2" x 4" x (length as required) Spacer Blocks (see Close
Off Stud Space, page 12).
Oval Vent Kit 9901 is recommended.
Vent Enclosure Kit 9812 or 9824 if furnace is to be sur-
face mounted is recommended.
1 x 1 wood strips if Optional Side Outlet Grille Register
6701 is used.
--5--