The Winegard Gateway with Air 360
+
can access the internet two different
ways: from a local WiFi network or a
4G LTE network.
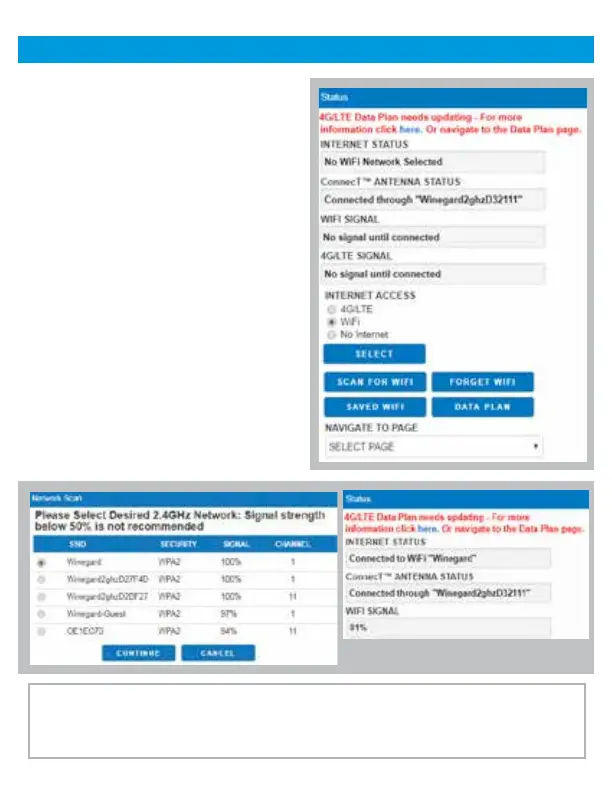
Step 4 - To connect to a WiFi network,
select WiFi from the Internet Access
options and then click on SCAN FOR
WiFi. This will bring up a list of all
WiFi signals in range (this could take
up to 30 seconds). The list of available
networks will be displayed by signal
strength. Select the desired network
(SSID) and click CONTINUE.
Step 5 - Enter the network password, if
prompted. Once the Winegard Gateway
connects to the internet the INTERNET
STATUS field will show Connected (this
could take as long as two minutes). You
are now ready to use the WiFi.
NOTE: Some networks will display a “splash page” when connecting instead
of using a network password. When connecting to a network requiring a splash
screen for multiple days, it may be necessary to clear your browser cache.
Operation (web, cont.)
11

 Loading...