Maintenance2722−1/A2
RT-flex58T-E
Winterthur Gas & Diesel Ltd.
4/ 12
4. Dismantling an injection valve
⇒ Remove receiver 20.
⇒ Screw down injection valve 1 on valve holder 94273, as mentioned in section
2, however without connecting HP hose 94275.
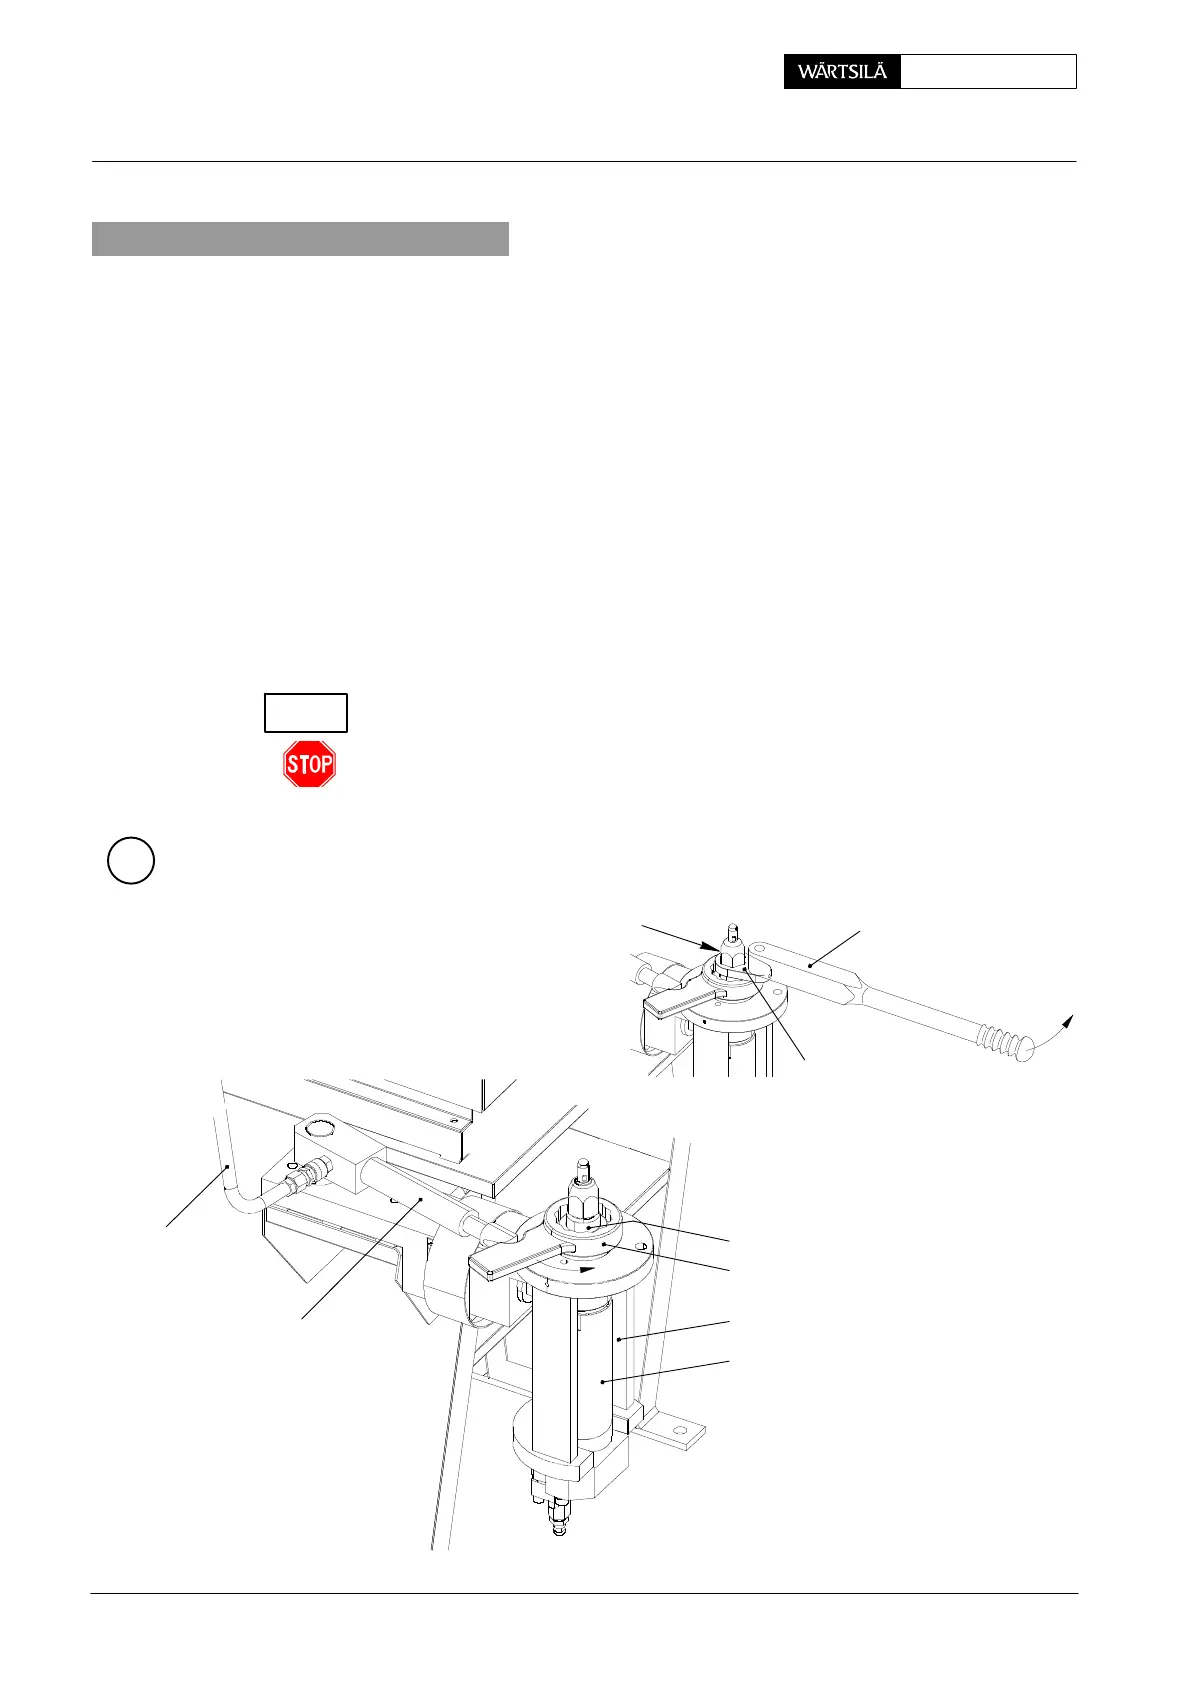
⇒ Loosen collar nut 6 and unscrew spring tensioner 7 until the compression
spring 12 is completely released (Fig. ‘D’).
⇒ Turn valve holder 94273 through 180_ into vertical position.
⇒ 1
ST
step: Loosen clamping nut 15 (AF 41) by means of socket wrench insert
94269C−41 and torque spanner 94011A.
⇒ 2
ND
step: Loosen coupling nut 11 (AF 55) by means of slugging wrench
94269A−55 and hydraulic cylinder 94269B.
⇒ Unscrew the clamping nut and coupling nut.
⇒ Remove the nozzle body 14 with nozzle needle 13 and nozzle tip 8, tappet 10
and compression spring 12.
D If necessary, withdraw the nozzle tip in accordance with section 7.
Examine all parts for their condition.
Never interchange nozzle needle 13 and nozzle body 14! Each nozzle needle
belongs to its mated nozzle body into which it has been individually fitted with
greatest precision.
B
94269B
94269A−55
94275
94273
1
WCH01205
11
DRAWN FOR
RT−flex82T
2
ND
STEP LOOSENING
OF COUPLING NUT
94269C−41
94011A
15
1
ST
STEP LOOSENING
OF CLAMPING NUT
2013-08 / ER-3
Injection Valve: Checking, Dismantling, Assembling and Adjusting Injection Valve with FAST
CHECK