Maintenance
2722−1/A2
RT-flex58T-E
Winterthur Gas & Diesel Ltd.
11/ 12
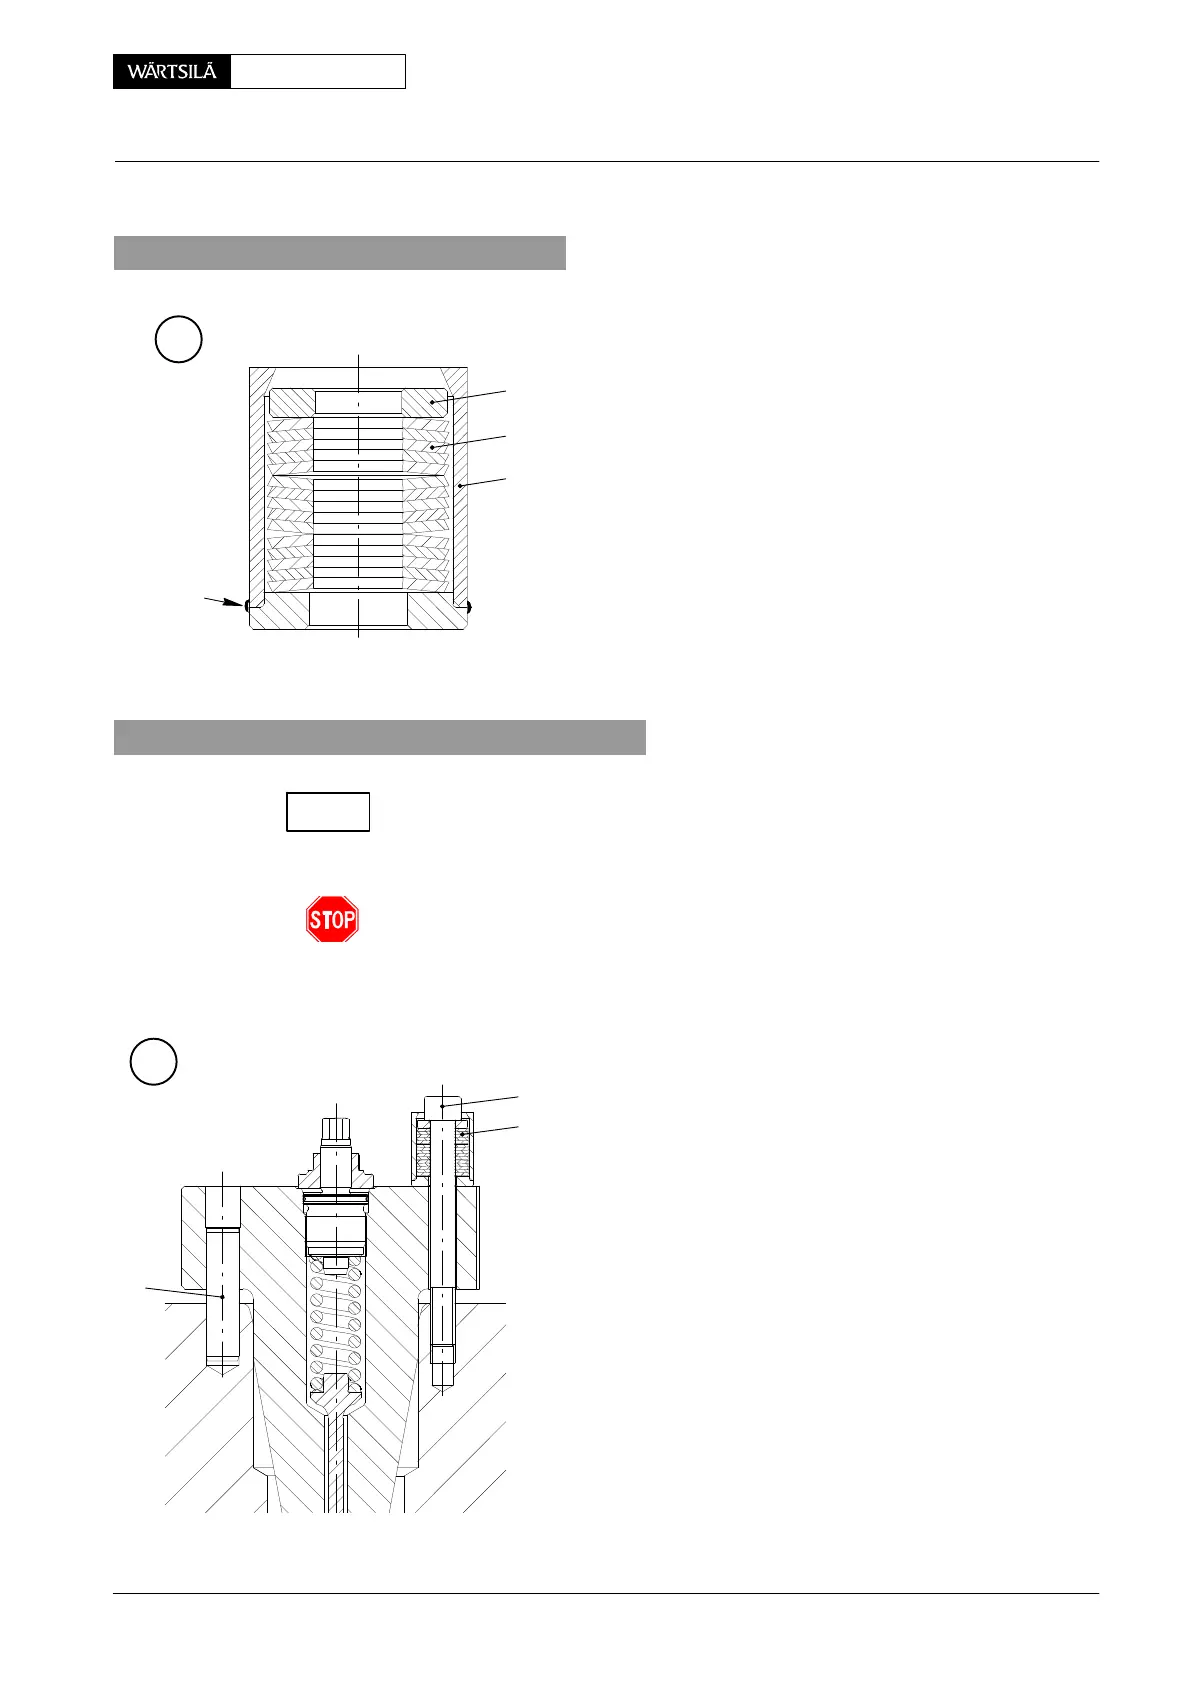
8. Arrangement of cup spring packet
H
3
4
19
TACK
WELDED
004.069/98
Cup spring packet 4 consists of three packs composed
of five cup springs which are arranged and fitted in
spring cage 19.
The spring cage forms a unit and therefore its bush and
bottom are diagonally tack welded.
9. Fitting an injection valve in cylinder cover
Clean the seating surface of the injection valve in the cylinder cover and check for
damages.
If necessary recondition the seating surface using the special tool supplied with the
tools set (see 2708−3).
The sealing must be metal-to-metal, i.e. no joint must be put in between.
⇒ Place the injection valve carefully in the cylinder cover. Dowel pin 18 assures
the correct position.
2
4
015.744/07
I
18
9.1 Screwing down the injection valve
⇒ Apply Never-Seez NSBT-8 to the threads and the
seating surfaces of Allen screws 2.
⇒ Press the injection valve onto its seat in the cylin-
der cover by equally tightening the Allen screws.
The correct pressure is reached when both spring
packets 4 are completely compressed (
solid block
length), then loosen both Allen screws by 90_. The so
called solid block length is reached when the Allen
screws are tightened with a noticeable higher resist-
ance.
2013
Injection Valve: Checking, Dismantling, Assembling and Adjusting Injection Valve with FAST
CHECK