1107200 Shadow VI User Manual
page 40 Chapter 2 Installation and Checkout
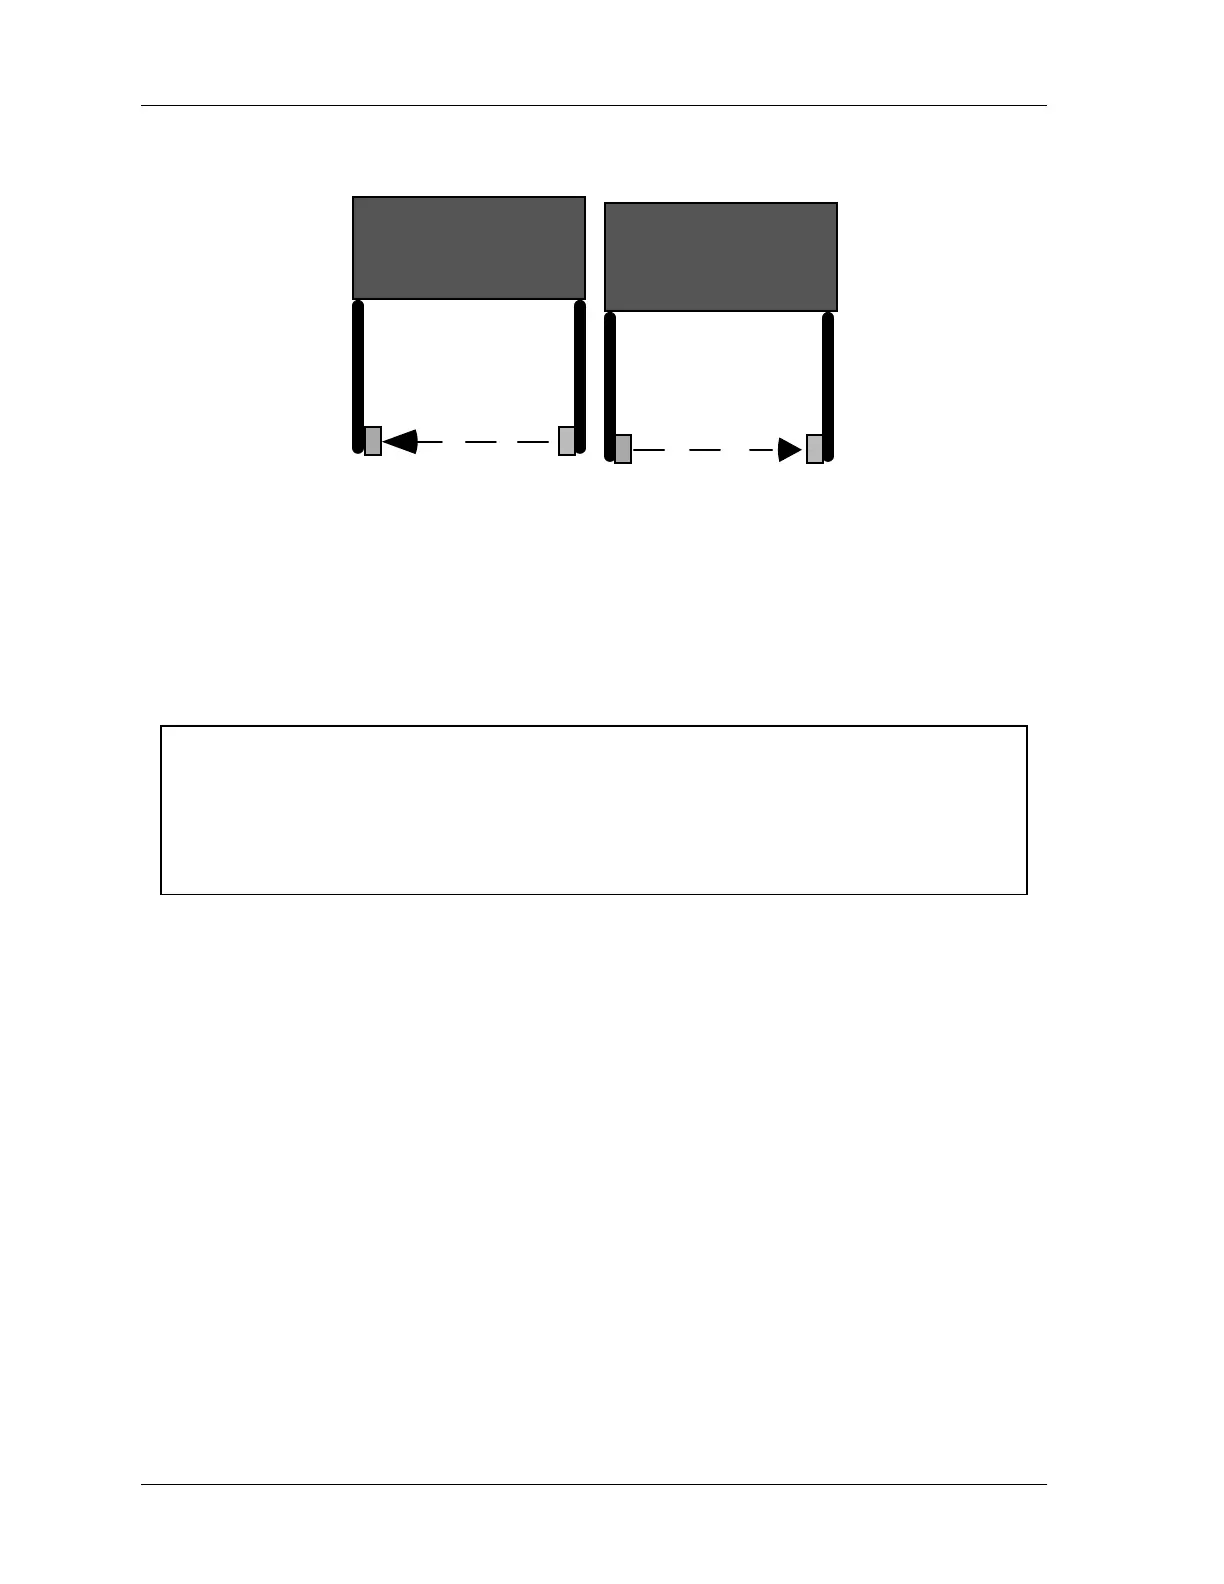
Press #1
TXRX
Press #2
TX
RX
Figure 2-11. One Way to Avoid Cross Talk - Reversing Transmitters (TX) and
Receivers (RX)
Loosely Mounting Shadow VI Transmitter and
Receiver
CAUTION
FAULTY SHOCK MOUNT INSTALLATION
Install the shock mounts between the mounting surface and the universal mounting brackets
that hold the optic heads in order to protect the heads from damage.
Failure to comply with these instructions could result in property damage.
Leave the Shadow VI heads loose on their mounting brackets so that you can properly
determine wiring length and conduit required. You will align and tighten the heads later.
Shock mounts are provided to help protect the optic heads of your Shadow VI from damage
due to shock or vibration.
Follow the steps below to loosely mount the optic heads (transmitter and receiver).
1. Locate four mounting holes for each head, in either your brackets or on a solid surface as
described above. The shock mount studs have 1/4-20 threads. For installation into a
solid surface, use a No. 7 drill and 1/4-20 tap. For through-installation onto a metal
bracket, drill clearance holes.
2. Before mounting the optic heads, install four shock mounts for each head. Thread a
shock mount into each of the four tapped holes in the mounting surface (Figure 2-12,
next page), or use a lock washer and nut to secure each shock mount to a metal bracket.
3. Using lock washers and nuts, loosely mount the optic heads onto the shock mounts, as
indicated in Figure 1.
4. Follow the instructions below to complete the installation. You will align and adjust the
heads (page 61) after you mount and wire the control.