1107200 Shadow VI User Manual
page 74 Chapter 3 Fixed and Floating Blanking
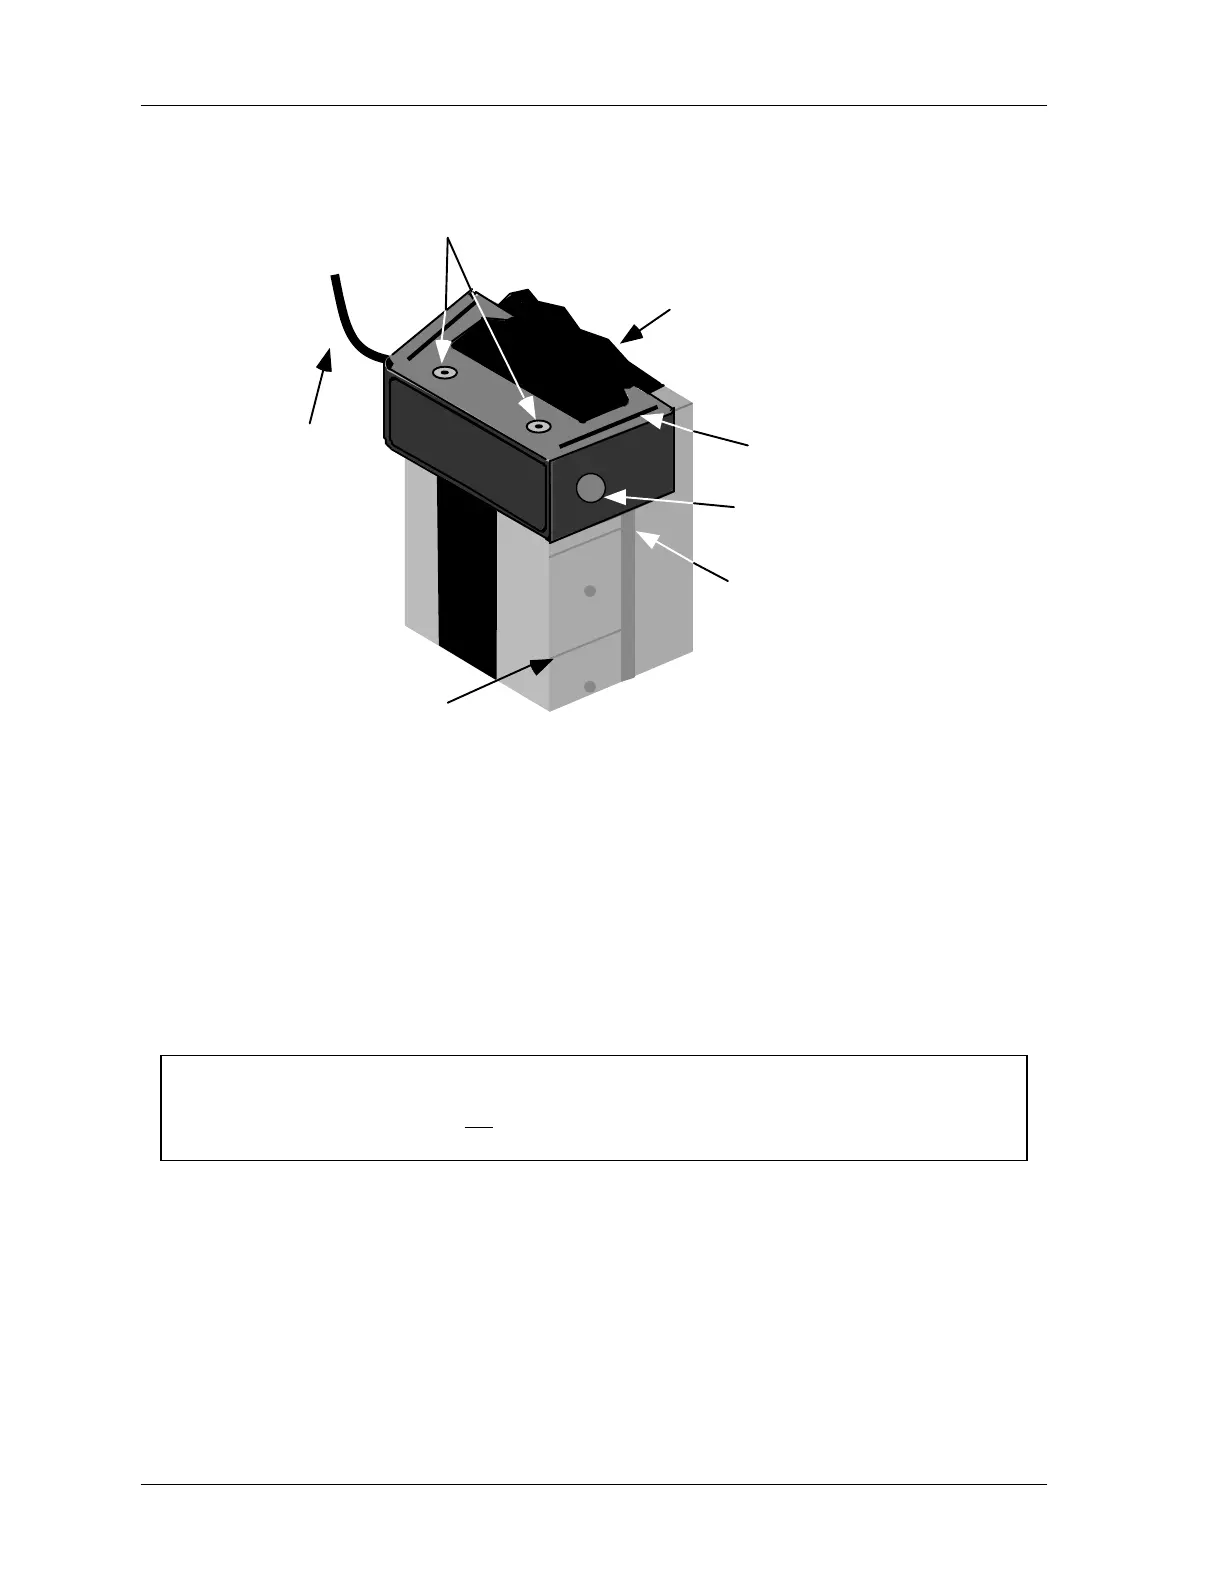
slide blanking
window up or
down the groove
on receiver
cut-away representing
top of receiver
plastic coverings have
been removed to allow
stacked windows
part of
master cable
shown
thumbscrew
grooves on window helps fit
one on top of the other
(no cable with slave)
alignment
indicators
Figure 3-2. Close-up — Installing Blanking Window
4. Press down firmly on the blanking window, and line it up between the alignment
indicators on the receiver. If you need to adjust the blanking window back up, press
down on the top of the receiver end cap as you push the master upward.
5. Once the blanking window is in the desired location, retighten the thumbscrew so it fits
firmly into the mating hole.
6. Next, guide the master blanking cable to the top of the receiver.
NOTICE
Be careful that the cable does not interfere in any way with the light path. If the cable is
routed in front of the receiver, you may inadvertently be blocking other light beams.
7. Locate the plastic cap attached to the mating connector at the top of the receiver. If it is
difficult to remove, carefully unfasten it from the threads by twisting and turning back
and forth. Once the cap is removed, the cable connector goes into that location.
8. Position the blanking window connector directly over the keyed connector at the top of
the receiver. The keyed connector has three pins which must fit into holes in the cable
connector. Twist the connector slightly until you feel the pins fit into the base. Then
screw the nut on the connector to tighten the cable connector in place.