Installation and commissioning
Comfort+ II RF – 6720892636 (2019/04)
6
▶ Switch on the heat source.
Fig. 4 Initialisation
Control unit and Key are connected in delivered condition ex
factory and detect each other automatically when powered up.
▶ Insert batteries into the control unit ( Chapter
9
, page
19
).
▶ Key and control unit connect automatically.
Once installed, the display displays the current room
temperature after the connection has been established.
▶ Before the installation of the control unit, ensure that the
signal strength at the installation location of the control unit
is sufficient ( section "Signal strength", page 11).
▶ Install the control unit.
3.2 Installation and commissioning of the
control unit
Putting the control unit into operation
The control unit uses wireless frequencies. It therefore offers
flexibility in terms of selecting a position. Connection of cables
is not required.
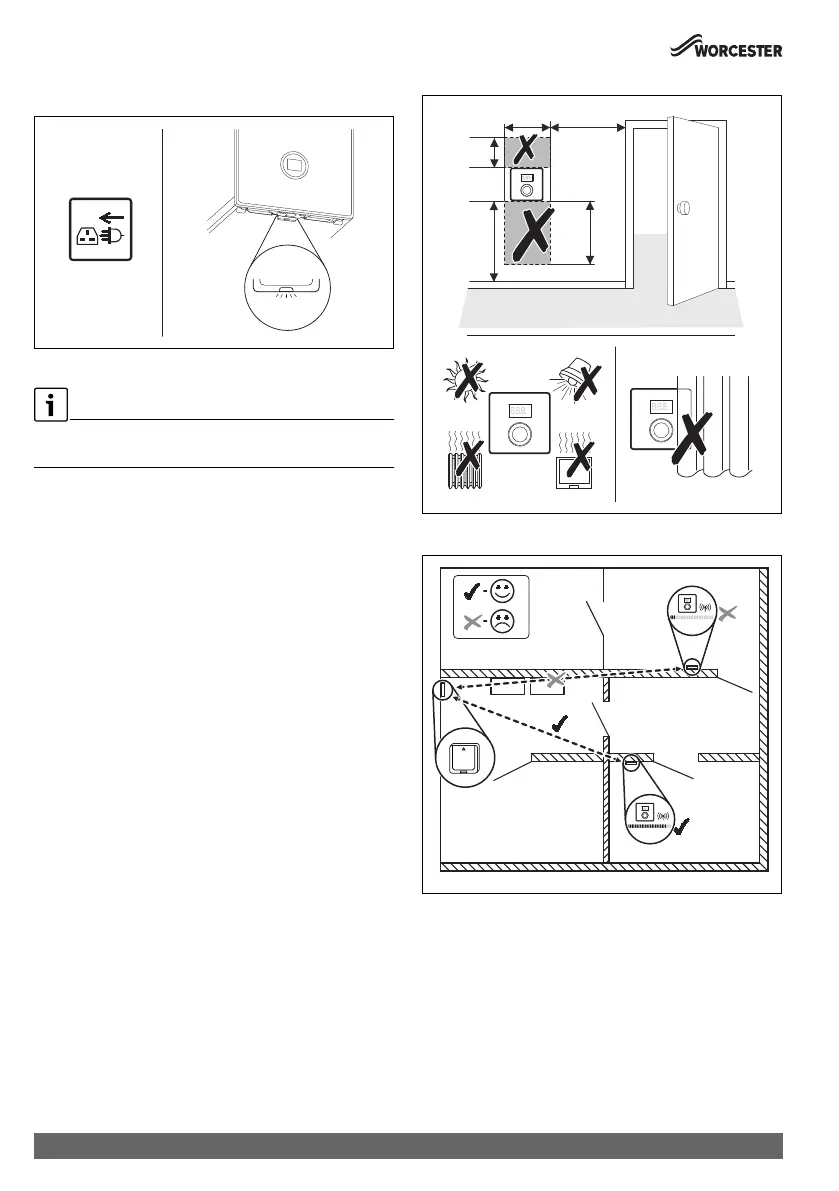
Air must be able to circulate freely round the control unit and it
must be installed on an open surface unhindered by curtains or
furniture. The control unit must not be positioned closer than
300 mm to metal objects, including wall-mounted metal boxes.
Do not mount the control unit on a wall where it will be exposed
to sunlight or draughts, preferably on an inside wall 1.2 m
above the floor.
The control unit must not be directly influenced by radiators or
heat-emitting objects, such as TVs or table lamps.
Fig. 5 Installation location of the control unit
Fig. 6 Wireless range
0010026081-001
2.1.
°C
°F
750
≥ 1000
≥ 1200
750
600
°C
°F
500
0010021101-001
°C
°F
°C
°F
°C
°F
0010021103-002
 Loading...