Installation
37
Greenstar 4000 – 6 720 891 161 (2020/09)
PRV pre-plumbing connection preparation
The PRV elbow has been designed to also be SimpleSwitch to the i Junior
and Si boilers. The PRV pre-plumbing connector can be routed to the
right (approx.45°) to line up with pre-existing PRV pipework from i Junior
and Si boilers.
▶ Connect PRV pre-plumbing connector to pre-existing PRV installation
pipework
▶ Fit the PRV pre-plumbing connector [2] to the PRV locator bracket
[1] as shown in the figure 46.
– The elbow (PRV pre-plumbing connector) [2] is supplied with the
appliance.
Once the wall frame has been mounted the PRV discharge pipe can
be fitted.
▶ Connect the PRV discharge pipe [3] to the PRV pre-plumbing
connector [2].
▶ The discharge pipe [3] can be routed as required.
The PRV locator bracket [1].
▶ This bracket must be removed before the appliance is hung on the
wall frame.
Fig. 46 PRV connection preparation
5.3 Hanging the appliance
NOTICE
Transport protection covers
▶ Remove any internal transport packaging and protection covers from
the appliance where applicable.
Before hanging the appliance
▶ With the exception of the optional Greenstar Intelligent filling
System, install any other accessories to the mounting frame before
continuing.
▶ Ensure the sealing washers are fitted to the appropriate service
valves before installing the appliance onto the mounting frame.
▶ Ensure that the control panel is in its closed position before lifting the
appliance.
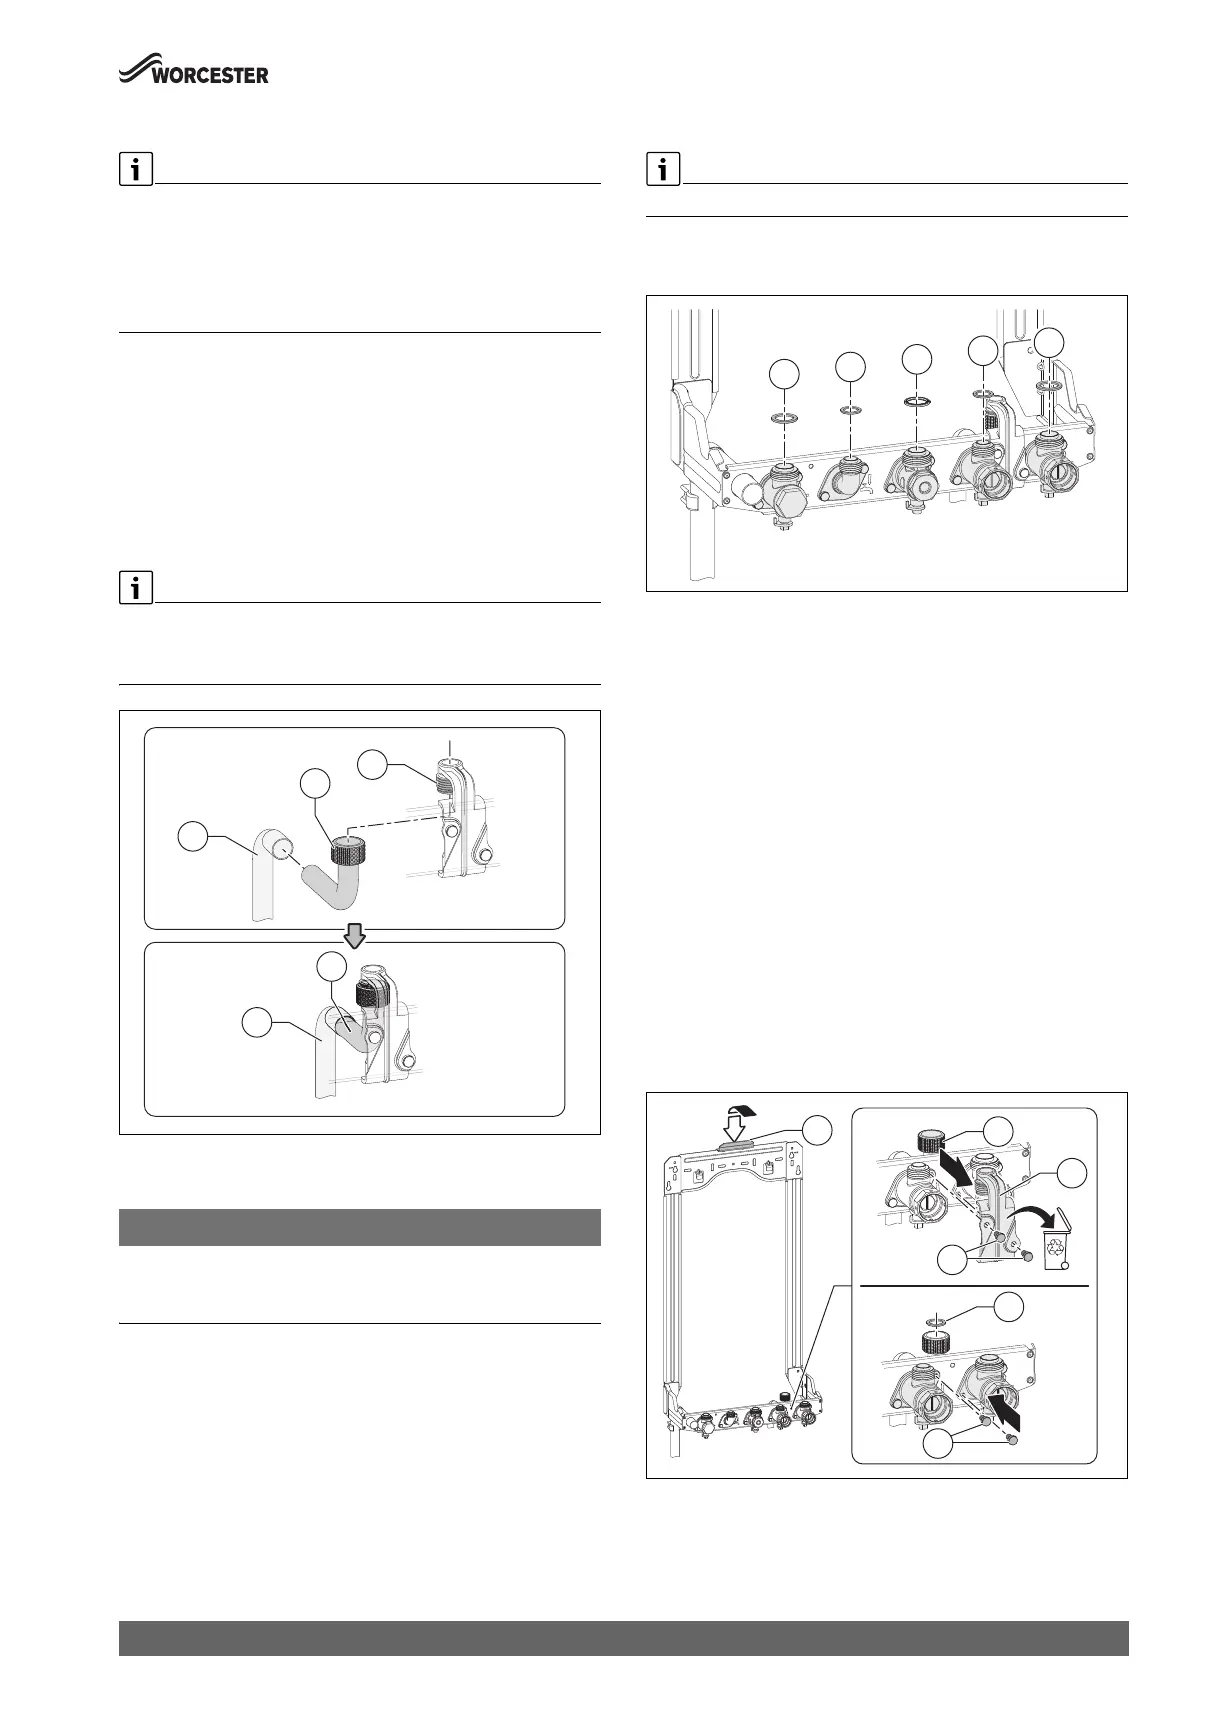
Preparing the service valves
The bonded washer supplied is for the Gas connection only.
▶ Fit the sealing washers to the service valves before hanging the
appliance.
Fig. 47 Fitting the sealing washers
[1] Central Heating Flow (22mm)
[2] Domestic Hot Water (15mm)
[3] Gas Inlet (22mm bonded washer)
[4] Domestic Cold Water Inlet (15mm)
[5] Central Heating Return (22mm)
Preparing the wall frame
Refer to figure 48
▶ To remove the pre-plumbing connector [3]:
– Unscrew the PRV outlet pipe [2] from the pre-plumbing
connector [3].
– Remove the two screws [4] holding the pre-plumbing connector
[3] in place.
– Remove the temporary PRV pre-plumbing connector [3], and
recycle.
– Replace the two screws [4] removed earlier and tighten firmly.
▶ Ensure that the sealing washer [5] is fitted for the PRV before hanging
the appliance.
▶ The appliance is mounted on the wall frame utilising the central
mounting point [1], at the top of the wall frame.
Fig. 48 Wall frame preparation
0010032154-001
1
5
2
4
3
1
5
4
4
2
3
0010032189-001
 Loading...