Replacement parts
69
Greenstar 4000 – 6 720 891 161 (2020/09)
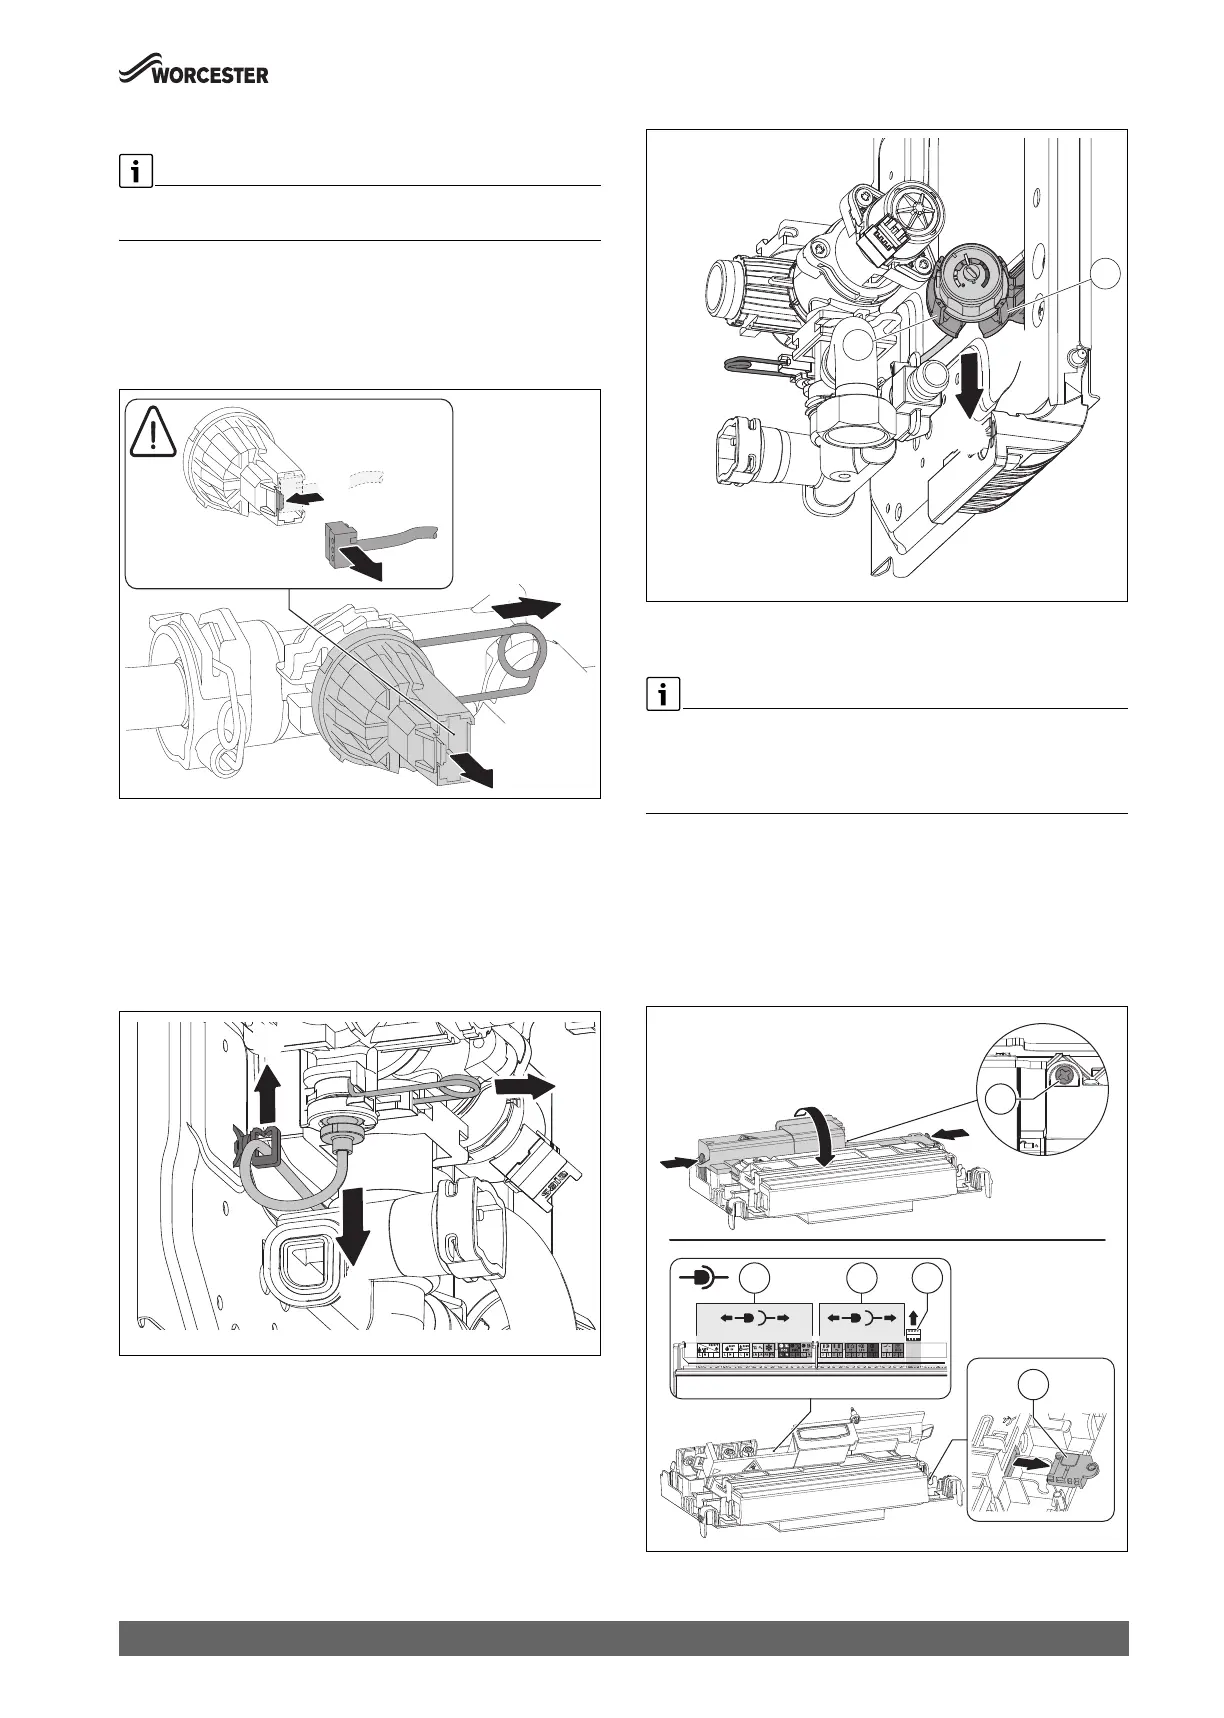
9.11 Replacing the pressure sensor
Pressure sensor is a wet pocket sensor, therefore the appliance must be
drained down.
▶ Remove the pressure sensor in the sequence shown.
– Release the electrical connection clip [1].
– Disconnect the electrical connection [2].
– Release the clip [3].
– Pull the pressure sensor forward to release [4].
Fig. 98 Pressure sensor removal
▶ Replace the pressure sensor in the reverse order
9.12 Pressure gauge removal
At the rear of the boiler:
1. Release the clip securing the pressure gauge connection [1].
2. Remove the capillary from the support clip [2].
3. Pull the connection down to remove [3].
Fig. 99 Rear view of pressure gauge connection
From the front of the boiler:
1. Release at least two of the retaining clips on the pressure gauge
mount.
2. Pull the pressure gauge forward and down to remove.
Fig. 100 Front view of pressure gauge
9.13 Replacing the control unit
Replacement control unit.
▶ The replacement control unit is not supplied with code plug or display
cover panel. These must be removed and refitted to the replacement
control unit.
Preparation before control unit removal.
▶ Loosen the retaining screw and open the cover.
▶ Remove connectors from the PCB on the both terminal strip sides.
– Power supply (power cables) terminal strip (2).
– Low voltage (signal cables) terminal strip (3).
▶ Remove connector for the Key accessory slot [4].
▶ Remove code plug [5].
Fig. 101 Control unit removal preparations
 Loading...