Chain Saw WG303E
17
Felling is a process of three cuts. First you make
your notch cuts, which consist of a top and
bottom cut. Finally, you will make the felling cut.
Notching undercut: Make the notch (x-w)1/3 the
diameter of the tree. The notch is cut on the side of the
tree in the desired direction of the fall. Make the lower
horizontal notching cut first as this will help to avoid
pinching either the saw chain or the guide bar when the
second notch cut is being made.
Felling back cut: After removing the wood from the
notch make the felling back cut on the opposite side
of the notch. This is done by making a cut about two
inches higher than the center of the notch. This will leave
enough uncut wood between the felling cut and the
notch to form a hinge. This hinge will help prevent the
tree from falling in the wrong direction. Hinge holds the
tree on stump and helps control fall (See Fig. M).
As the felling back cut gets close to the hinge the tree
should begin to fall. If there is any chance that the tree
may not fall in desired direction or it may rock back and
bind the saw chain, stop cut before the felling back cut
is complete and use wedges (Z) of wood, plastic, or
aluminum to open the cut and drop the tree along the
desired line of fall.
When the tree begins to fall, remove the chain saw from
the cutting, stop the motor, put the chain saw down, and
then use the retreat path planned. Be alert for overhead
limbs falling and watch your footing.
To complete the felling operation, drive a wedge (Z) into
the horizontal felling cut (See Fig. M).
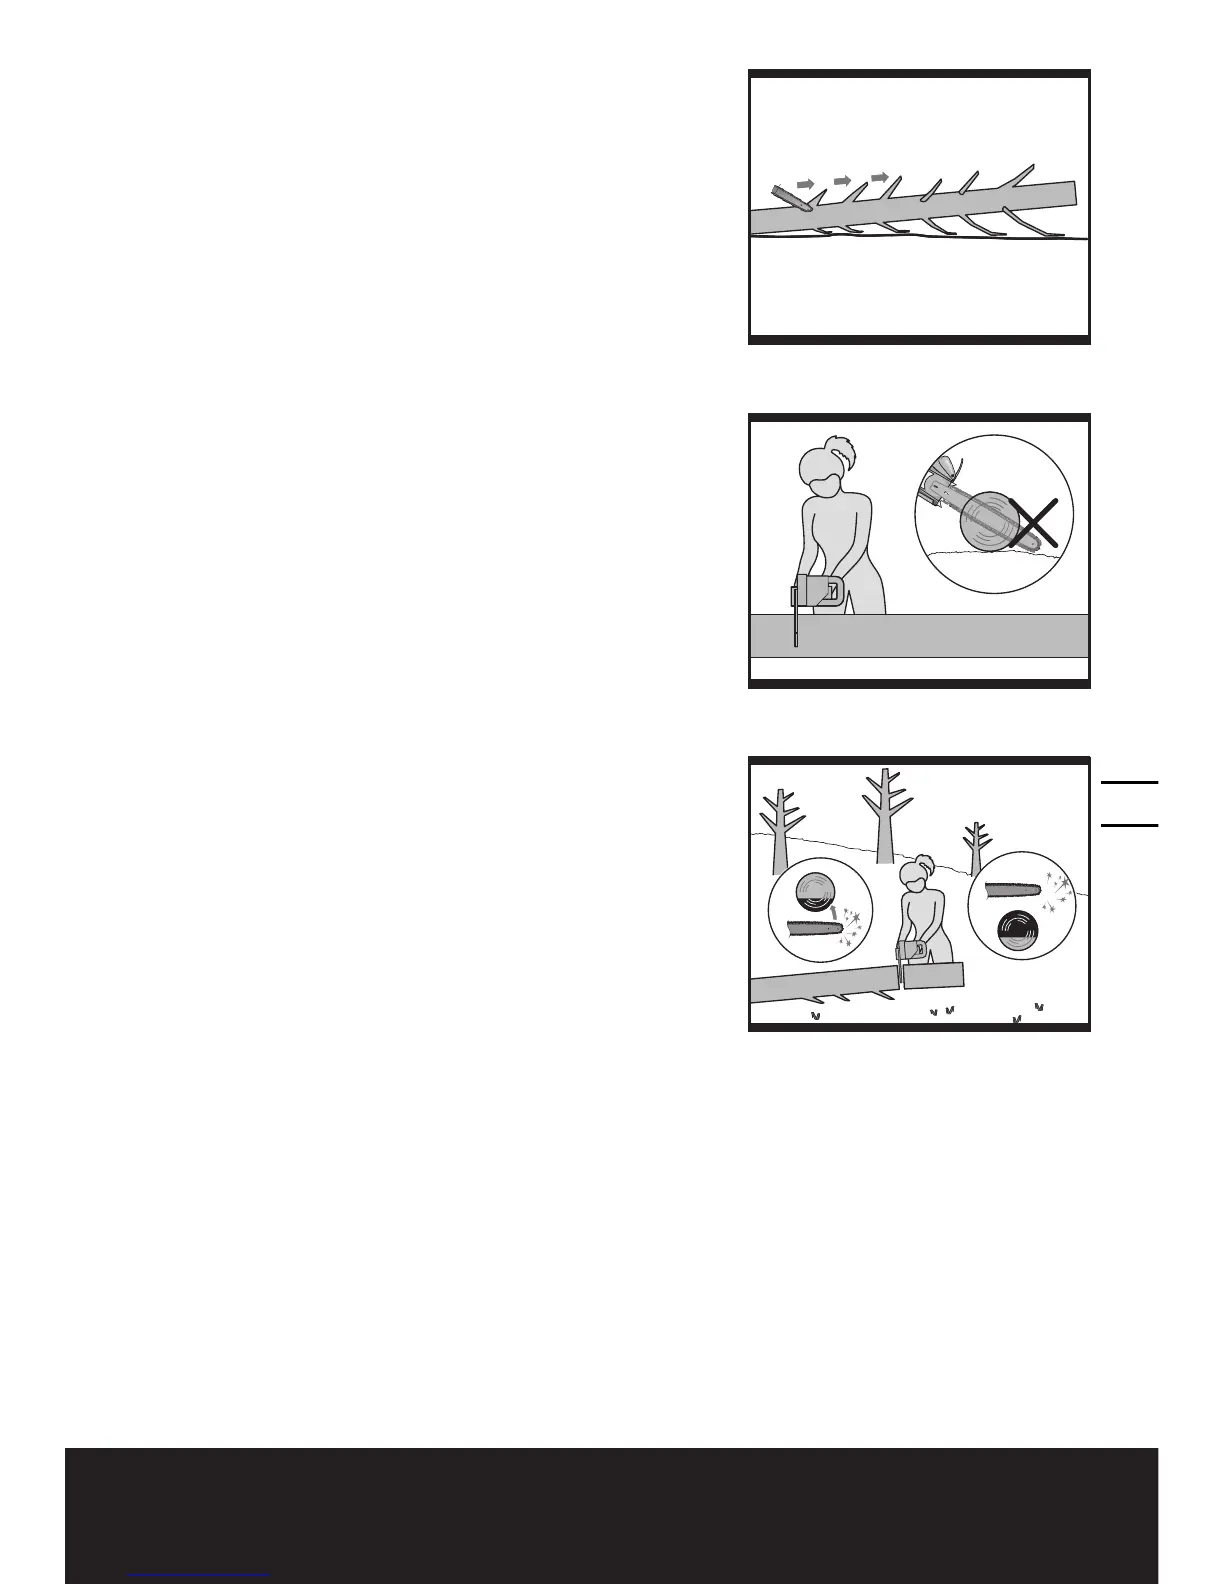
LIMBING A TREE (See Fig. N)
Limbing is removing the branches from a fallen tree.
When limbing, leave larger lower limbs to support the
log off the ground. Remove the small limbs in one cut as
illustrated. Branches under tension should be cut from
the bottom up to avoid binding the chain saw.
BUCKING A LOG (See Fig. O)
Bucking is cutting a log into lengths. It is important to
make sure your footing is firm and your weight is evenly
distributed on both feet. When possible, the log should
be raised and supported by limbs, logs or chocks. Follow
the simple directions for easy cutting.
When the log is supported along its entirety, laying flat
along the ground as illustrated, it is cut from the top
(overbuck) (See Fig. O).
When the log is supported on one end, as illustrated, cut
1/3 the diameter from the underside (underbuck). Then
make the finished cut by overbucking to meet the first
cut (See Fig. P).
N
O
2
2/3
1
1/3
P

 Loading...