cutting.
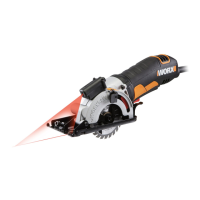
f. Your circular saw has a built-in work light for better
visibility when cutting. To turn on the LED work light,
the saw must be plugged in. Push the switch from
OFF to LED.
6. STARTING A CUT (See Fig. J,K,L1,L2)
a) Set-up and clamp your work piece and mark your
cut line.
b) Set the handle on the saw to the desired angle for
your cutting application.
c) Set the depth of cut (with corresponding length of
cut).
d) Position the front of the saw’s base onto the
leading end (edge) of the work piece that is solidly
supported. Align the center of the “V” notch on the
front of the base with the cut line (See Fig. J).
e) Manually release the blade guard release lever while
holding the finger lift bracket on the rear of the base
(See Fig. Ka, Kb) as you lower the saw’s handle and
blade to the selected depth.
Make sure the blade is not making contact with
the workpiece.
f) With both hands on the handle, squeeze the trigger’s
molded finger grip safety release “backward” while
squeezing down on the paddle switch to turn the
saw “On”.
g) Let the blade reach full speed before you enter the
work piece, starting your cut.
h) Press down on the saw, keeping the front of the
base flat against the work piece as you slowly push
the saw’s blade into the work piece (See Fig. Kc).
i) Carefully guide the saw through the line of cut. Do
not bind the blade in the cut; Push the saw blade
forward at a rate where the blade is not laboring.
When the cut is complete, release the trigger safety
release and paddle switch and let the blade come to
a complete stop. Do not remove the saw and blade
from the work piece while the blade is moving.
This could damage your cut, cause kickback, loss of
control and result in serious injury.
j) When the blade and saw are clear of and removed
from the work piece (See Fig. Kf), the lower blade
guard and base will be able to automatically drop

 Loading...