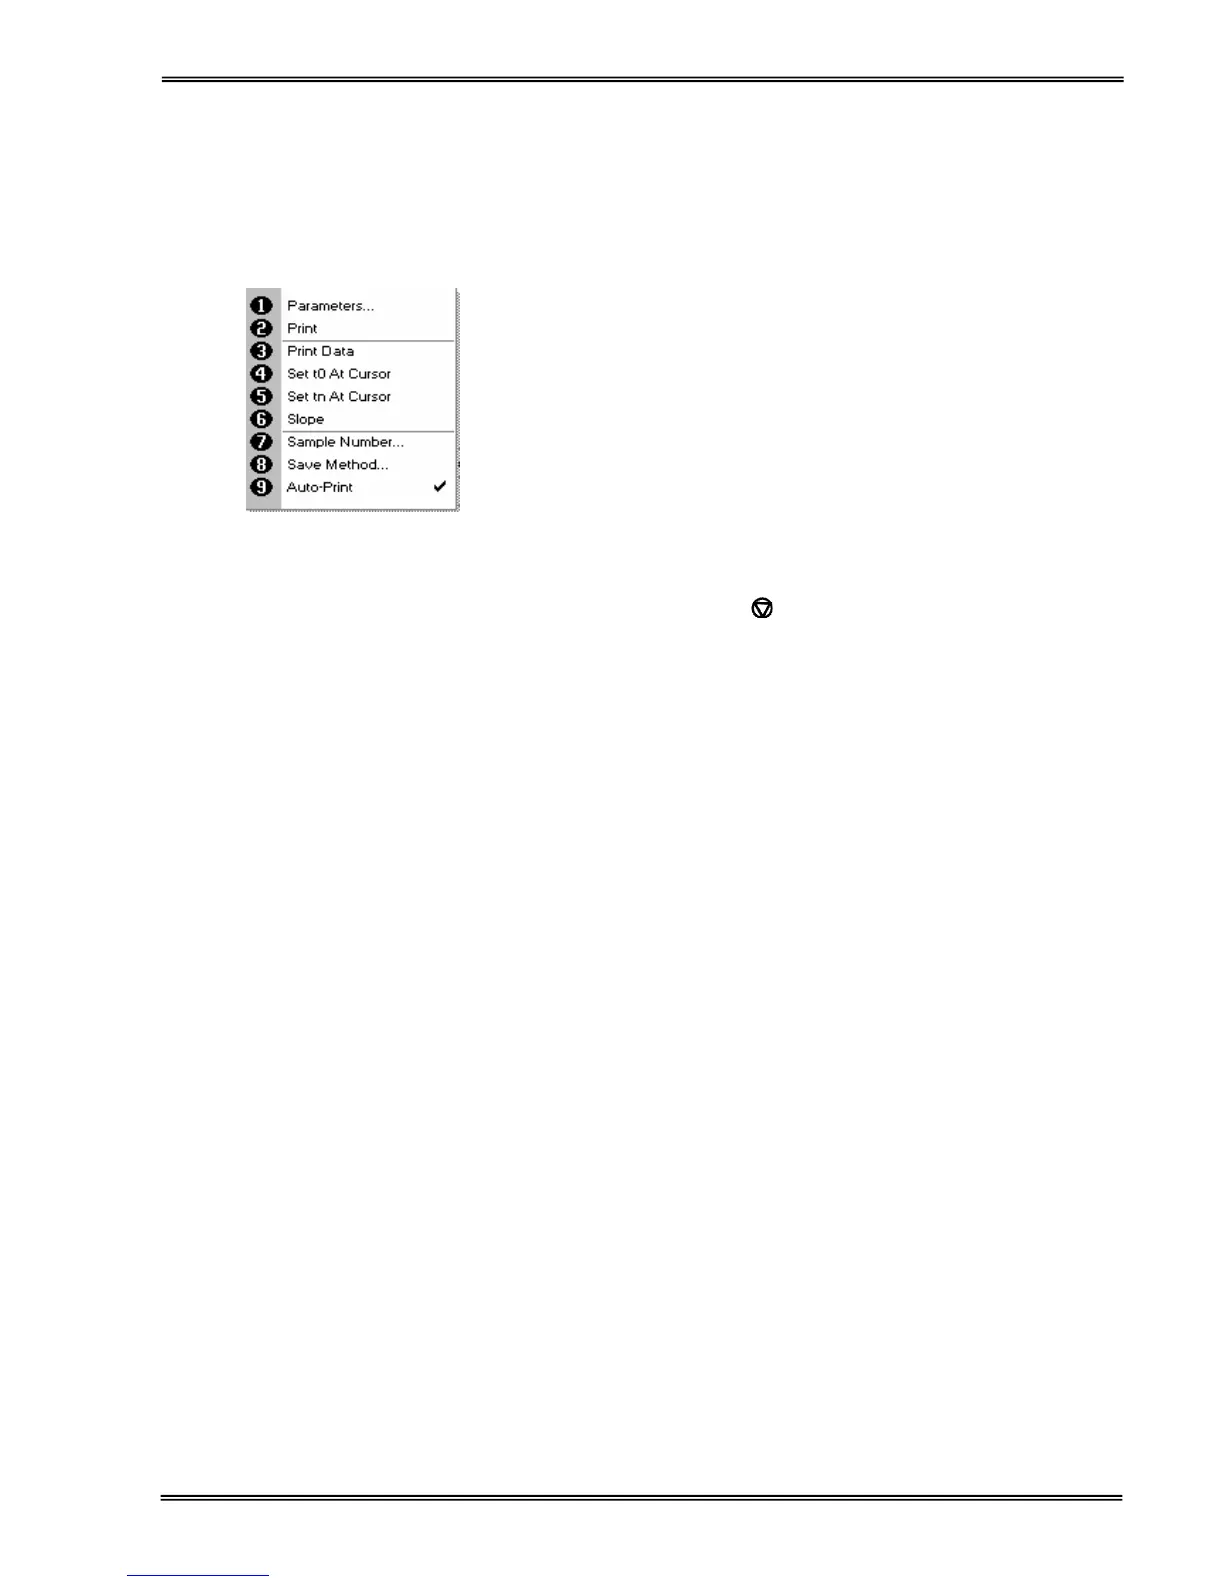
(select using key pad numbers)
1. Return to parameter 1 screen (step 1 above).
2. Print data on the results screen via selected method.
3. Print all the data.
4. Set the t
0
position (starting point for the slope and dA
calculation) at the current cursor position. Value is retained
for subsequent samples.
5. Set the t
n
position (finishing point for the slope and dA
calculation) at the current cursor position. Value is retained
for subsequent samples.
6. Toggle the calculated slope line on and off.
Note: if any data points enclosed by t
0
and t
n
are beyond the
range of the instrument (>2.5A or <0.3A) then this option is
greyed out.
7. Sample number – add a prefix to the sample number and
reset the incrementing number to the desired value.
8. Save method –
to store in (Favourites/Methods 1-9), press the down arrow
and enter name.
9. Auto-print – toggles auto-print on/off.
Exit options by pressing
, or wait.
 Loading...