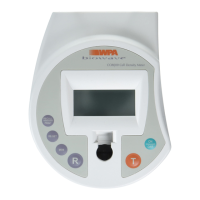
1. REMOVE THE POWER CABLE FROM THE
INSTRUMENT. Turn the instrument over and
remove cap head screws from positions A and B
using the Allen key provided.
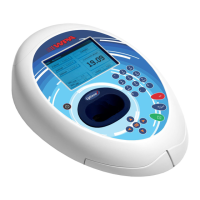
2. Turn the instrument back over and lift the
accessory cover vertically upwards to remove.
Remove the tie-wrap from the cable.
3. Invert the instrument and replace the cap head
screws at A and B.
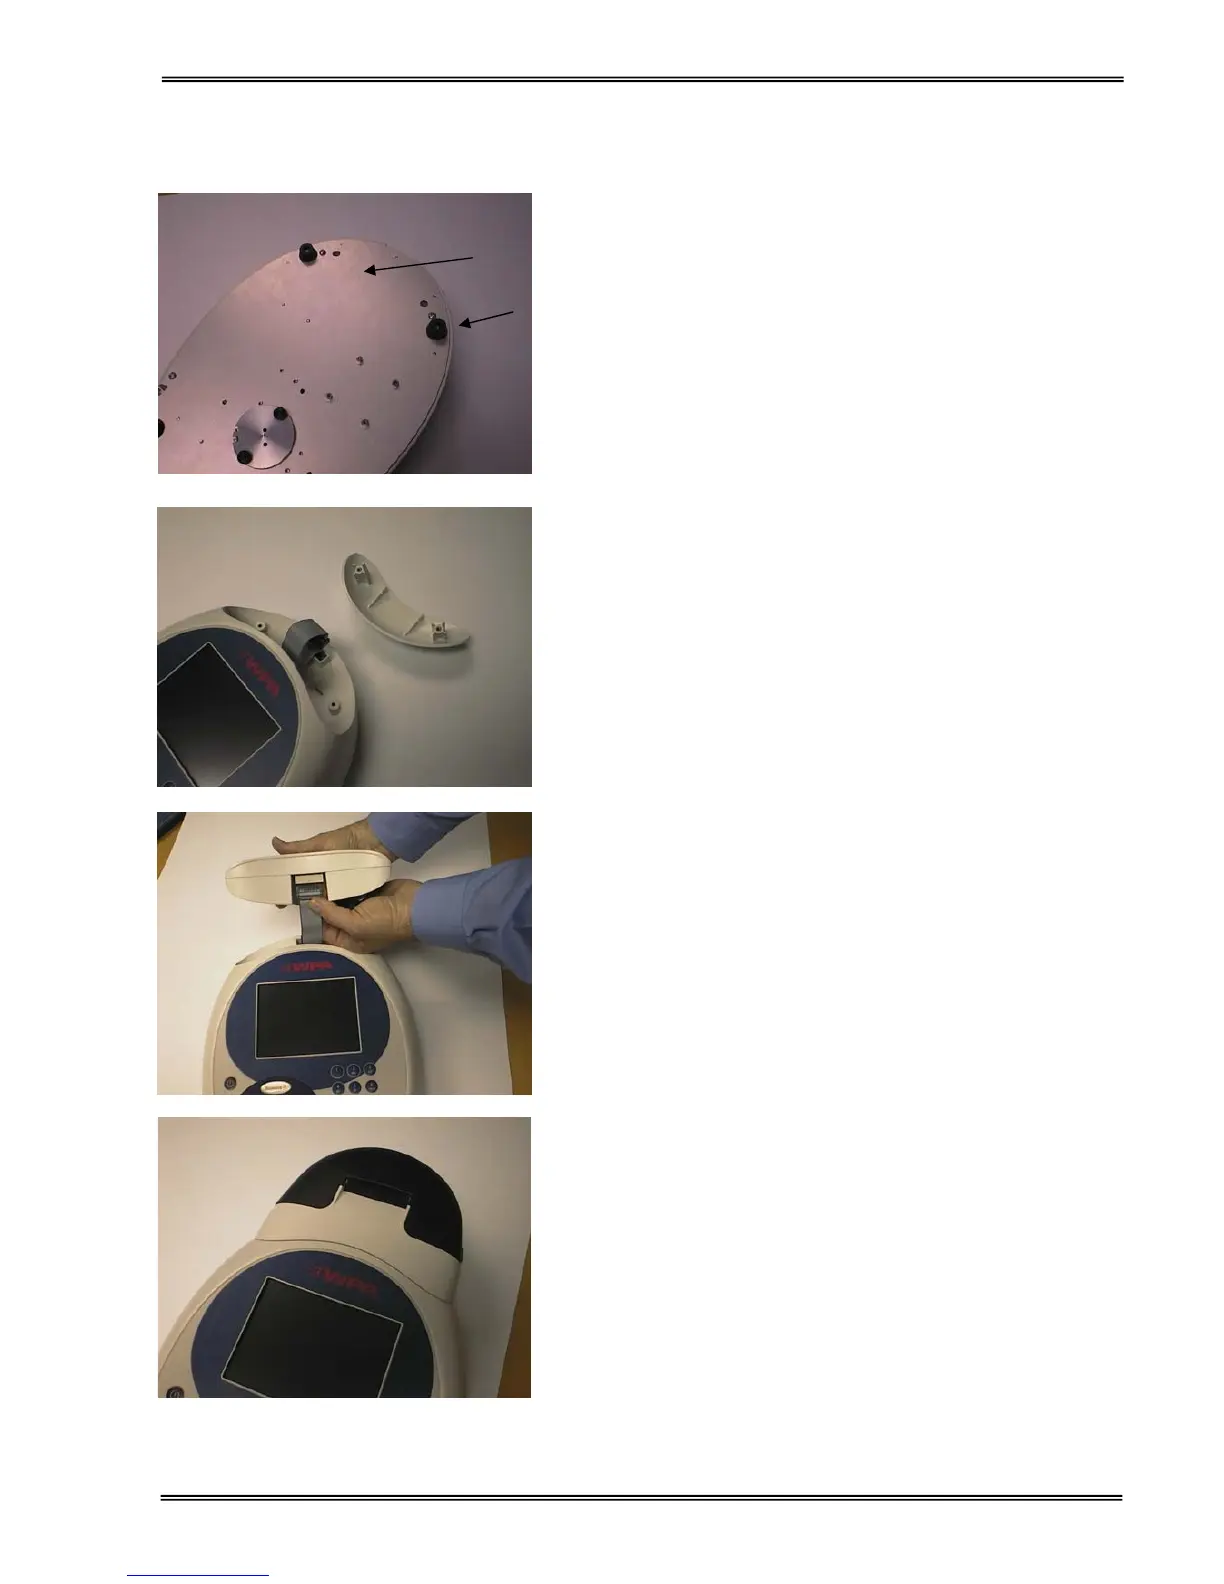
4. Plug the accessory cable into the printer.
5. Lower the printer onto the locating bosses and
push down firmly.
A
 Loading...