RapidMatch
TM
GO Spectrophotometer
15
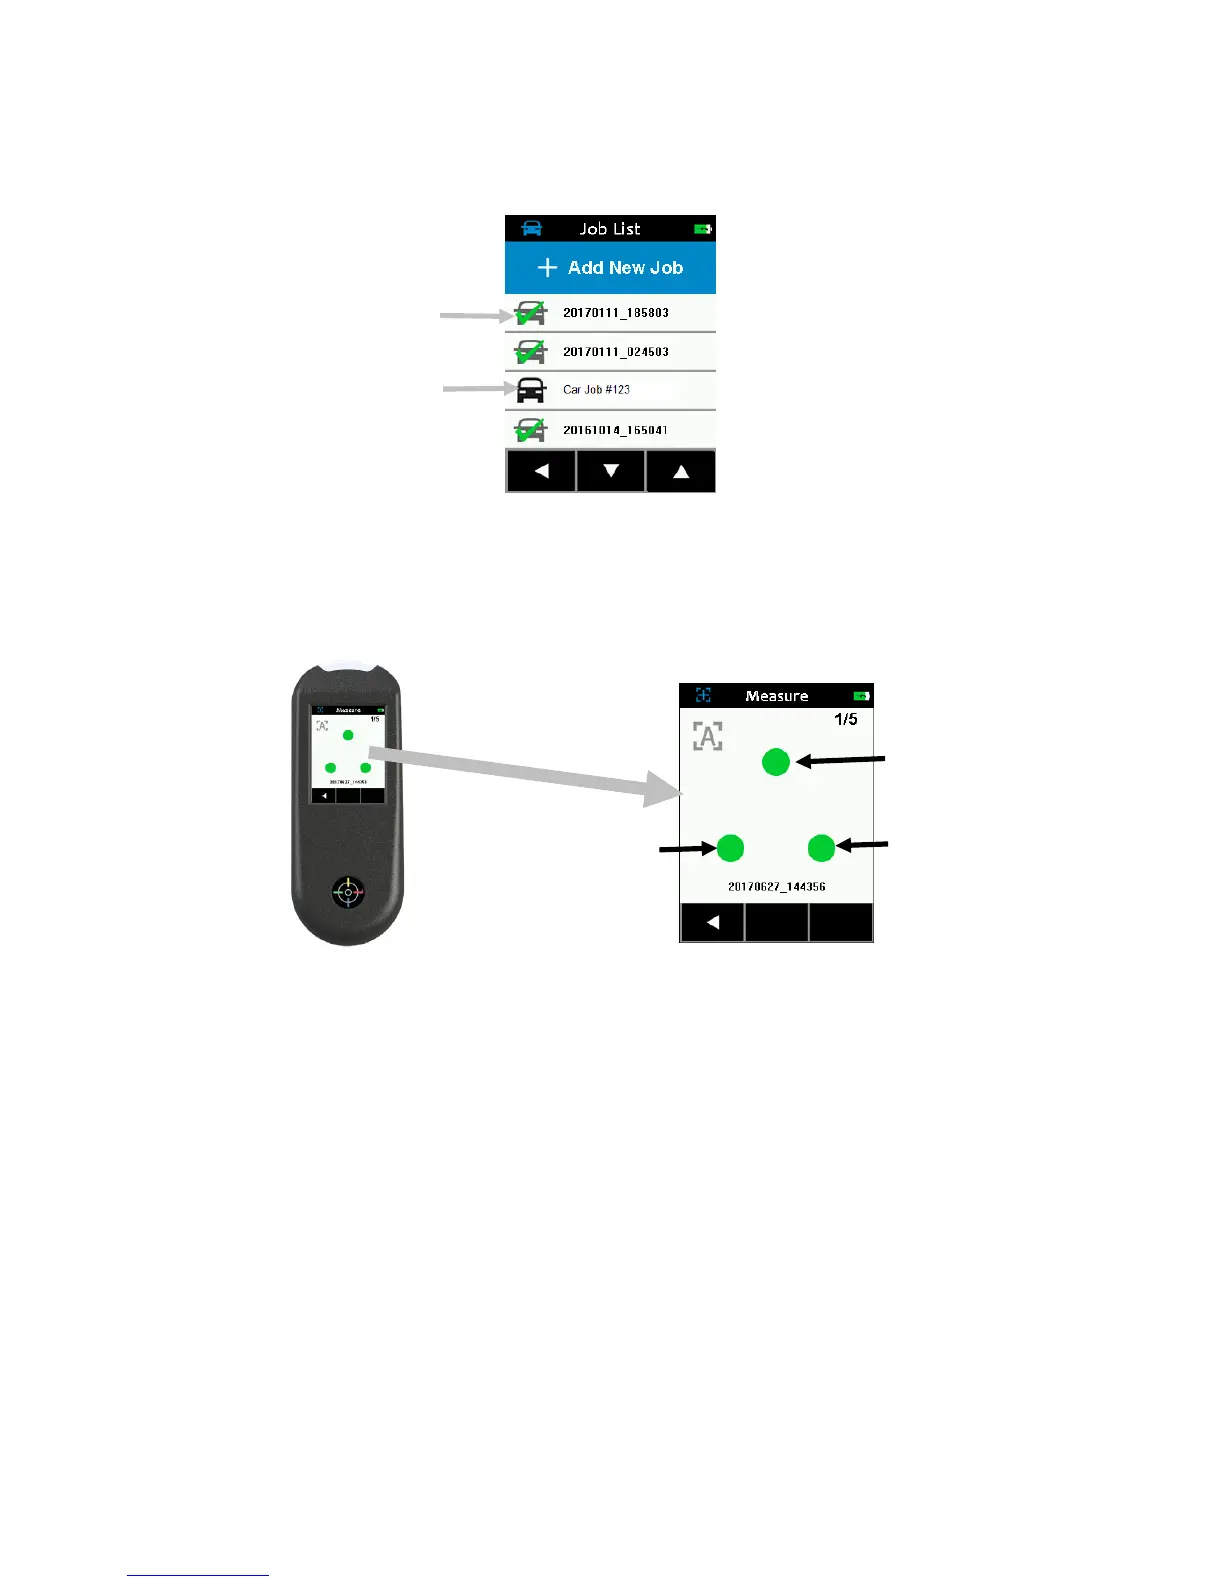
green checkmark. Downloaded jobs that have a green checkmark have
already been completed.
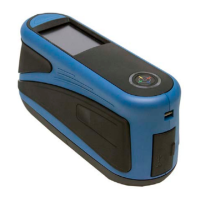
4. Locate the measurement port in the bottom of the instrument over the
first measurement area while viewing the screen (1).
5. Gently rock the instrument until all three positioning indicators (2) in the
screen turn green. This indicates that all three contact sensors are
activated.
6. Hold the instrument steady and press the Measure button or tap the
screen to initiate a measurement in case the instrument is configured in
Manual Mode. If the instrument is configured in Automatic Mode, the
measurement will be triggered as soon as (with a one-second delay) the
instrument is correctly positioned on the check zone and all pins are in
contact (green indicators on UI). Continue to hold the instrument steady
until the progress bar in the screen reaches 100%.
7. Continue with the remaining area measurements to complete the job.
8. After the last measurement is completed, the quality of the
measurement is indicated with a 5 point system. Five points indicates
excellent measurement without variation between the readings, 3-4
points indicates good measurement and 1-2 points indicates an
acceptable measurement. Tap the Left (
◄) arrow on the Job data
saved screen to return to the Job List screen.