EasyManua.ls Logo

Xilinx Artix-7 FPGA AC701 User Manual

Xilinx Artix-7 FPGA AC701
40 pages
To Next Page IconTo Next Page
To Previous Page IconTo Previous Page
Page #11 background image
AC701 Getting Started Guide www.xilinx.com 11
UG967 (v3.0) July 10, 2013
Basic Hardware Bring-up with Built-In Self-Test
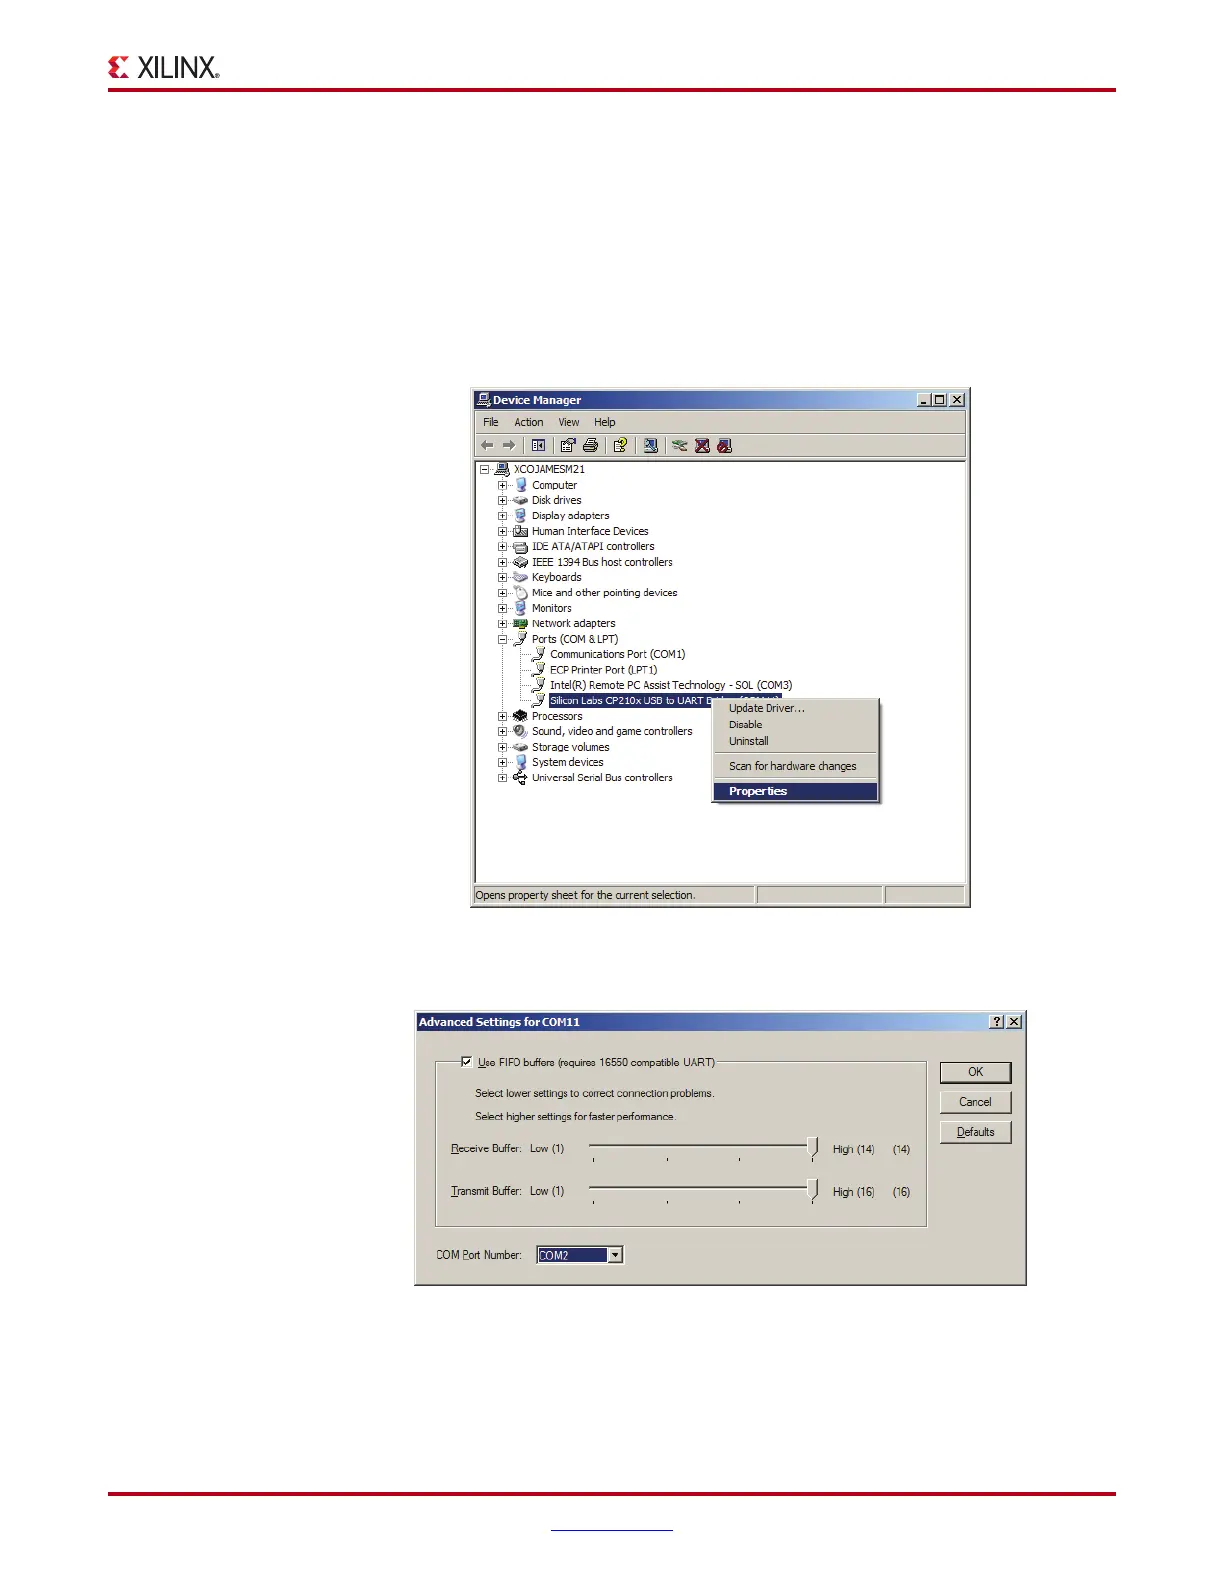
2. Set the USB-UART connection to a known PORT in the Device Manager:
a. Right-click the Computer desktop icon and select Properties.
b. Click Device Manager.
c. Right-click the Cypress device in the list, and select Properties (see Figure 6).
d. Click the Port Settings tab, then click the Advanced… button.
e. Select an open COM port between COM1 and COM4 (see Figure 7).
Note:
Steps and diagrams refer to a Windows host PC.
X-Ref Target - Figure 6
Figure 6: Selecting the Cypress Driver in the Device Manager
X-Ref Target - Figure 7
Figure 7: Setting the Port for the Cypress Driver
UG967_06_111412
UG967_07_111412
Question and Answer IconNeed help?

Do you have a question about the Xilinx Artix-7 FPGA AC701 and is the answer not in the manual?

Xilinx Artix-7 FPGA AC701 Specifications

General IconGeneral
Logic Cells215, 360
DSP Slices740
Block RAM13, 140 Kbits
PCIe InterfaceGen2 x4
DDR3 Memory1 GB
Ethernet10/100/1000 Mbps
Flash Memory128 Mb
Form FactorATX
FPGA DeviceXC7A200T-2FBG676C
USBUSB-JTAG/UART
ConfigurationSPI Flash, JTAG
Clocking200 MHz
Expansion ConnectorsFMC
Clock Management Tiles6
Power Supply12V
Operating Temperature0°C to 85°C

Summary

Artix-7 FPGA AC701 Evaluation Kit Overview

Introduction to the AC701 Evaluation Kit

Overview of the Artix-7 FPGA AC701 Evaluation Kit and its features.

Basic Hardware Bring-up with Built-In Self-Test

Introduction and Setup

Explains BIST, hardware setup, board configuration, and connection steps.

Run the BIST Application

Guide to downloading, unzipping, and running the BIST design files.

AMS Bring-up with AMS101 Evaluation Card

Introduction and Evaluation Steps

Overview of AMS features and steps for evaluating analog signals.

Advanced Bring-up with Base TRD

Introduction, Features, and Setup

Details TRD overview, features, hardware setup, and driver installation.

Using the Application GUI

Configuration and monitoring using the application GUI for TRD testing.

Additional Resources

Xilinx Resources

Support website links for Answers, Documentation, Downloads, and Forums.

References

Supplemental websites providing useful material for the guide.

Warranty

Related product manuals