Technical Support US: 888-443-2751 Technical Support INTL: 316-943-2751
10
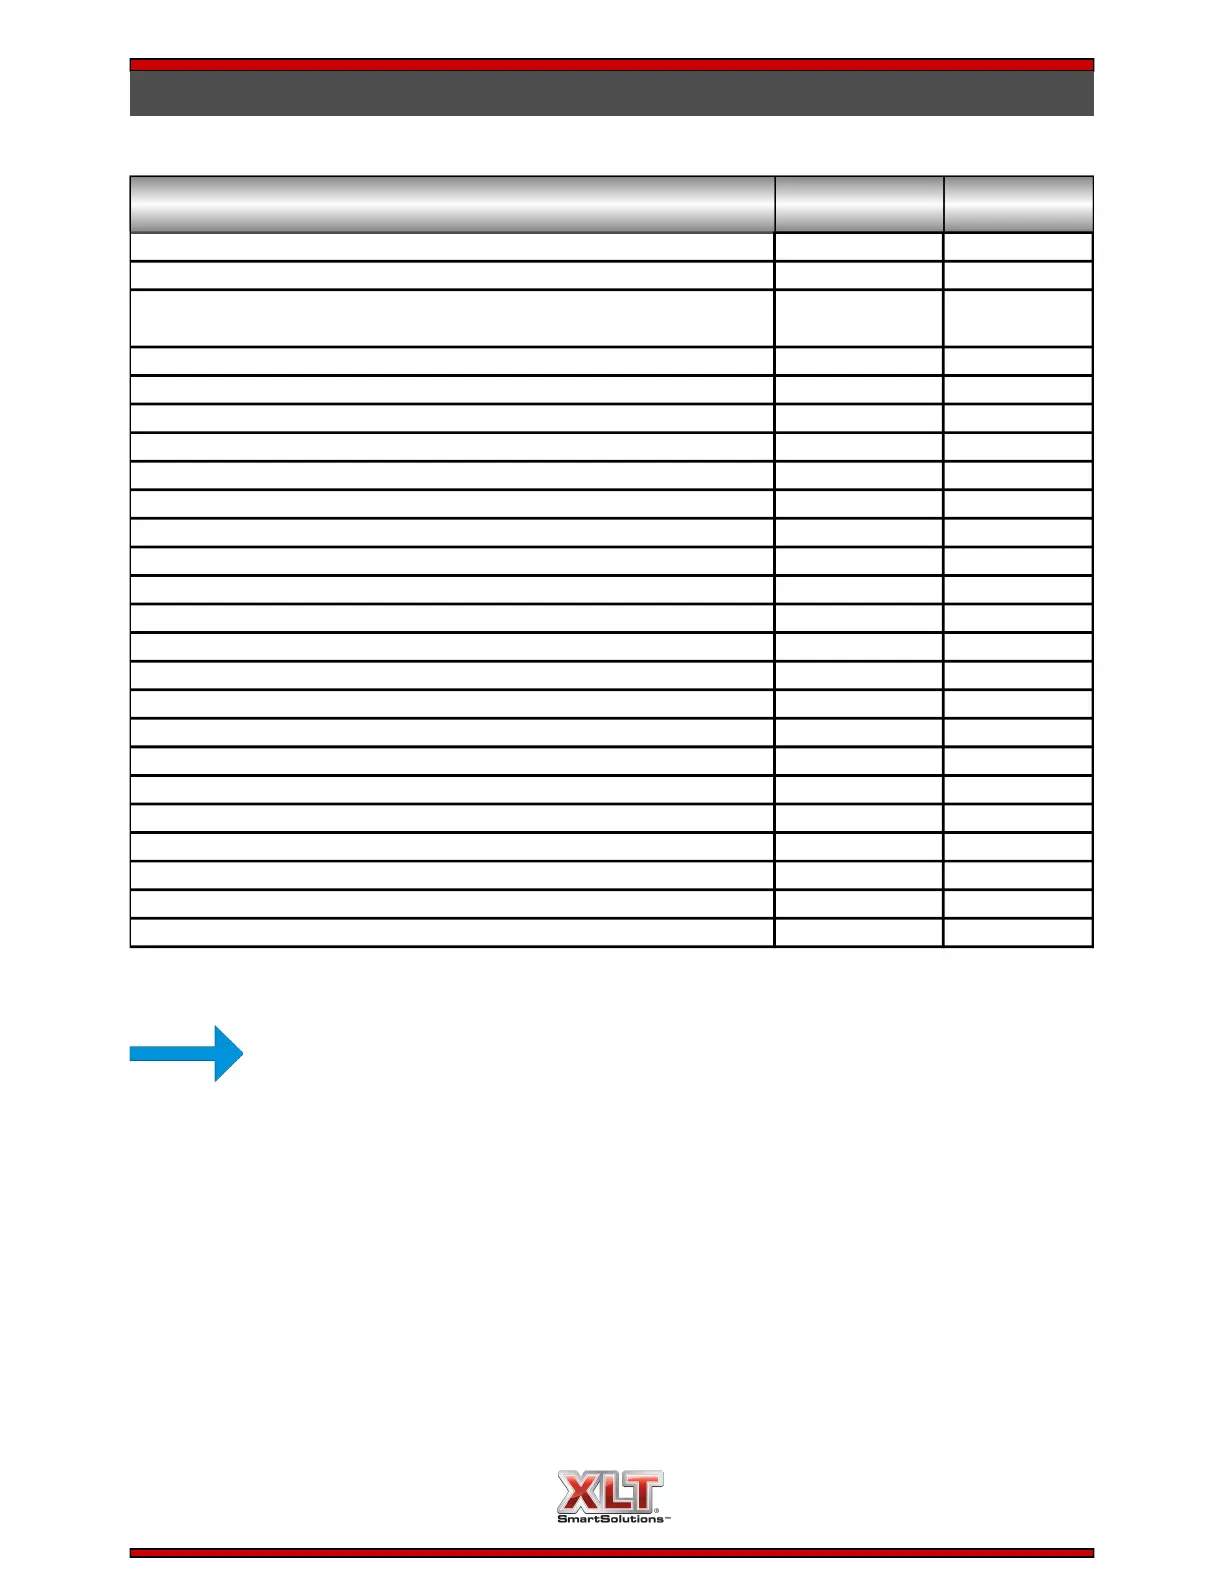
INSTALLATION RESPONSIBILITIES
NOTE
If XLT employees are completing the installation process, they will be considered a
Service Company in relation to the table above.
Site Survey: Verify electric and gas meter/regulator sizes X
Supply wiring from TS1 #R3, R4, R5 to exhaust fan X
Supply (1) single phase 230 volt 10 amp circuit from breaker panel to
XLT Hood
Assembly of new hood per XLT Installation & Operation Manual X
Suspend XLT Hood from ceiling X
Install new exhaust fan on roof X
Supply power to XLT Hood X
Install Duct Cover or Valance above XLT Hood X
Assembly of new ovens per XLT Installation & Operation Manual
Bases assembled and set in place X
Ovens moved and stacked with proper lifting equipment X
Assemble shrouds & brackets to XLT Oven/Hood X
Connecting fuel to XLT products
Install piping and drip legs X
Weld ducting to XLT Hood X
Install flexible gas hoses X
Connect electrical supply X
Connection may require Permit and Code Inspections X
Relocate Make-Up-Air to enter the room at the ends of the ovens X
Start-up per XLT Installation & Operation Manual: X
Gas pressure/leak testing, hood/oven functions, adjust as necessary X
Start-Up Checklist must be submitted to XLT to validate Warranty X
 Loading...