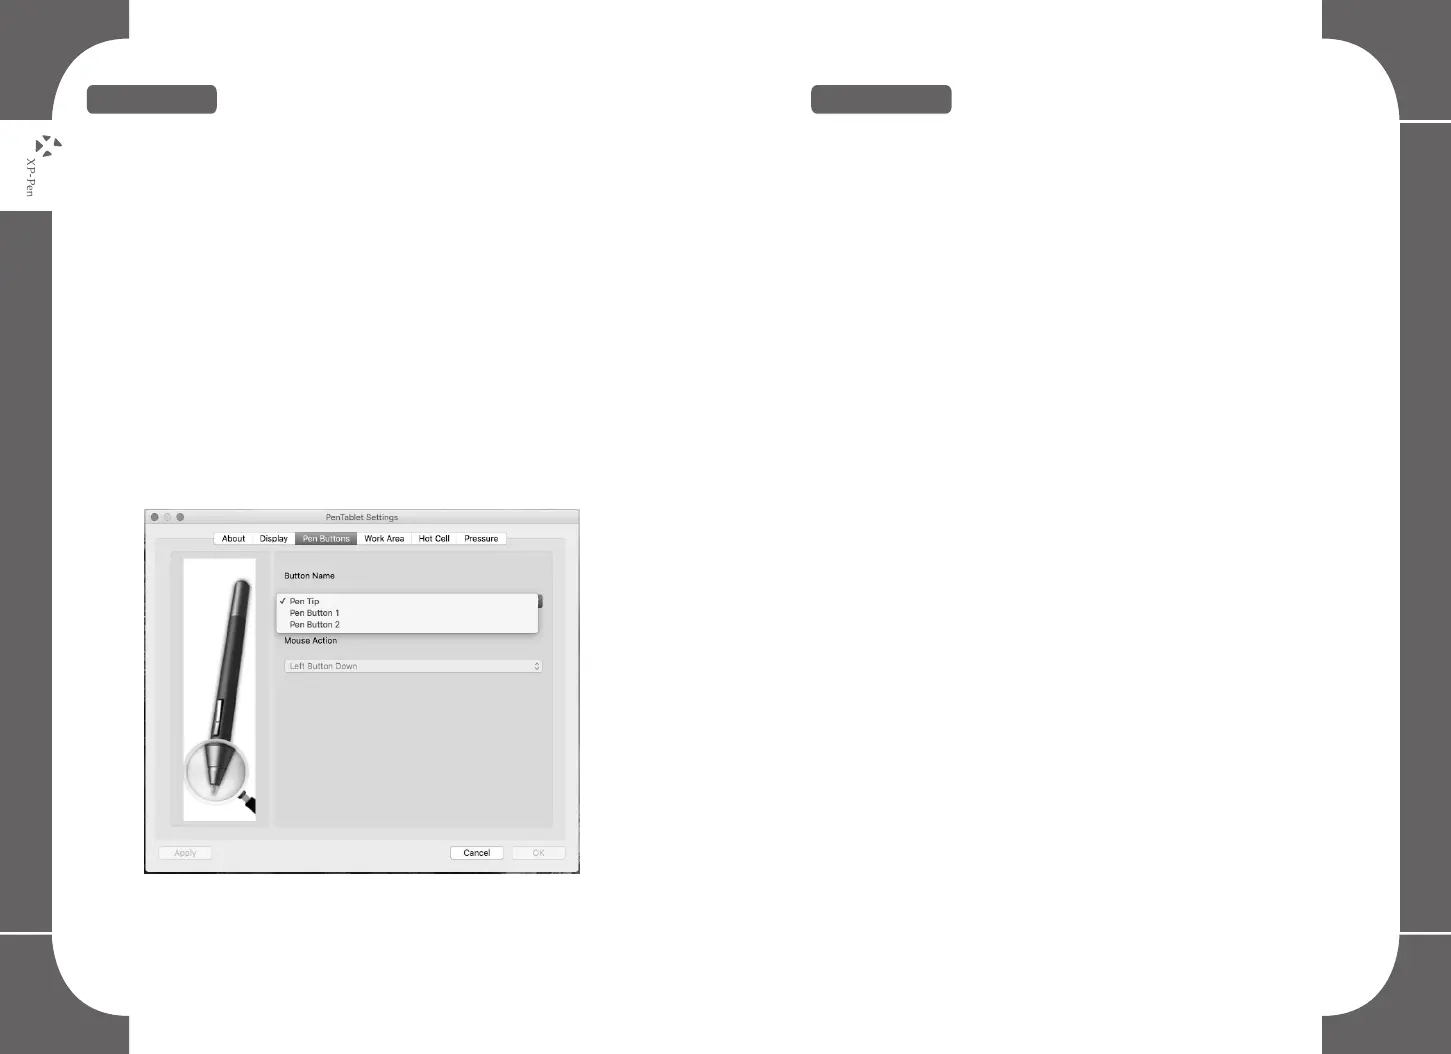
4.Pen Buttons
Pen Button 1 & 2:
Select the function for pen button 1 and button 2 from these options:”No
Action”, “Left Button Down”, “Left Button Double Click”, “Right Button
Down”, “Right Button Double Click”, “Middle Button Down”, “Middle
Button Double Click”, “Toggle Eraser” and “User defined”.
Pen/Eraser toggle function:
The Pen/Eraser toggle function allows you to configure the button’s
command function. When the stylus is inside the working area press the
barrel button to toggle between pen/eraser modes. The screen will
indicate the current mode.
NOTE:
The Pen/Eraser toggle switch will only toggle between the pen tip
and eraser, not as “brush”.
Image 6-4: Pen Buttons
5.Working Area
Move and drag the working area scale points to adjust your
desired working area size. If you want to assign a working area
location move the working area to the assigned location as
required.
Inch, cm and Line:
You can choose different measurement systems when changing
the Origin X, Origin Y, Width and Height.
Origin X & Origin Y:
Indicates the current height and width of the Pen area dimensions.
You may also type in new values here to change the dimensions of
the tablet working area.
Width & Height:
Indicates the horizontal and vertical distances of the upper left
corner of the pen area. You may also set their values by typing in
the numerical values here.
Left Hand:
Choosing “Left-hand” mode will change the physical usage
direction of the tablet to adapt to your preference.
Full area:
Tap on the full area button to select the largest possible working
area.
28 29