DG-Stomp
13
Hexagonal Nut
Hexagonal Nut
1/2
[10j]
[10j]
shield film
PN
2/2PN
Fig.2
Fig.3
[10j]:Bind Head Tapping Screw-P 3.0x12 MFZN2BL (VC161100)
[10c]: Bind Head Tapping Screw-B 3.0x8 MFZN2BL (EP600190)
[10e]: Hexagonal Nut 9.0 12x2 MFNI33 (LX200060)
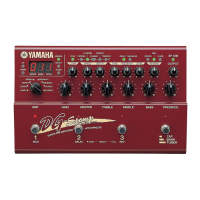
3. PN Circuit Boards (1/2, 2/2)
3-1. Remove the bottom case. (See Procedure 1.)
3-2. Remove the DM circuit board. (See Procedure 2.)
3-3-1. PN1/2 Circuit Board
Remove the controls, knobs and special hexagonal nuts
from the front panel, the three (3) screws marked [10j]
and the shield film from the PN1/2 circuit board. The
PN1/2 circuit board can then be removed. (Fig. 3)
3-3-2. PN2/2 Circuit Board
Remove the four (4) special hexagonal nuts from
foot switches. The PN 2/2 circuit board can then be
removed. (Fig. 3)
Topcover
[10c-b]
DM
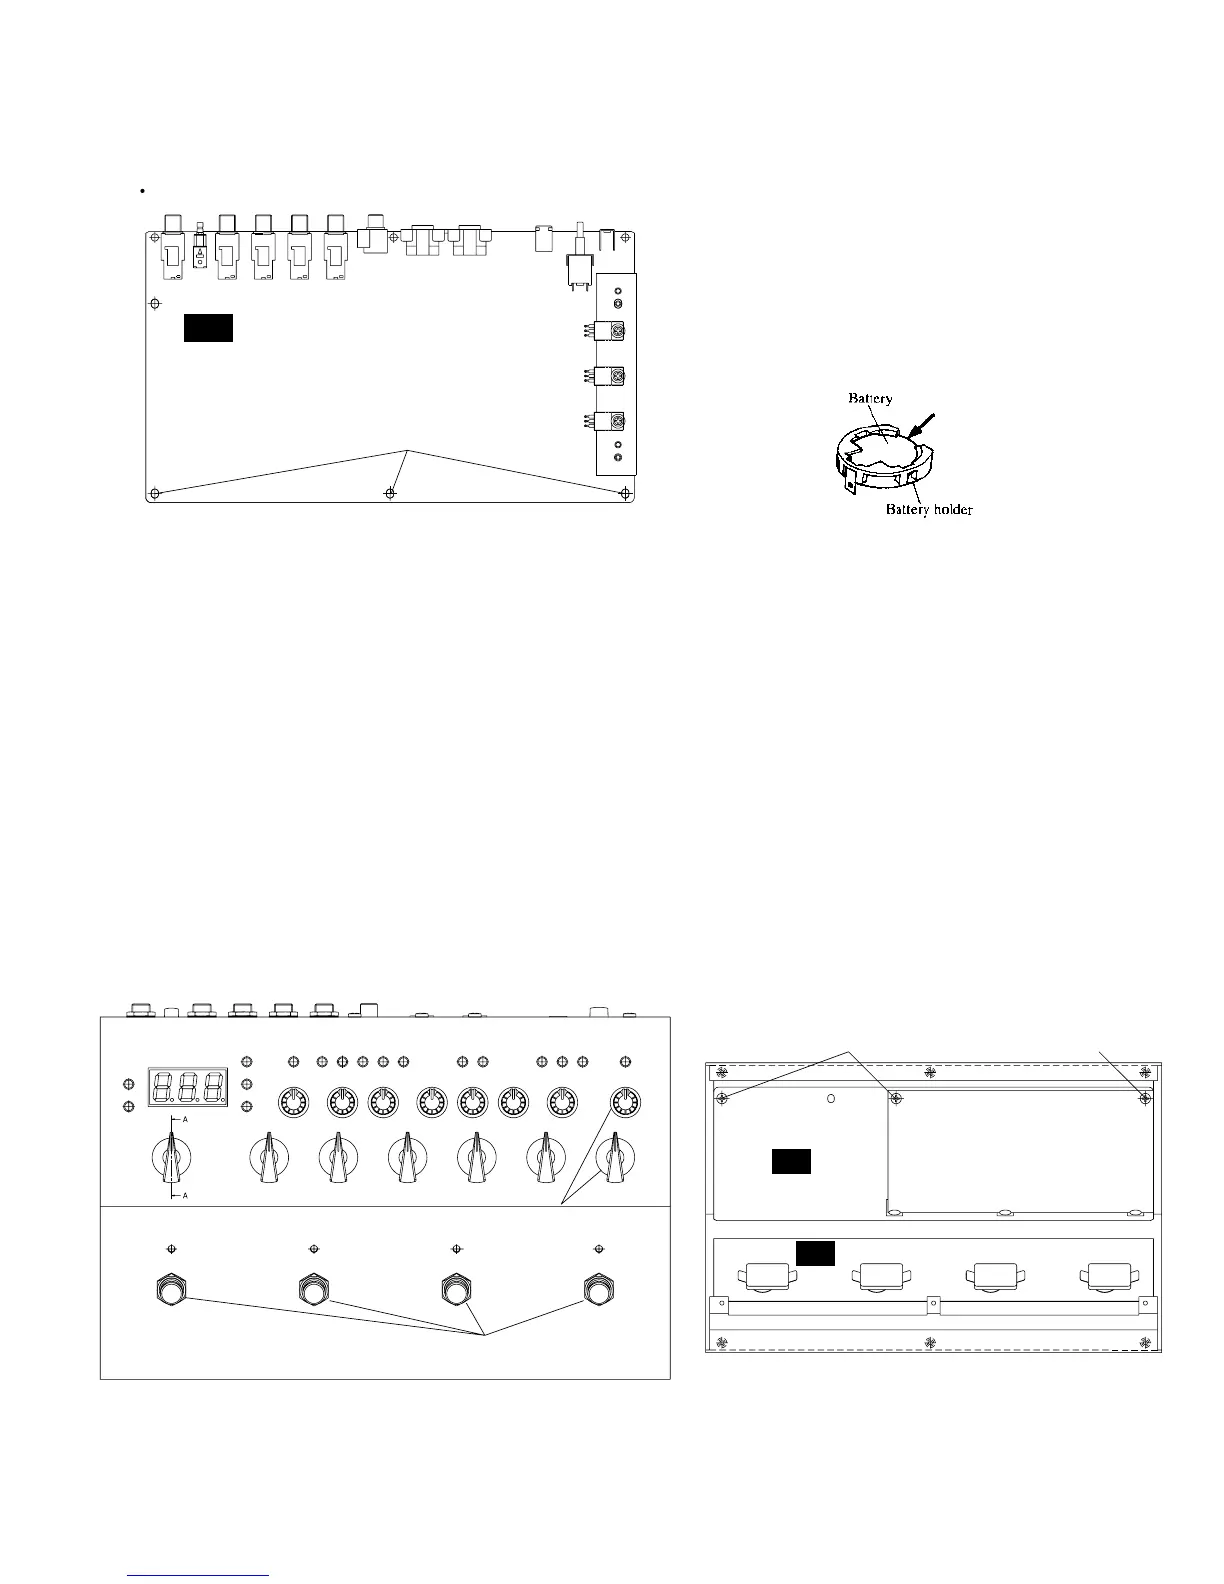
Battery VN103500
VN103600(Battery holder for VN103500)
• Notice for back-up battery removal
Push the battery as shows in figure,
then the battery will pop up.