–75–
NOTE 1:
1. First, tighten the lower ring nut to approximately 52 Nm (5.2 m · kg, 37 ft · lb) with a torque wrench,
then loosen the lower ring nut completely.
2. Retighten the lower ring nut to 18 Nm (1.8 m · kg, 13 ft · lb) with a torque wrench.
Shift rod nut M6 7 0.7 5.1
Shift arm pinch bolt M6 10 1.0 7.2
Rear brake master cylinder locknut — 16 1.6 11
Coolant reservoir bolt M6 7 0.7 5.1
Battery box bracket bolt M6 7 0.7 5.1
Battery box bolt M6 7 0.7 5.1
Battery box bolt M6 10 1.0 7.2
Battery holder bolt M6 10 1.0 7.2
Horn bolt M6 7 0.7 5.1
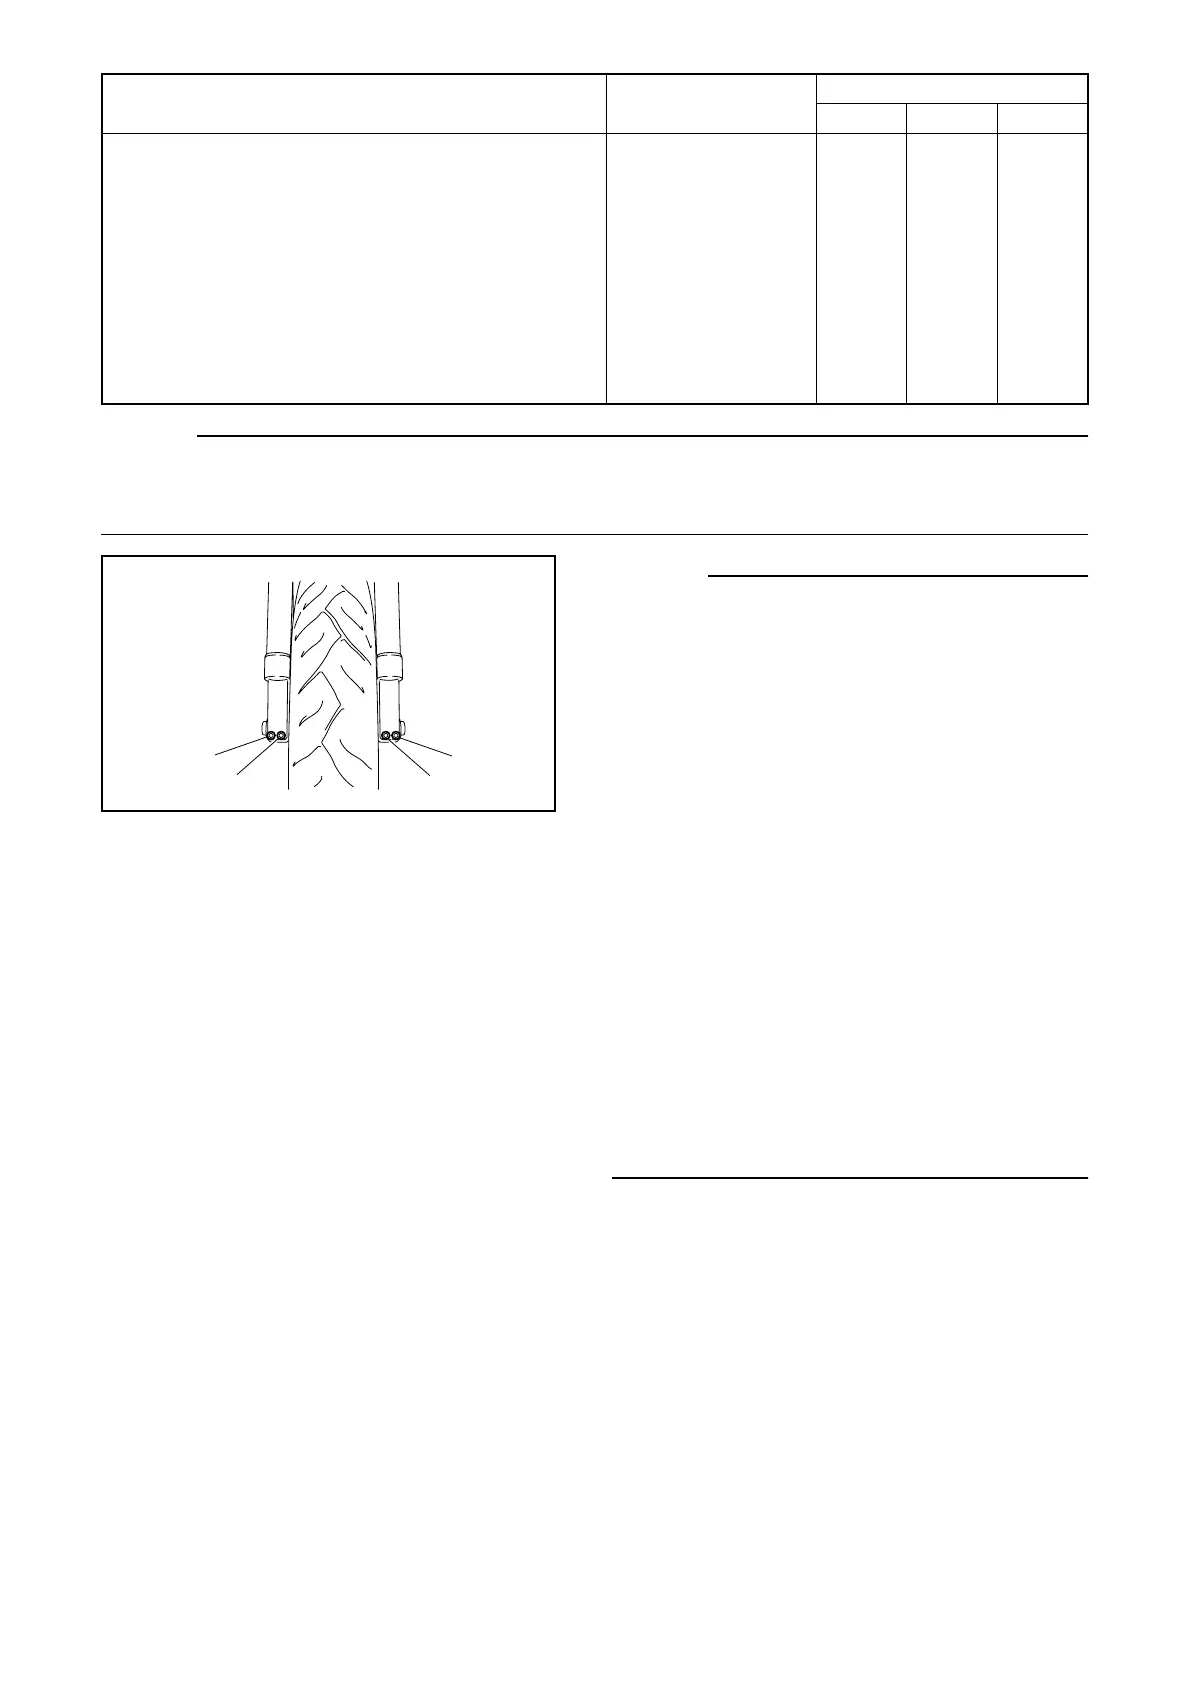
1. Insert the front wheel axle from the right side
and tighten it with the flange bolt from the left
side to 91 Nm (9.1 m · kg, 66 ft · lb) without
performing temporary tightening.
2. In the order pinch bolt (2)
→
pinch bolt (1)
→
pinch bolt (2), tighten each bolt to 21 Nm
(2.1 m · kg, 15 ft · lb) without performing tem-
porary tightening.
3. Check that the right end of the front axle is
flush with the front fork. If necessary, manually
push the front axle or lightly tap it with a soft
hammer until its end is flush with the front fork.
However, if the surface of the front axle end is
not parallel to the surface of the front fork, align
a point on the outer edge of the axle with the
fork, making sure that the axle does not pro-
trude past the fork.
4. In the order pinch bolt (4)
→
pinch bolt (3)
→
pinch bolt (4), tighten each bolt to 21 Nm
(2.1 m · kg, 15 ft · lb) without performing tem-
porary tightening.
Item Thread size
Tightening torque
Nm m · kg ft · lb
4
1
3
2