WATER PUMP
6-12
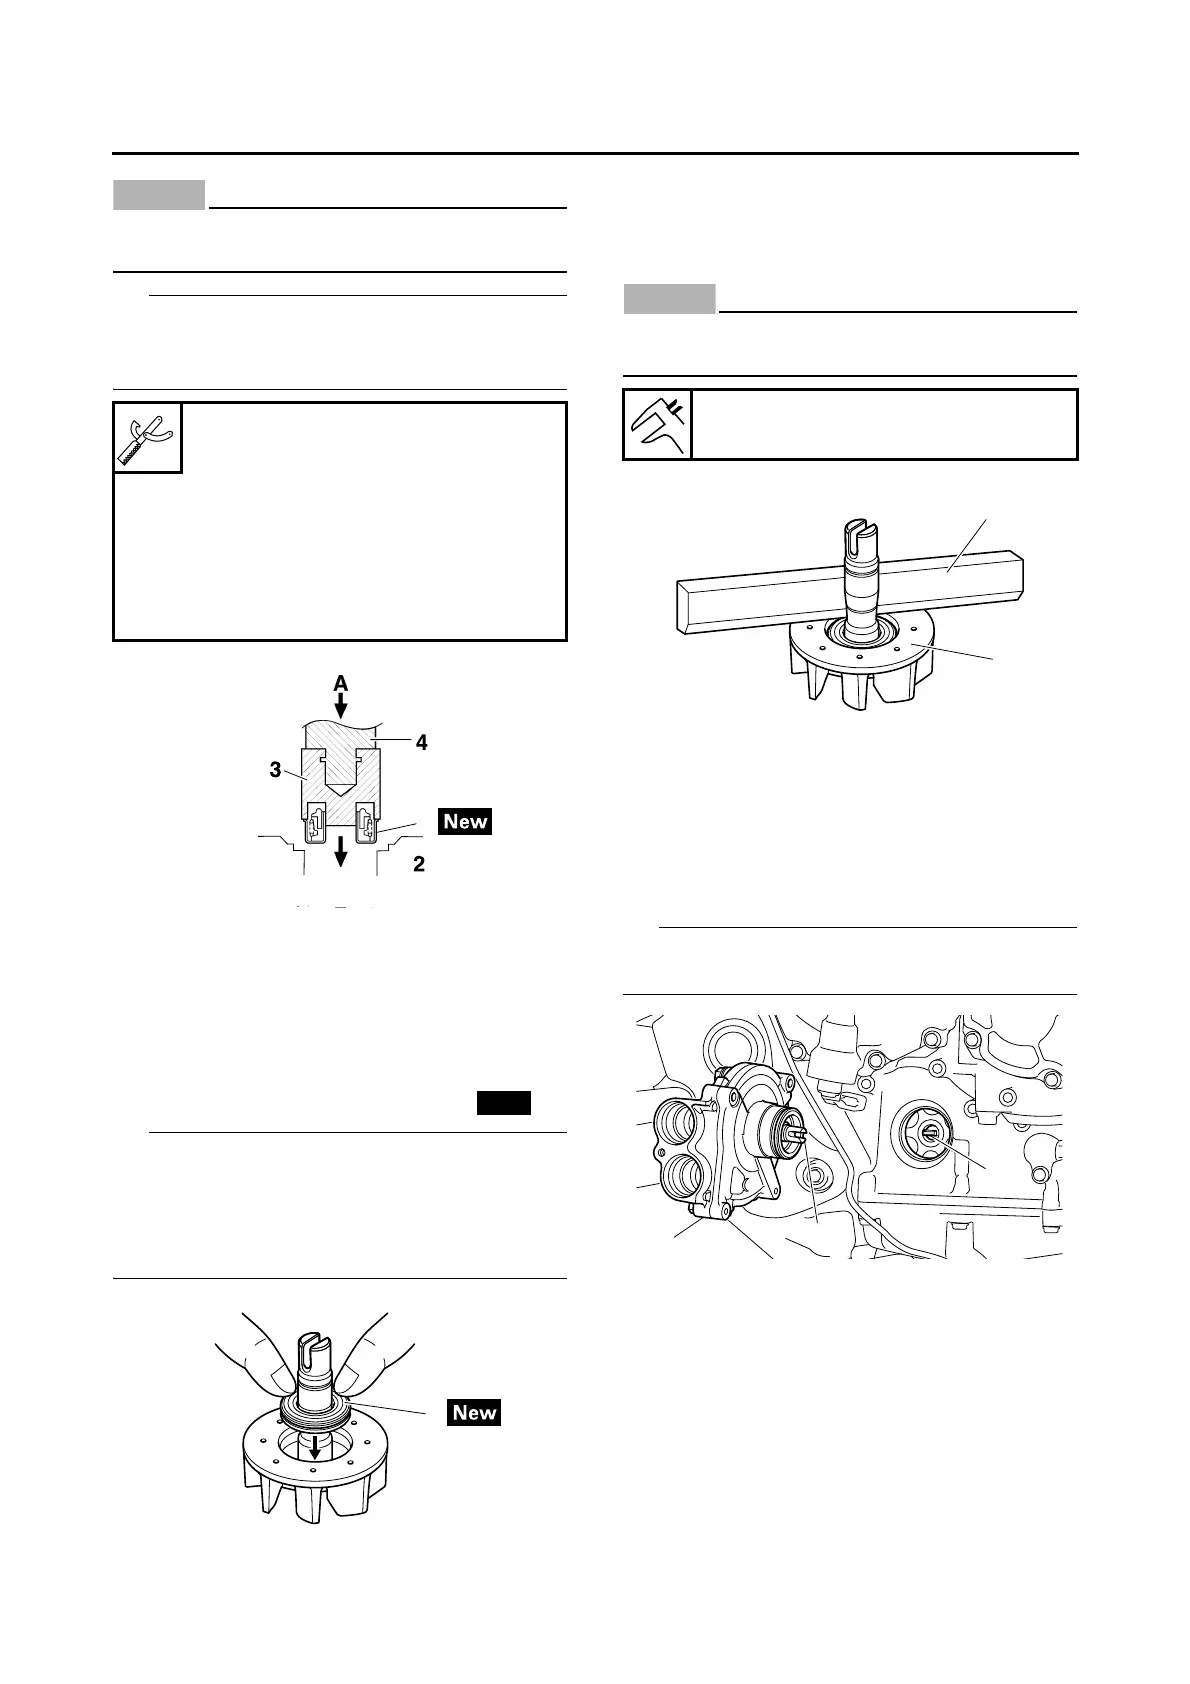
ECA20330
Never lubricate the mechanical seal (hous-
ing side) surface with oil or grease.
Use the special tools and a press to press the
mechanical seal (housing side) straight in until it
touches the water pump housing.
3. Install:
• Mechanical seal (impeller side) “1”
• Before installing the mechanical seal (impeller
side), apply tap water or coolant onto its outer
surface.
• If the top of the mechanical seal is dirty, clean
it.
4. Measure:
• Impeller shaft tilt
Out of specification Repeat steps (3) and
(4).
ECA20340
Make sure the mechanical seal (impeller
side) is flush with the impeller.
EAS30449
INSTALLING THE WATER PUMP
1. Install:
• Water pump assembly “1”
Align the slit “a” on the impeller shaft with the
projection “b” on the oil pump driven sprocket.
2. Fill:
• Cooling system
(with the specified amount of the recom-
mended coolant)
Refer to “CHANGING THE COOLANT” on
page 3-29.
3. Check:
• Cooling system
Leaks Repair or replace the faulty part.
Mechanical seal installer
90890-04132
Water pump seal installer
YM-33221-A
Middle driven shaft bearing driver
90890-04058
Middle drive bearing installer 40 &
50 mm
YM-04058
2. Water pump housing
3. Mechanical seal installer
4. Middle driven shaft bearing driver
A. Push down
Impeller shaft tilt limit
0.15 mm (0.006 in)
1. Straightedge
2. Impeller