FUEL TANK
7-4
EAS30456
INSTALLING THE FUEL PUMP
1. Install:
• Fuel pump gasket
• Fuel pump
• Fuel pump bracket
• Fuel pump bolts
• Do not damage the installation surfaces of the
fuel tank when installing the fuel pump.
• Always use a new fuel pump gasket.
• Install the fuel pump gasket so that the lip side
turns to the inside of the fuel tank.
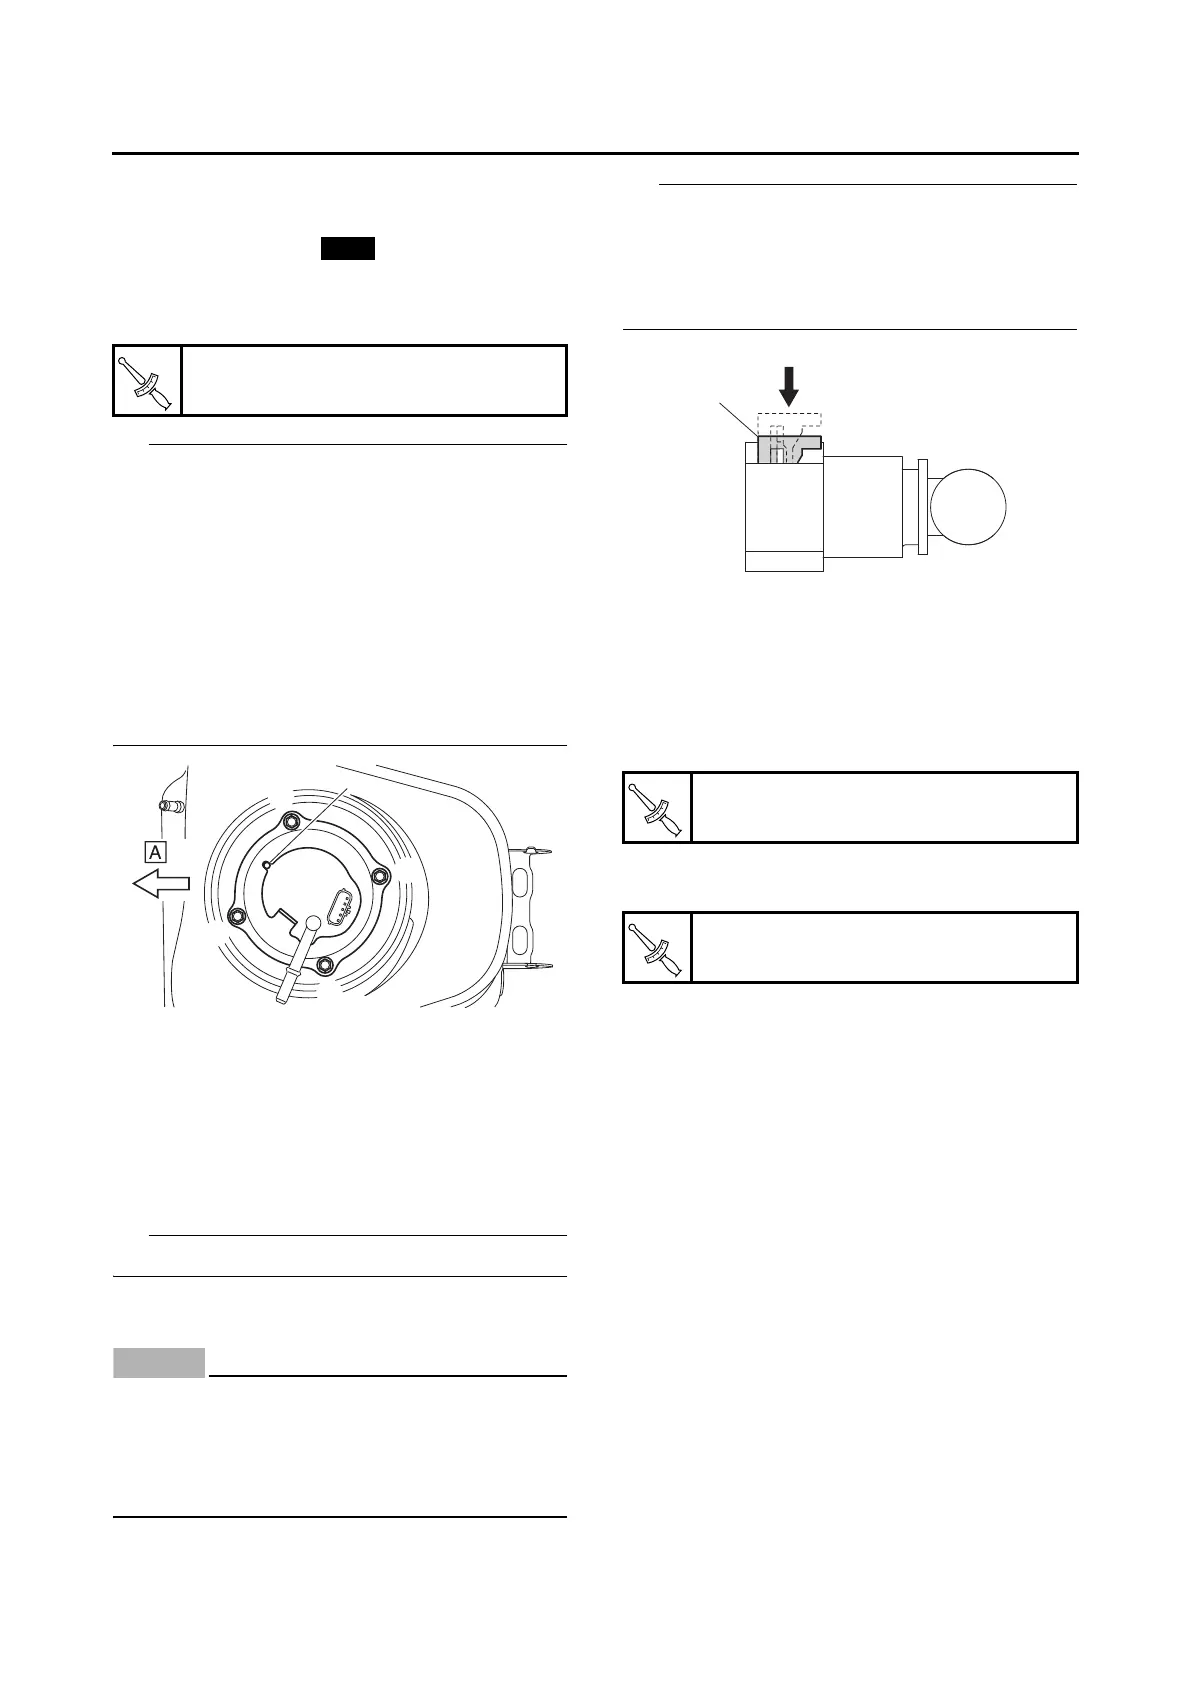
• Install the fuel pump as shown in the illustra-
tion.
• Align the projection “a” on the fuel pump with
the slot in the fuel pump bracket.
• Tighten the fuel pump bolts in the proper tight-
ening sequence as shown.
EAS30457
INSTALLING THE FUEL TANK
1. Install:
• Fuel tank
• Rear fuel tank bolt
• Fuel tank nut
Temporarily tighten the rear fuel tank bolt.
2. Connect:
• Fuel hose (fuel tank side)
ECA17500
When installing the fuel hose, make sure that
it is securely connected, and that the fuel
hose connector cover on the fuel hose is in
the correct position, otherwise the fuel hose
will not be properly installed.
• Install the fuel hose onto the fuel pump secure-
ly, and slide the fuel hose connector cover “1”
in the direction shown in the illustration.
• It is prohibited to wear the cotton work gloves
or equivalent coverings.
3. Connect:
• Fuel tank breather hose
• Fuel tank drain hose
• Fuel pump coupler
4. Tighten:
• Front fuel tank bolt
5. Tighten:
• Rear fuel tank bolt
Fuel pump bolt
4.0 N·m (0.40 kgf·m, 2.9 lb·ft)
A. Forward
2
1
4
3
a
Front fuel tank bolt
7 N·m (0.7 kgf·m, 5.1 lb·ft)
Rear fuel tank bolt
7 N·m (0.7 kgf·m, 5.1 lb·ft)
1



 To Next Page