Periodic maintenance and adjustment
7-34
7
EAU25081
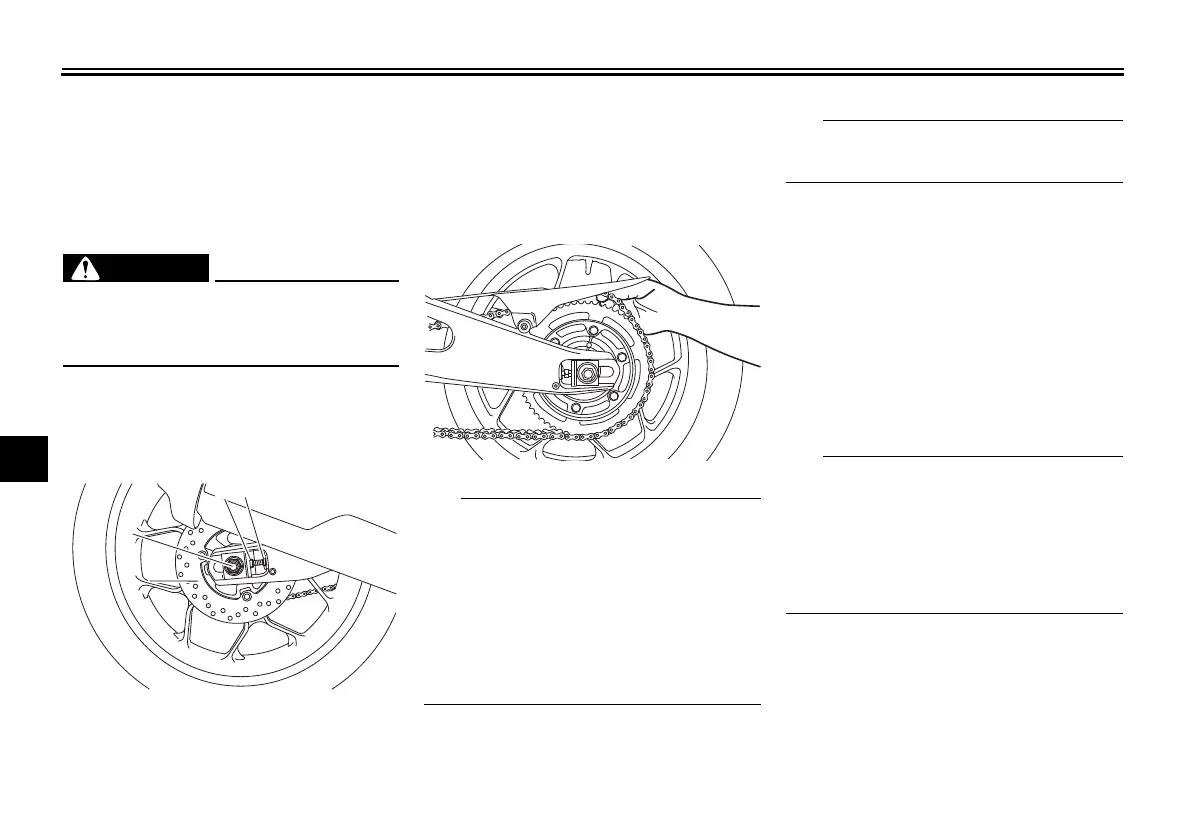
Rear wheel
EAUU2180
To remove the rear wheel
EWA10822
To avoid injury, securely support the
vehicle so there is no danger of it
falling over.
1. Loosen the locknut and drive
chain slack adjusting bolt on each
side of the swingarm.
2. Loosen the axle nut.
3. Raise the vehicle so the rear wheel
is off the ground. (See page 7-32.)
4. Remove the axle nut.
5. Push the wheel forward, and then
remove the drive chain from the
rear sprocket.
z If the drive chain is difficult to re-
move, remove the wheel axle first,
and then lift the wheel upward
enough to remove the drive chain
from the rear sprocket.
z The drive chain does not need to
be disassembled in order to re-
move and install the rear wheel.
6. While supporting the brake caliper
and slightly lifting the wheel, pull
the wheel axle out.
A rubber mallet may be useful to tap
the wheel axle out.
7. Remove the wheel. NOTICE: Do
not apply the brake after the
wheel and brake disc have been
removed, otherwise the brake
pads will be forced shut.
[ECA11073]
To install the rear wheel
1. Install the wheel and the brake cal-
iper bracket by inserting the wheel
axle from the right side.
z Make sure that the slot in the
brake caliper bracket is fit over the
retainer on the swingarm.
z Make sure that there is enough
space between the brake pads
before installing the wheel.
1. Axle nut
2. Drive chain slack adjusting bolt
3. Locknut
UB1VE0E0.book Page 34 Tuesday, September 3, 2019 1:19 PM