Periodic maintenance and adjustment
7-29
7
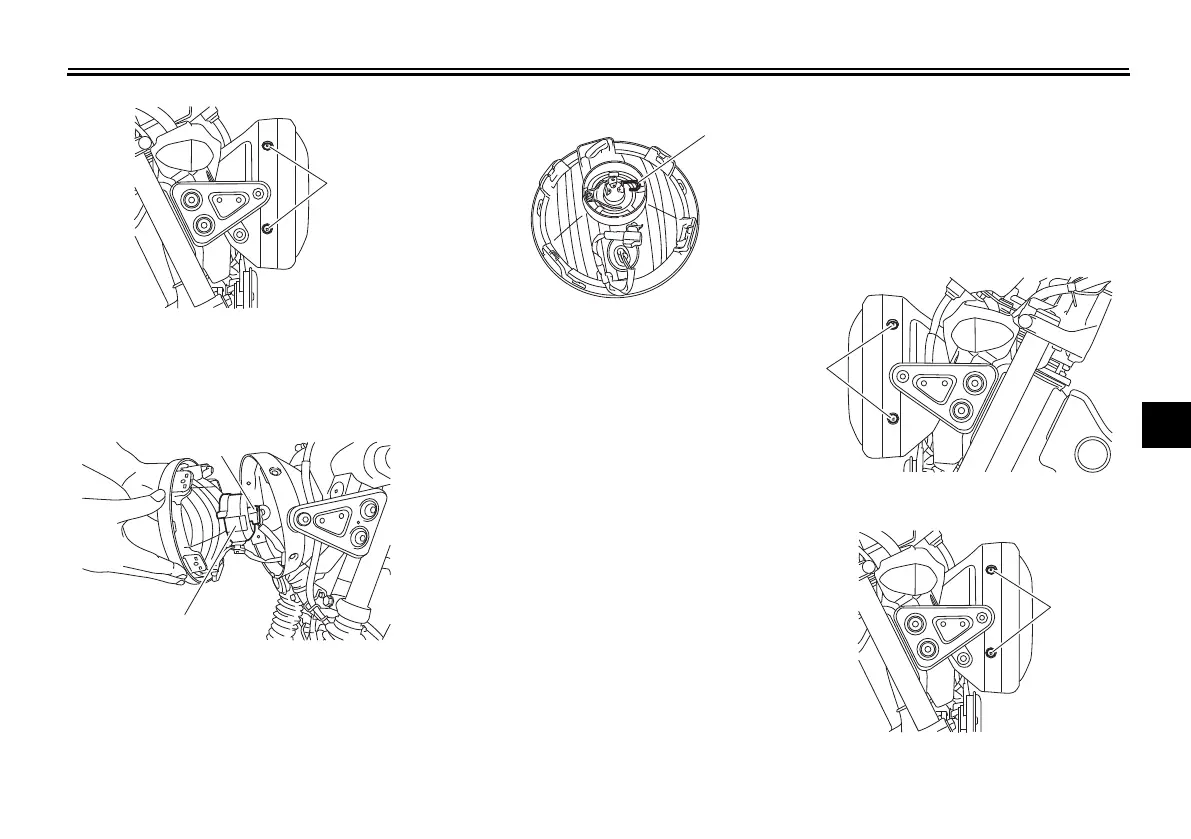
2. Disconnect the headlight coupler,
and then remove the headlight
bulb cover.
3. Unhook the headlight bulb holder,
and then remove the burnt-out
bulb.
4. Place a new headlight bulb into
position, and then secure it with
the bulb holder.
5. Install the bulb cover, and then
connect the coupler.
6. Install the headlight unit by install-
ing the screws.
7. Have a Yamaha dealer adjust the
headlight beam if necessary.
EAU33417
Replacing the auxiliary light
bulb
If the auxiliary light bulb burns out, re-
place it as follows.
1. Remove the headlight unit by re-
moving the screws.
1. Screw
1. Headlight coupler
2. Headlight bulb cover
1. Headlight bulb holder
1. Screw
1. Screw
UBKWE0E0.book Page 29 Tuesday, July 18, 2023 8:34 AM