Periodic maintenance and adjustment
7-30
7
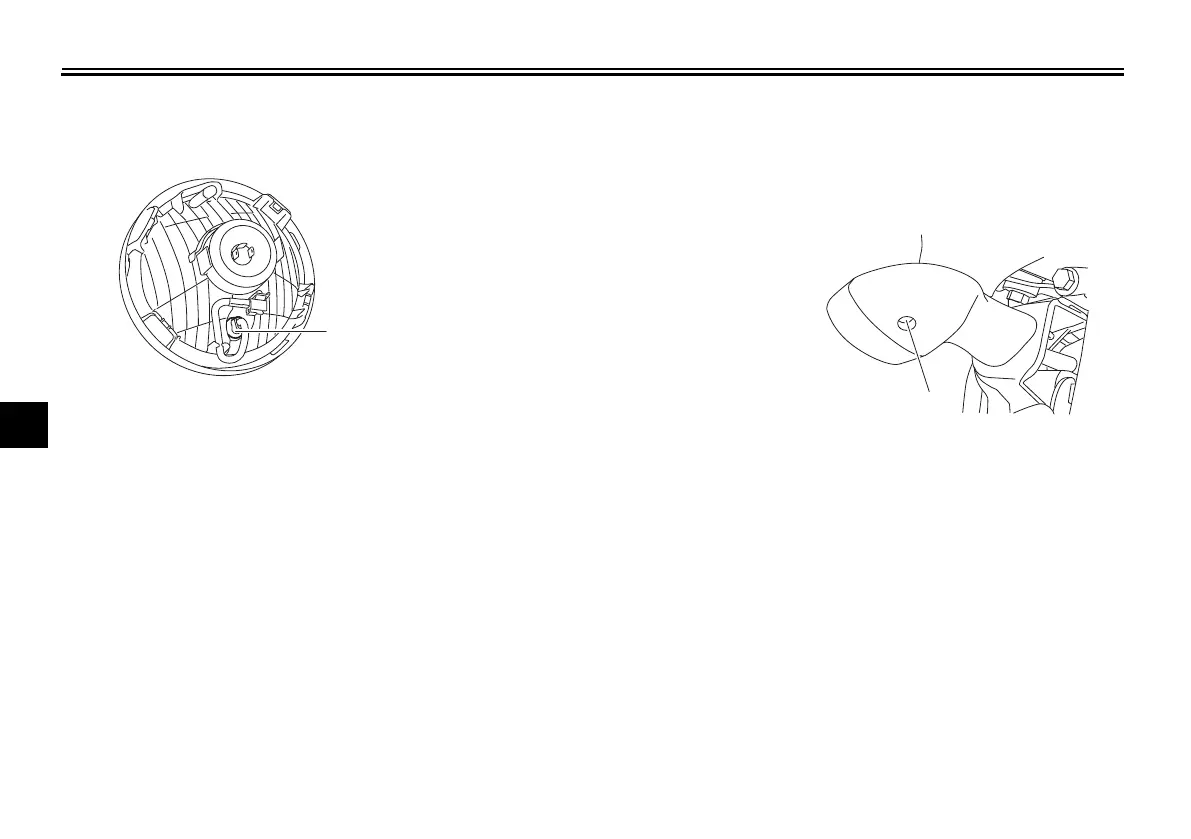
2. Remove the socket (together with
the bulb) by pushing it in and turn-
ing it counterclockwise.
3. Remove the burnt-out bulb by
pushing it in and turning it coun-
terclockwise.
4. Insert a new bulb into the socket,
push it in, and then turn it clock-
wise until it stops.
5. Install the socket (together with
the bulb) by pushing it in and turn-
ing it clockwise until it stops.
6. Install the headlight unit by install-
ing the screws.
EAU43041
Tail/brake light
If the tail/brake light does not come on,
have a Yamaha dealer check its electri-
cal circuit or replace the bulb.
EAU24205
Replacing a turn signal light
bulb
1. Remove the turn signal light lens
by removing the screw.
2. Remove the burnt-out bulb by
pushing it in and turning it coun-
terclockwise.
3. Insert a new bulb into the socket,
push it in, and then turn it clock-
wise until it stops.
4. Install the lens by installing the
screw. NOTICE: Do not over-
tighten the screw, otherwise the
lens may break.
[ECA11192]
1. Auxiliary light bulb socket
1. Screw
UBKWE0E0.book Page 30 Tuesday, July 18, 2023 8:34 AM