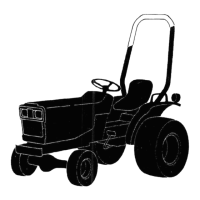
XI.
TRACTOR
ASSEMBLY
1.
GENERAL ASSEMBLY
(10)
Attach the hood.
(1)
Attach the clutch disc and pressure plate to
the main drive shaft, insert the shaft in the
fly-
(11)
Attach the muffler.
wheel, center
it,
and then secure the pressure
(12)
Put in transmission lube oil.
plate to the flywheel with bolts.
NOTE: Make sure rhat there is no oil on the mount-
ing
suflaces of the flywheel and pressure plate.
[ASSEMBLY CAUTIONS]
(2)
Fit the main drive shaft into the clutch
(1)
Parts with a Serial No. before 51000 or after
housing.
51001 have either a different shape or dimension.
The difference
is
described in the procedure, and
(3)
Move the tractor towards the engine, and
should be heeded.
attach the engine and tractor.
(2)
When assembling the gears, fork, and fork
NOTE: Check to be sure the PTO main drive shaft is
shaft be sure to pay close attention to the color
correctly joined to the joint.
direction and position. Pay close attention to the
illustration so that they are put in properly.
(4)
Assemble the tachometer cable, drag rod,
throttle rod, and decompression rod.
(3)
The number in brackets indicating the dimen-
NOTE: AN splitpins should be replaced with new ones.
sions 0.r gears refers to Serial No. before 51000.
(4)
The last figure of the gears indicates the
NG
n
(5)
Attach the fuel oil pipe to the fuel pump.
Open the filter cock. Bleed the fuel system of air
of gear teeth.
at the fuel pump. Attach the return pipe to the
fuel injection valves.
(5)
In the event that there are no instructions
for installing the oil seal,
it
should be installed
NOTE: Replace the copper packing.
so
it
is
flush with the outer edge
as
shown in the
illustraion.
(6)
Attach the hydraulic pipes.
~ ~
NOTES; Replace the copper packing on the tractor
(6)
Oil Seal Lip. To prevent damage to the
0-
side; nuke sure rhat O-rings are in position on the en-
ring, installation should begin only after the shaft
gine side
and hole have been checked for any sharp edges.
a) Attach high and low pressure pipes to the tractor
In the event that there are sharp edges they
should be removed.
side.
b) Attach high and low pressure pipes
to the engine.
c) Secure pipes with pipe clamps.
(7)
Be sure that the spring
is
completely install-
ed inside the oil seal. Check that
it
does not slip
out of the slot in the inside of the oil seal.
(7)
Mount the battery. Connect the positive
and negative terminals.
(8)
When inserting the. oil seal in the shaft be
NOTES;
sure that the lip does not turn up.
If the lip
a) Be sure the cushioning inserts are in position
turns up, pull
it
out of the shaft a little. Insert
b) Secure the bartery clamp firmly in position
the seal in the shaft again turning
it
lightly with
your fingers,
itshould return to its correct condi-
(8)
Attach the front grille. tions.
.---.
(9)
Carry out electrical wiring (refer to the
wiring diagram).