48 support@yardistrystructures.com
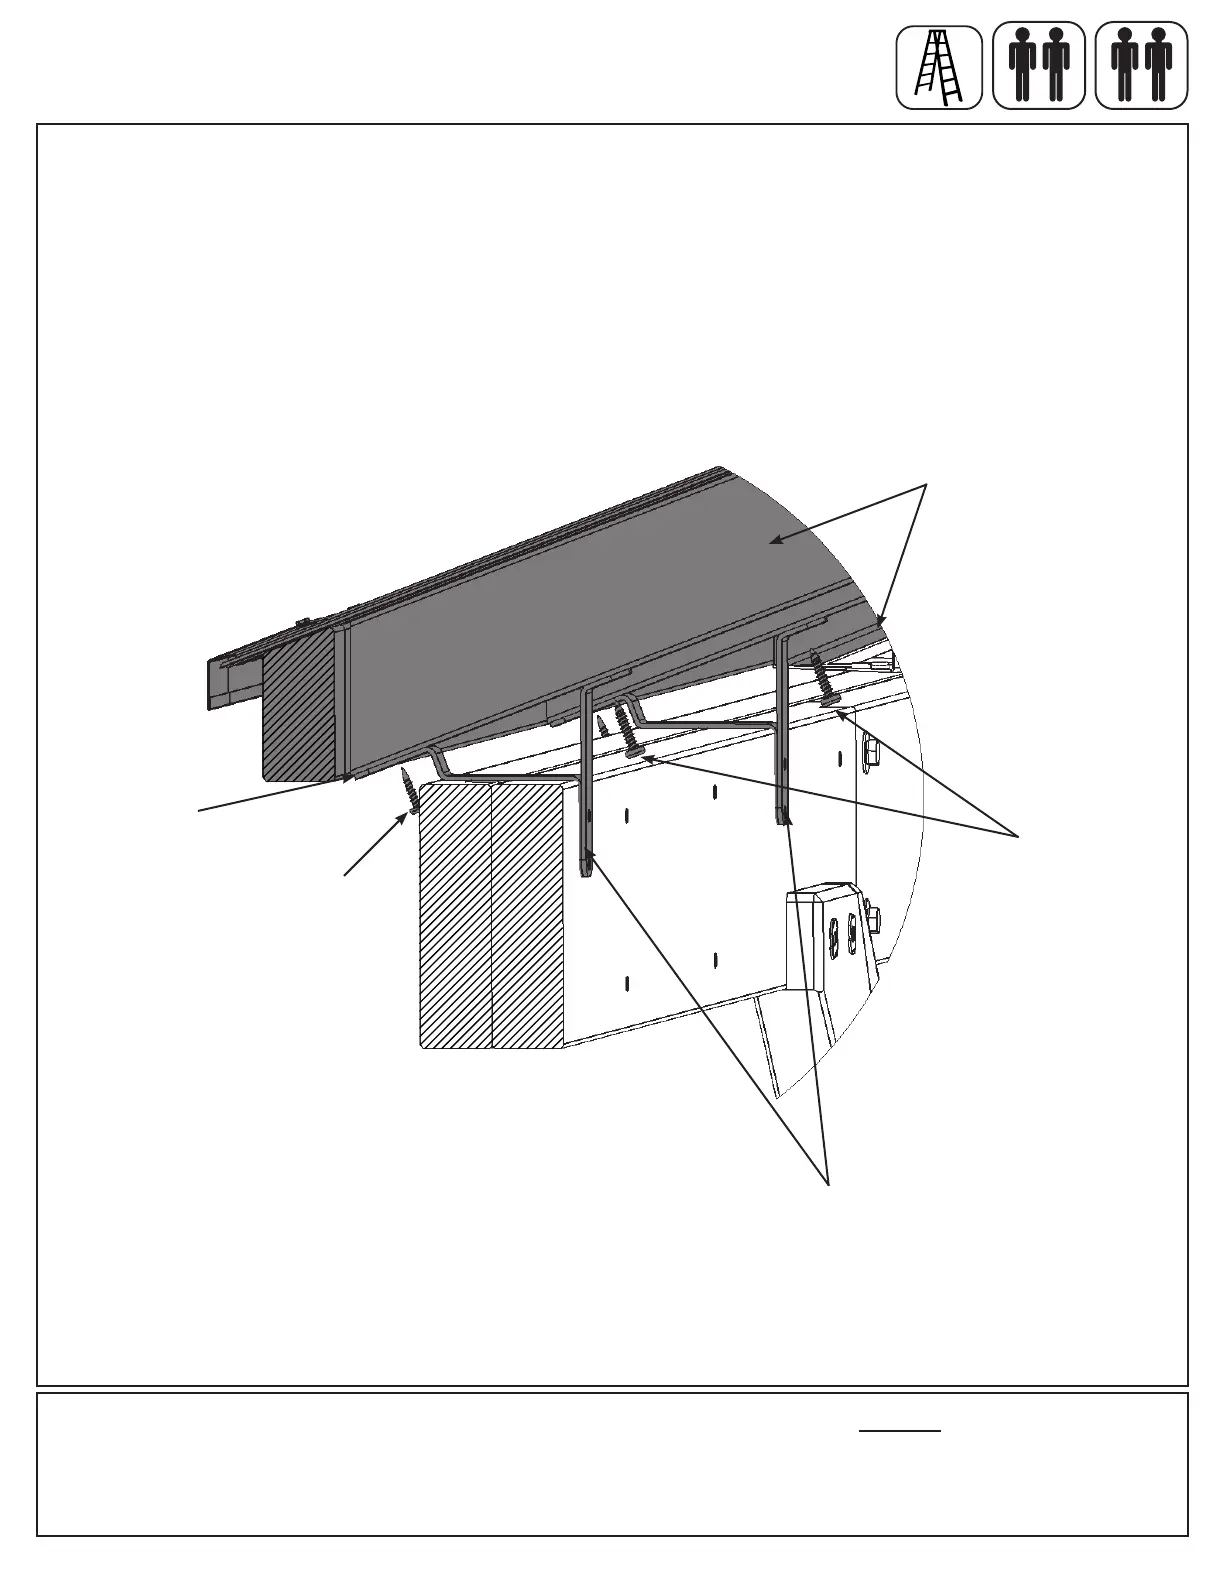
C: On the Small Roof Rafter Assembly just installed, centred and ush to the bottom of (442) Rafter Short Right,
(441) Rafter Short Left and (440) Rafter attach one Roof to Beam Bracket per board with one #8 x 1” Pan Screw
in the bottom hole and one #12 x 1-1/2” Pan Screw in the top hole per bracket. (g. 19.5)
x 3
Fig. 19.5
Parts removed
for clarity
Roof to
Beam
Bracket
#12 x 1-1/2”
Pan Screw
(x3)
Flush
Attach to Rafter Short Right,
Rafter Short Left and Rafters
#8 x 1”
Pan Screw
(x3)
Hardware
3 x #8 x 1” Pan Screw
3 x #12 x 1-1/2” Pan Screw
3 x Roof to Beam Bracket
Step 19: Attach Final Roof Panel
Part 3