4-2
IM WT310E-02EN
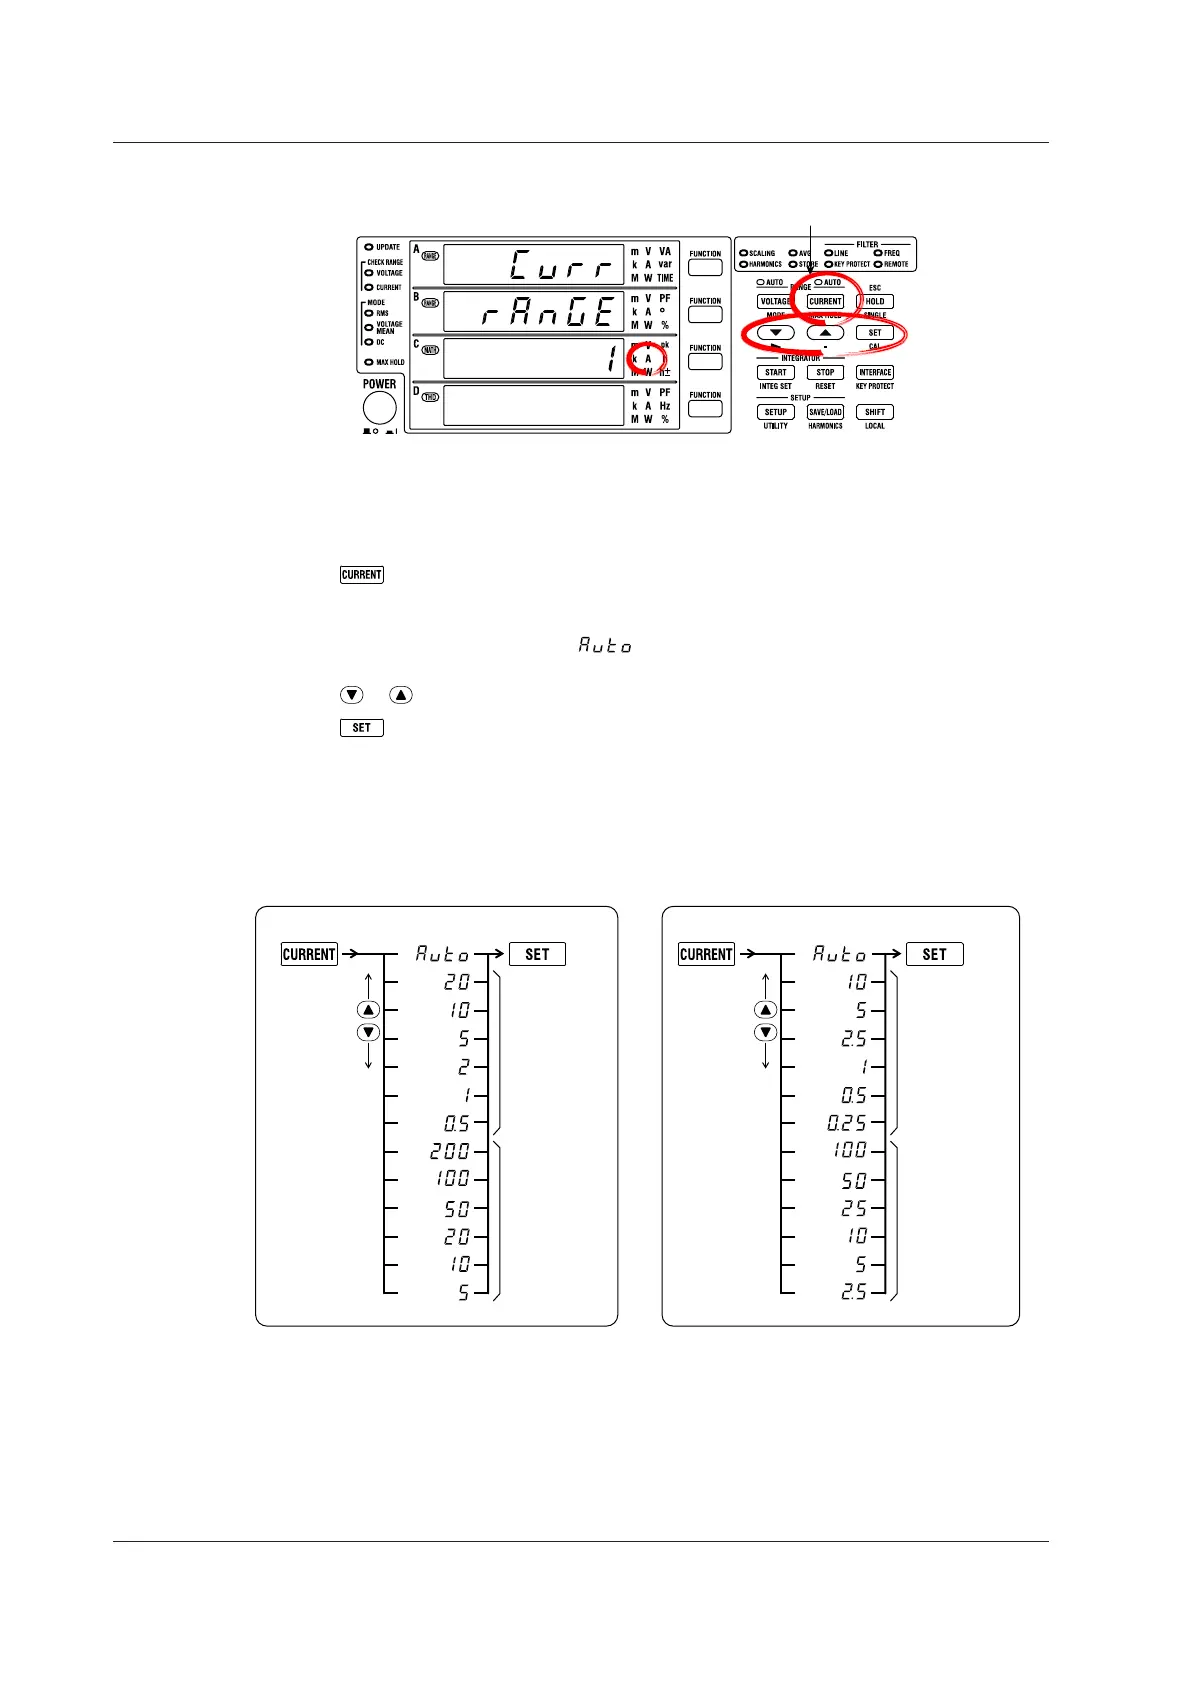
Setting the Current Range
CURR
RANGE
1
AUTO indicator for the current range
For information about the other digital numbers and characters that are displayed in the
7-segment LED displays, see section 1.3.
An illustration of the WT310E/WT310EH is used in this explanation, but this operation can be
performed using the same keys on the WT332E/WT333E.
1.
Press .
The current range setup menu appears.
The selected current range blinks in display C.
If you previously set the current range to (the AUTO indicator for the current range is lit), the current
range that has been automatically selected on the basis of the measured current blinks.
2.
Press or to display the current range that you want to select in display C.
3.
Press .
The current range is confirmed, and each of the displays returns to showing measured values.
The figures below show steps 1 to 3 in flowcharts. The User’s Manual, IM WT310E-01EN, uses these types
of flowcharts to explain procedures.
WT310E Current Ranges
(Display C) 1. 3.
Confirm the
setting.
(Display C) 1. 3.
Confirm the
setting.
When the Crest Factor Is Set to 6 or 6AWhen the Crest Factor Is Set to 3
The unit is A.
The unit is mA.
The unit is A.
The unit is mA.
2. 2.
There are more ranges to choose from on models with the /EX1 or /EX2 option. For details, see section 2.4
in the User’s Manual, IM WT310E-01EN.
4.1 Setting the Measurement Ranges

 Loading...


