Do you have a question about the YOKOGAWA WT5000 and is the answer not in the manual?
Configures the instrument's measurement mode (Normal, IEC Harmonic, or Flicker).
Provides an overview of input element and wiring unit settings for basic measurement conditions.
Details settings for computing methods, harmonic measurement, displays, and data saving.
Covers system settings including date/time, language, LCD, and environment preferences.
Explains procedures for saving, loading, and initializing instrument setup configurations.
Details how to display and configure current sensor settings.
Configures the wiring system (e.g., 1P2W, 3P3W) for input elements.
Sets the voltage and current ranges for each input element, including auto and fixed ranges.
Sets up external current sensors, including ON/OFF, conversion ratio, and display format.
Configures VT and CT ratios for scaling measurements accurately.
Defines valid measurement ranges for voltage and current to prevent over-range errors.
Applies sensor correction for amplitude and phase to improve measurement accuracy.
Configures line and frequency filters (e.g., HFR, AAF, DLF) to reduce noise.
Sets the measurement period and sync source for accurate data acquisition.
Configures the crest factor settings (CF3, CF6, CF6A) for waveform analysis.
Adjusts the data update interval and averaging settings for display refresh rates.
Defines equations for calculating motor efficiency (η1, η2) and total efficiency.
Configures delta computation settings (type, mode) for three-phase measurements.
Sets averaging type and count to reduce measurement noise and improve stability.
Configures master/slave settings for synchronous measurement operations.
Customizes screen display formats, including numeric, graph, and custom screen configurations.
Shows numerical measurements of voltage, current, active power, and power factor.
Displays calculated apparent, reactive, and corrected power values based on defined equations.
Shows phase difference and frequency measurements for voltage and current signals.
Displays results from user-defined functions and events for advanced analysis.
Captures and displays the maximum measured values for voltage, current, and power.
Allows custom screen configuration by setting backgrounds and numeric data boxes.
Registers and selects up to five custom screen configurations for quick access.
Configures integration settings like mode, timer, and scheduled times for energy measurements.
Shows calculated integrated values for watt hours and ampere hours numerically.
Sets conditions for IEC harmonic measurements, including FFT points and harmonic orders.
Displays harmonic measurements for voltage, current, power, and power factor numerically.
Configures graph display types (Wave, Trend, Bar, Vector) and screen divisions.
Displays voltage and current waveforms, allowing zoom and position adjustments.
Shows trends of voltage and current over time, with adjustable time scales.
Visualizes harmonic orders and magnitudes using bar graphs for analysis.
Illustrates phase differences and magnitude relationships using vector diagrams.
Configures storage operation modes (Manual, Real Time, Event) and storage count.
Selects specific numeric data items to be stored, including voltage, current, and harmonics.
Specifies the save destination (User, USB, Network) and file naming conventions.
Manages the data storage process by starting, pausing, and ending recording.
Explains how to connect USB memory devices for data saving and loading.
Configures save conditions, including data types, file naming, and comments.
Selects which numeric data items (voltage, current, power, etc.) to save.
Defines the format (BMP, PNG, JPEG) and color settings for saved screen images.
Initiates the saving process for selected data types and screen images.
Provides functions for managing files and folders in the file list.
Sets up motor evaluation parameters like speed, torque, and efficiency calculations.
Shows motor evaluation results numerically, including speed, torque, and efficiency.
Freezes the current measurement values on the screen for later review.
Performs a single measurement and holds the value, useful during dynamic conditions.
Manages the Null feature to cancel DC offset for accurate measurements.
Executes zero-level compensation to adjust for instrument drift and improve accuracy.
Uses cursors to measure values at specific points on waveform displays.
Applies cursors to trend graphs to measure values at specific time points.
Uses cursors to identify harmonic orders and values on bar graph displays.
Configures parameters for IEC harmonic measurements according to IEC 61000-4-7 standard.
Sets conditions for IEC voltage fluctuation and flicker measurements.
Performs voltage fluctuation and flicker measurements, including normal and dmax modes.
Details how to connect the instrument to a network using Ethernet interface.
Sets up TCP/IP parameters, including IP address, subnet mask, and DNS settings.
Explains how to access instrument files via FTP server using a PC.
Enables access to instrument functions and data through a web browser.
Configures connection to network drives for centralized data storage.
Synchronizes the instrument's clock with an SNTP server for accurate timekeeping.
Configures remote control settings for network, GP-IB, and USB interfaces.
Sets up D/A output channels for analog signal output of measurement data.
Sets up IEEE 1588 time synchronization for precise network time management.
Configures display languages for messages, menus, and USB keyboard input.
Adjusts LCD brightness and configures automatic screen turn-off settings.
Sets environmental preferences like frequency display, decimal point, and rounding.
Performs self-tests on memory and front panel keys for instrument diagnostics.
Accesses and displays system messages and error logs for troubleshooting.
Displays instrument details, firmware versions, and current sensor statuses.
Locks touch panel and front panel keys to prevent accidental operation.
Lists warning messages and their corresponding corrective actions or relevant sections.
Details setup-related error messages and their troubleshooting guidance.
Lists system error messages and the required maintenance or corrective actions.
| Frequency Range | DC, 0.1 Hz to 1 MHz |
|---|---|
| Number of Channels | Up to 7 |
| Interfaces | USB, Ethernet, GP-IB, RS232 |
| Sampling Rate | 10 MS/s |
| Harmonic Analysis | Up to the 500th order |
| Weight | Approximately 15 kg |
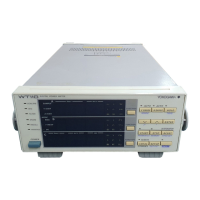
| Display | 10.1-inch WXGA (1280 x 800) TFT LCD |