4-1
IM WT5000-02EN
4.1 Setting Integration Conditions
► “Enabling or Disabling Independent Integration (Independent Control)” in the features guide
► “Integration Auto Calibration On/Off (Auto Cal)” in the features guide
► “Integration Mode (Integration Mode)” in the features guide
► “Integration Timer (Integration Timer)” in the features guide
► “Scheduled Times for Real-Time Integration (Start Time/End Time)” in the features guide
► “Watt Hour Integration Method for Each Polarity (WP ± Type)” in the features guide
► “Current Mode for Current Integration (q Mode)” in the features guide
► “Rated Time for Integrated D/A Output (Integration Rated Time)” in the features guide
► “Integration resume action at power failure recovery (Resume Action)” in the features guide
This section explains operating procedures using the following setup methods.
• Procedure Using the Setup Menu (see chapter 1)
• Procedure Using the Menu Icons (see page iii)
• Procedure Using the Keys (other than SETUP) (see section 1.2 in IM WT5000-03EN)
Procedure Using the Setup Menu
1.
Tap the Setup icon , or press MENU under SETUP.
2.
Tap Computation/Output tab. A computation and output settings overview screen appears.
Pressing ESC closes the overview screen.
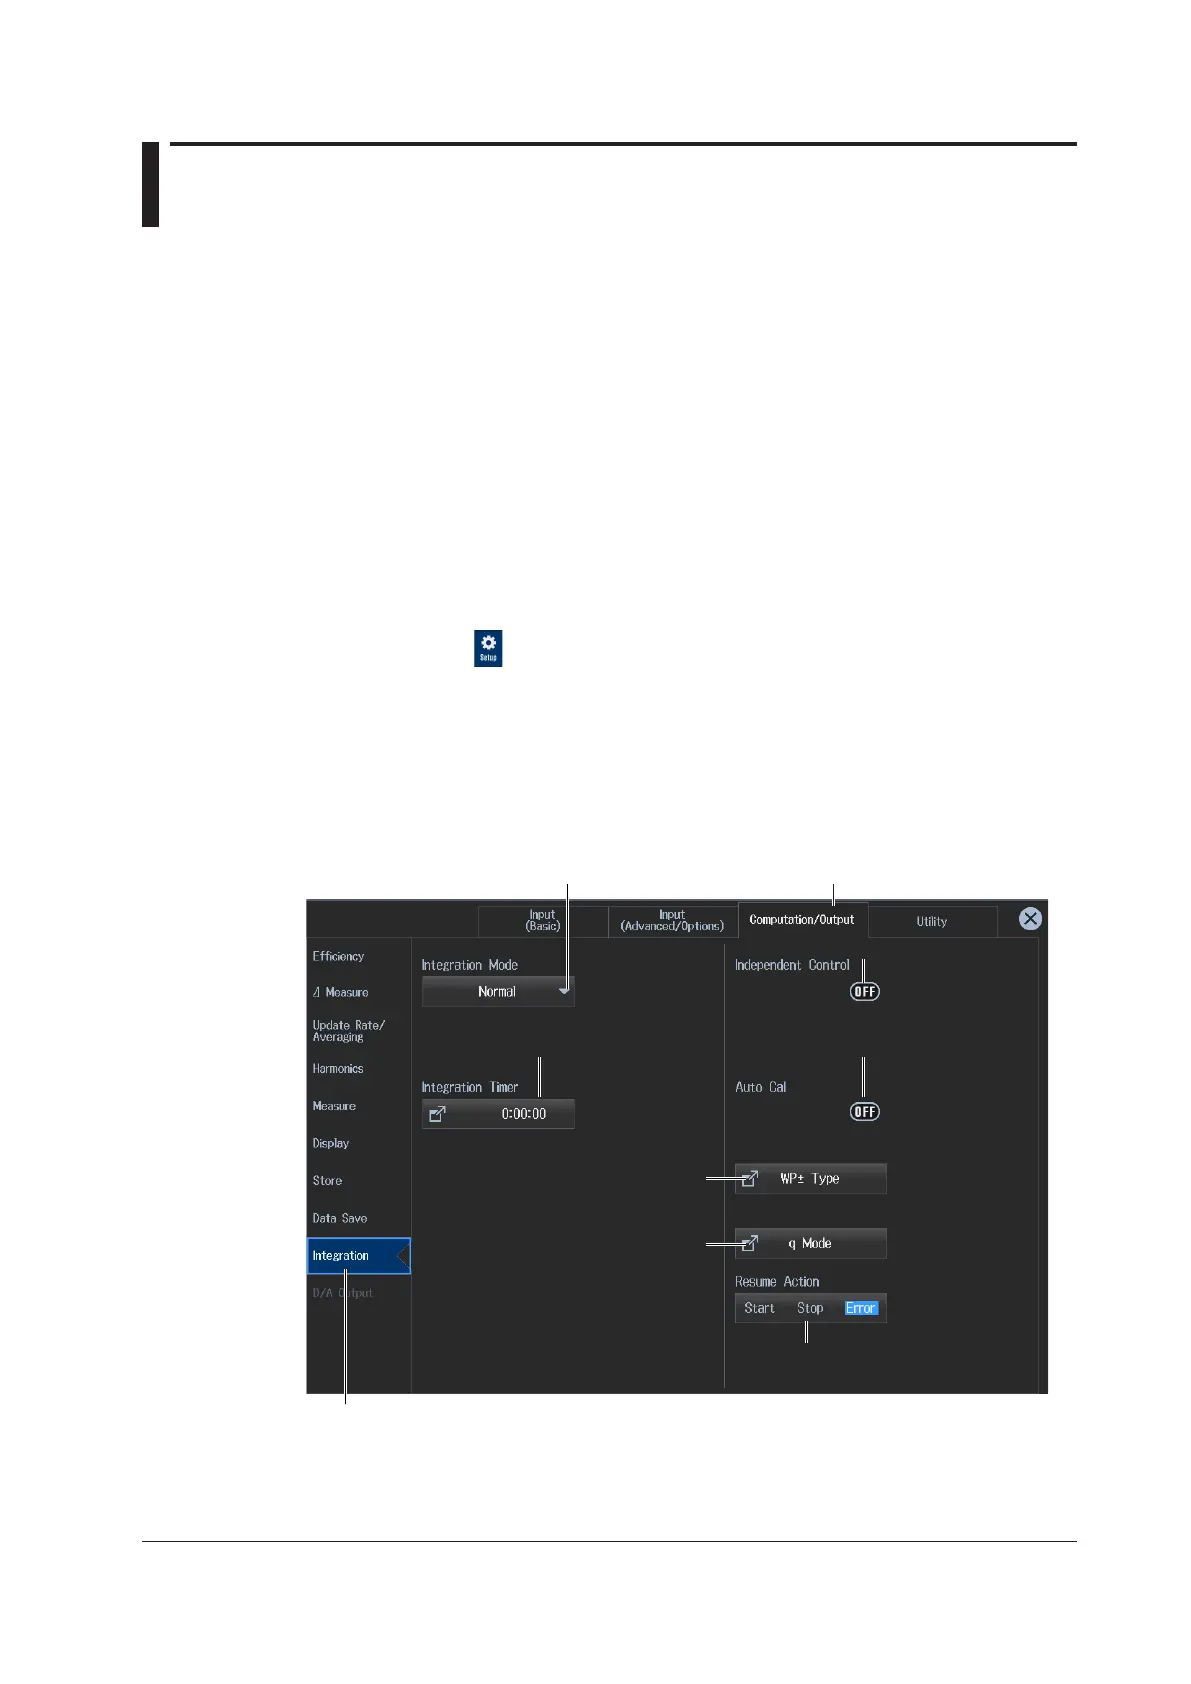
Setting Integration Conditions (Integration)
3.
Tap Integration. An integration condition setup screen appears.
• When the Integration Mode Is Set to Normal or Continuous
Computation/Output tab
Set the integration conditions.
Set the integration mode.
(Normal, Continuous, R-Normal, R-Continuous)
Set the integration timer.
Set the independent integration (OFF, ON).
Set integration auto calibration (OFF, ON).
Set the watt-hour integration
methods for each polarity.
Set the current modes for
current integration.
Set the integration resume operation at
power failure recovery (Start, Stop, Error).
Chapter 4 Integrated Value Measurement (watt hours and ampere hours)

 Loading...