EasyManuals Logo

Yongnuo YN-622C User Manual

Yongnuo YN-622C
31 pages
To Next Page IconTo Next Page
To Previous Page IconTo Previous Page
Page #9 background imageLoading...
Page #9 background image
3.Install Flash on the Hot Shoe of the
Transceiver (as Receiver)
Preparation Before Use
7
1. Install the transceiver on the
mini stand or other fixing
equipment (excluded).
2. Loosen the locking ring of the
flash.
3. Slip the mounting foot of the
flash into the receiver.
4. Tightly lock the locking device
of the flash.
!
connected reliably before use, turn all equipments
on, setting the transceivers in the same channel,
set the group of receivers , test button can be used
to awaken and test whether the flash works before
shooting(refer to Page 10), trigger the flash until
flash recyling completely.
Check that all equipments are installed and
Caution! The hot shot of the
transceivers can only install
flash being applicable to DSLR
cameras, can not install high-
v o l t a g e f l a s h , o r t h e
transceiver may be damaged.
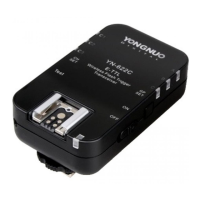
Other manuals for Yongnuo YN-622C

Questions and Answers:

Question and Answer IconNeed help?

Do you have a question about the Yongnuo YN-622C and is the answer not in the manual?

Yongnuo YN-622C Specifications

Power IconPower
battery type2x AA batteries (1.5v Alkaline or 1.2v NiMH)
standby time60 hours
max safe trigger voltage on hot-shoe centre pin6 volts
Connectors IconConnectors
canon hot footwith locking ring and pin
canon hot shoefor mounting hot-shoe flash
pc-sync screwlock socketsync out only
Weight and Dimensions IconWeight and Dimensions
dimensions90 x 53 x 25mm (39mm incl. hot-foot)
weight79gm without batteries

Related product manuals