CAUTION
Do not loosen compressor mounting bolts.
Converting between 2-in. and
4- in. filters
About this task:
To convert a unit from the 4-in. filter configuration
to the 2-in. filter configuration, follow the steps
below.
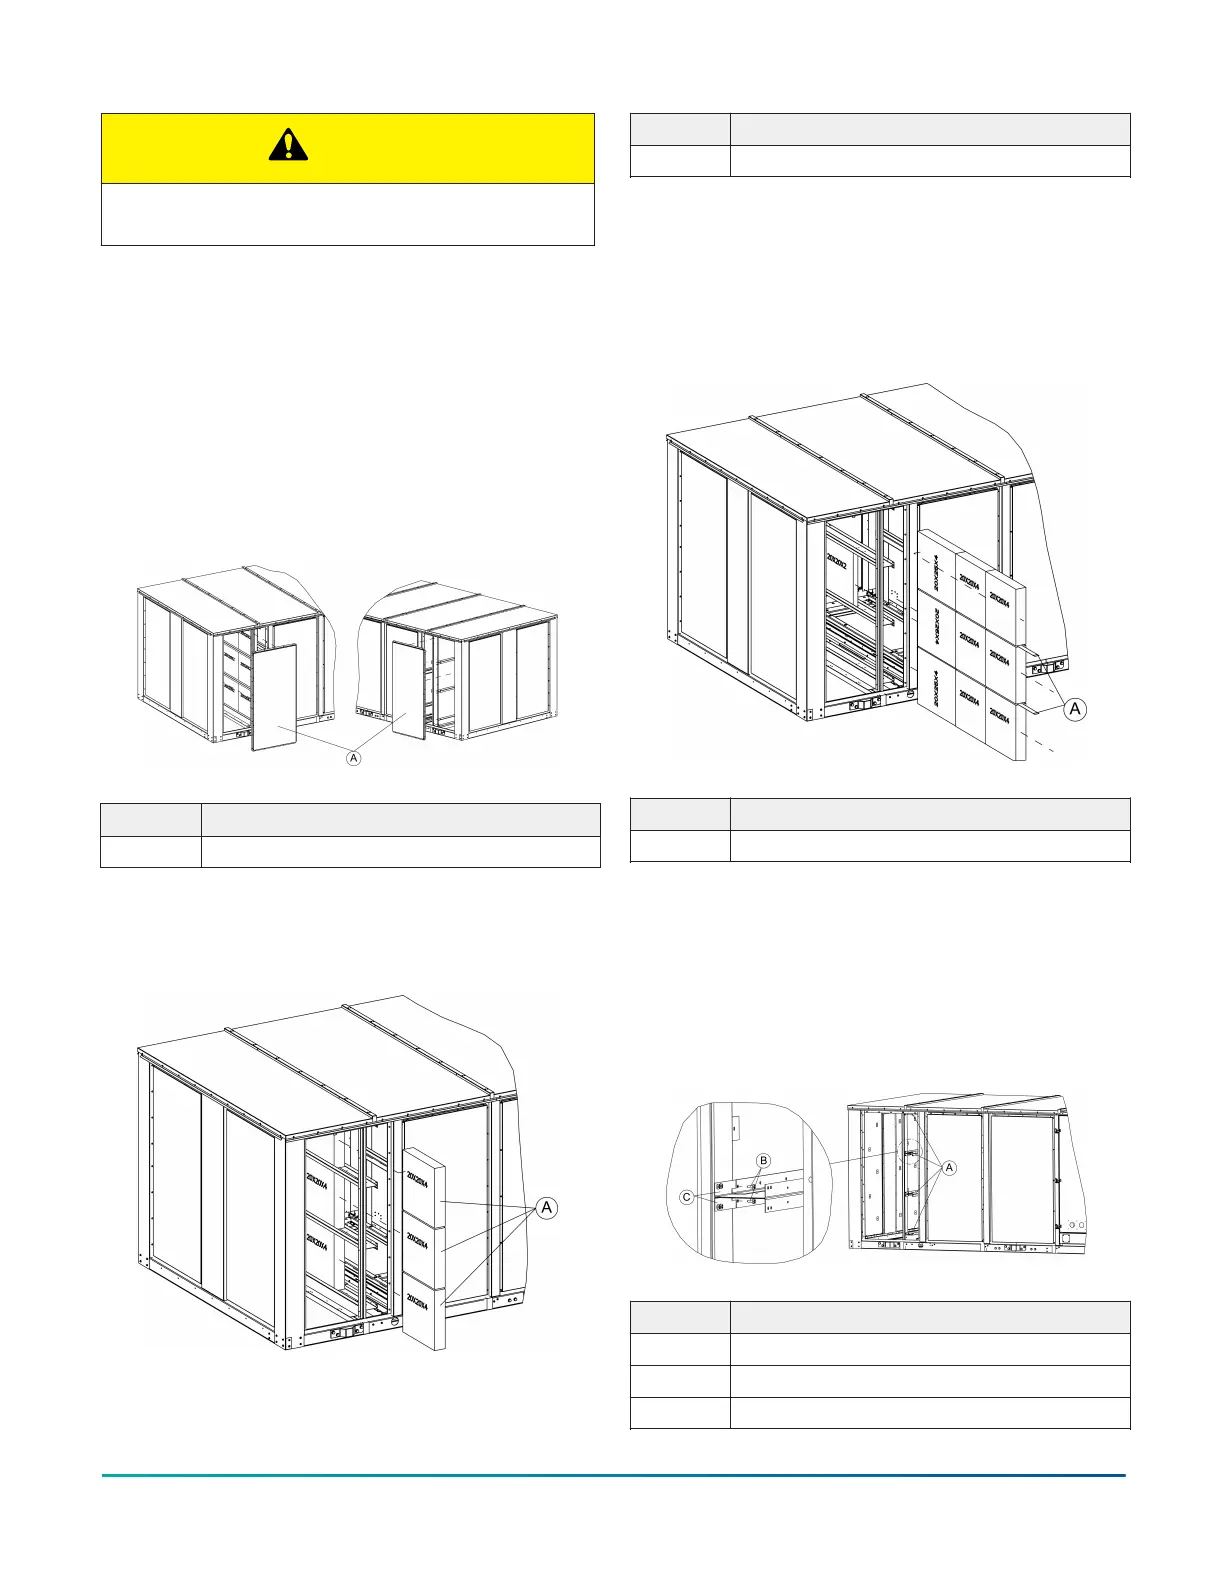
1. Remove the return air access panels from
both sides of the unit as shown in Figure 39.
Figure 39: Return air access panel locations
Item Description
A Return air access panels
2. Remove the first filter of each of the 3 racks
from the right side of the unit as shown in
Figure 40.
Figure 40: Filter removal
Item Description
A Filters
3. Locate the metal strip on each filter rack that
is exposed after removing the filters in Step
2. Slide each metal strip out of the unit to
remove the remaining filters from each rack
as shown in Figure 41. Keep the metal strips
to replace in a later step.
Figure 41: Removal of remaining filters
Item Description
A Metal strips for filter removal
4. For each filter rack, remove the metal bracket
from both the top and bottom channel of the
rack. There will be six metal brackets. This
is accomplished by removing a single screw
from each metal bracket on both the left and
right side of the unit. The bracket and screw
locations are shown in Figure 42.
Figure 42: Metal bracket removal
Item Description
A Metal bracket location
B Screws
C Metal bracket
Installation Manual: YORK
®
Sun
™
Select YV28 to YV50
30
Johnson Controls Ducted Systems