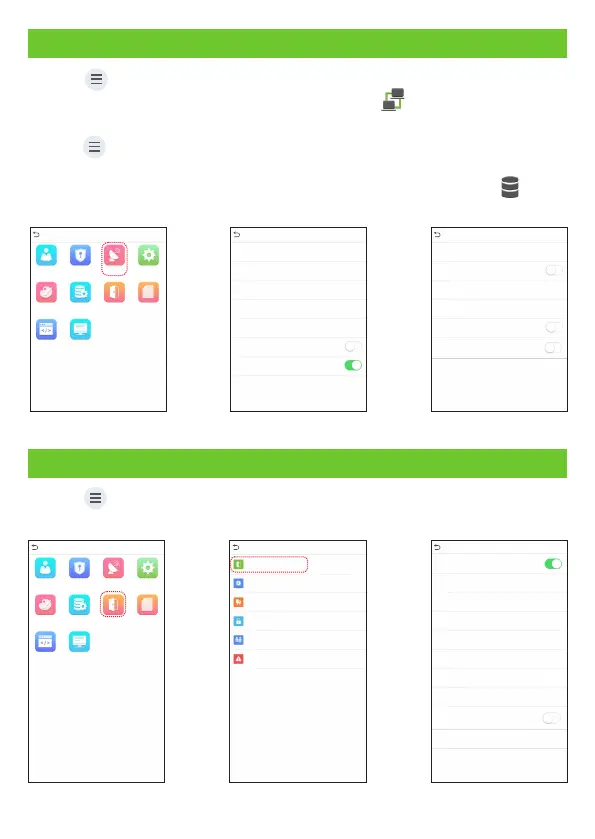
Ethernet and Cloud Server Settings
Click on COMM. Ethernet> [ ] > [ ] to set the network parameters. If the TCP/IP
communication of the device is successful, the icon will be displayed in the
upper right corner of the standby interface.
Click on > [COMM.] > [Cloud Server Setting] to set the server address and server
port, that is, the IP address and port number of the server after the software is
installed. If the device communicates with the server successfully, the icon will be
displayed in the upper right corner of the standby interface.
ADMS
6609
110.80.38.74
Server Mode
Enable Domain Name
Server Address
Server Port
Enable Proxy Server
Cloud Server Setting
HTTPS
192.168.163.200
0.0.0.0
4370
255.255.255.0
192.168.163.1
IP Address
Subnet Mask
Gateway
DNS
TCP COMM. Port
DHCP
Display in Status Bar
Ethernet
Main Menu
User Mgt.
User Role
COMM.
System
Data Mgt.Personalize Attendance
Search
Autotest
System Info
Access Control
L
13
Access Control Setting
Click on to enter the access control management interface and > [Access Control]
set relevant parameters of access control.
Main Menu
User Mgt.
User Role
COMM.
System
Data Mgt.Personalize Attendance
Search
Autotest
System Info
Access Control
L
Access Control Options
Time Rule setting
Holidays
Combined Verification
Anti-passback Setup
Duress Options
Access Control
Password/Face/Palm
1
Gate Control Mode
Verification Mode
Door available time period
Normal open time period
Master Device
Auxiliary input configuration
Speaker Alarm
Reset Access Setting
Access Control Options
None
In
Slave Device
Out
Verify mode by RS485
Card Only
 Loading...