10
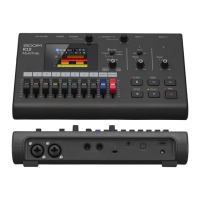
Functions of parts
■
Top
■
Bottom
①
Touchscreen
This shows various types of information
and allows operation by touch.
②
CLICK switch / BALANCE knob
When the CLICK switch is set to PHONES,
use the BALANCE knob to adjust the
balance between the MASTER and CLICK
signals output from the PHONES output
jack.
③
Channel/EFFECT/MASTER faders
Channel faders: These adjust individual
track signal levels in a range from −∞ to
+10 dB.
EFFECT fader: This adjusts the return level
of the send effect in a range from −∞ to
+10 dB.
MASTER fader: This adjusts the signal lev-
els output from the OUTPUT jacks and the
PHONES output jack in a range from −∞ to
+10 dB.
④
PHONES output volume knob
This adjusts the headphone output volume.
⑤
OUTPUT volume knob
This adjusts the OUTPUT volume.
⑥
Hi-Z switch
Turn Hi-Z on/off for INPUT 1. Turn this on
as necessary for the connected guitar or
bass.
⑦
PEAK indicators / GAIN knobs
Use these input gain knobs to adjust input
signals. Adjust these so that the PEAK
indicators do not light.
⑧
Other buttons
CLICK: This turns the click sound on/off.
The indicator lights when it is on.
REW: This moves the playback position one
ruler unit back. Press and hold to search
backward.
FF: This moves the playback position one
ruler unit forward. Press and hold to search
forward.
STOP: This stops recording/playback.
Press when stopped to move the record-
ing/playback position to the beginning of
the project.
PLAY: This starts/pauses playback of
recorded les. The indicator lights during
playback.
REC: This starts recording. The indicator
lights during recording.
⑨
Battery cover
Open this when installing or removing AA
batteries.

 Loading...