31
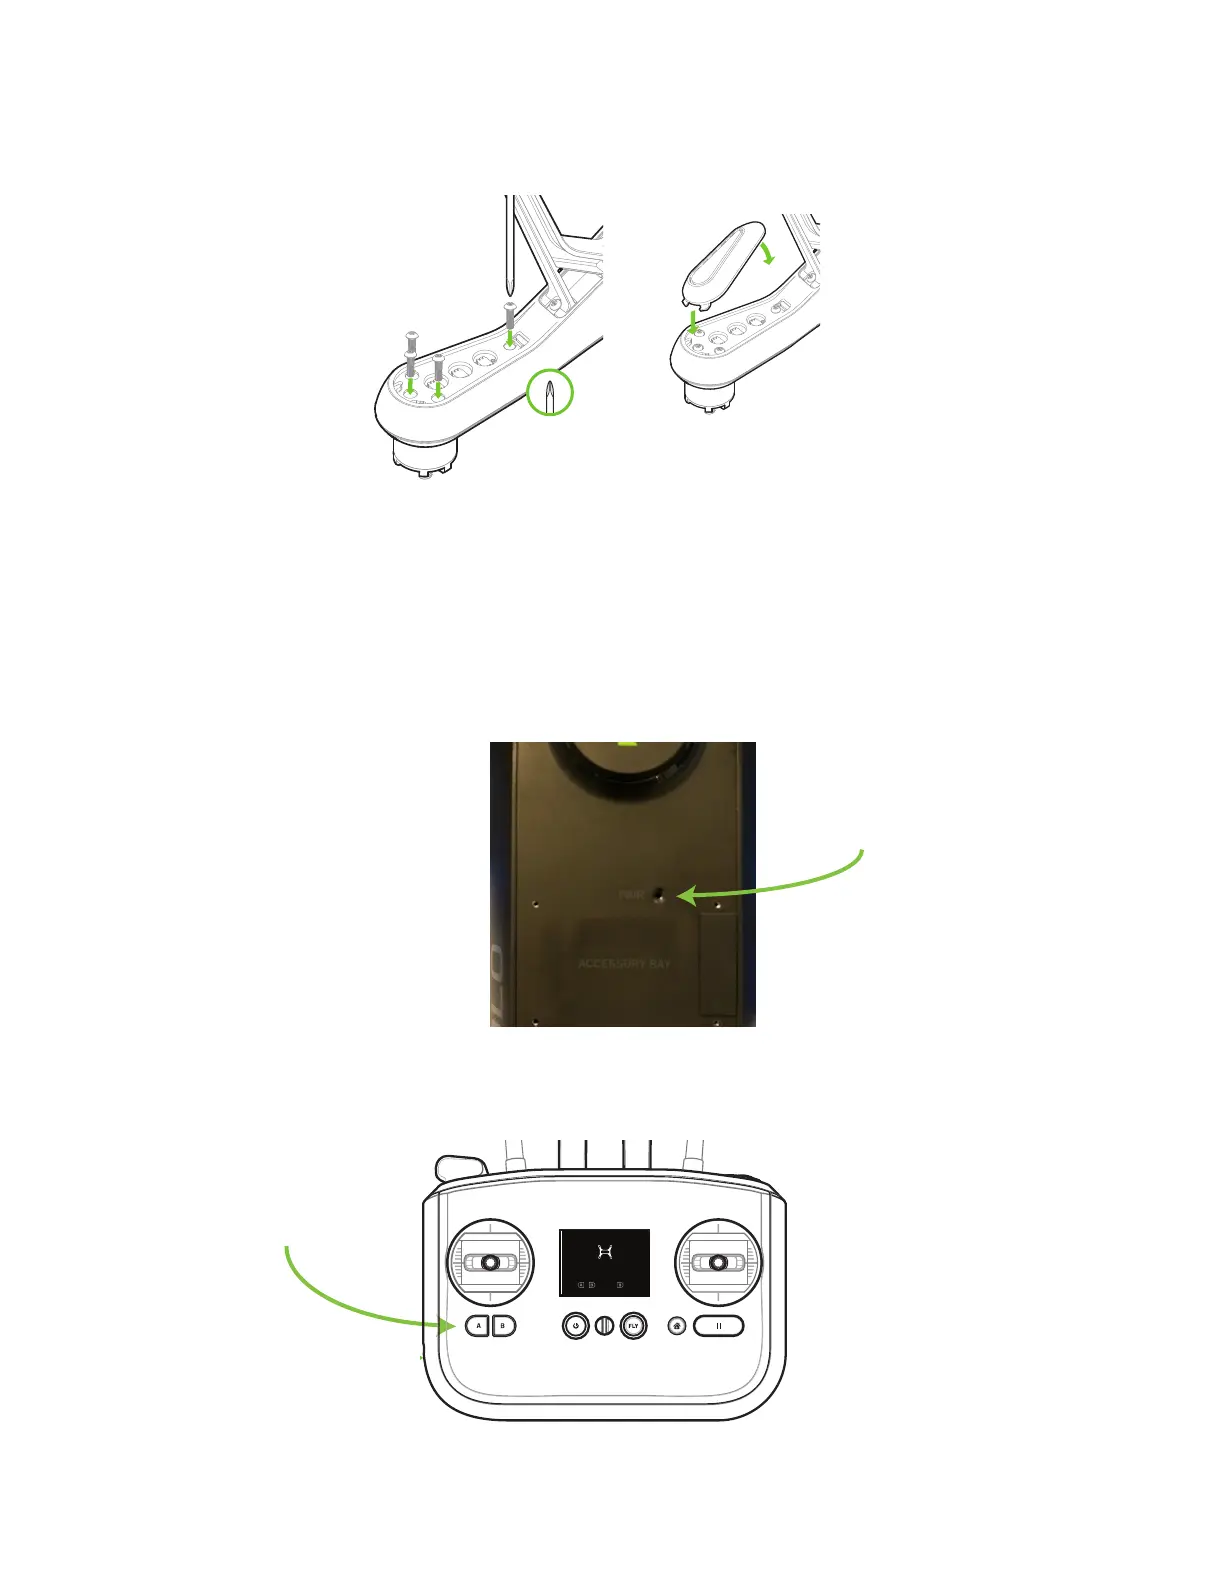
Turn over Solo and replace the 4 screws to secure the new motor pod into place. Snap the LED cover back into
place by positioning the front (1) and snapping the back tab into place (2).
Figure 5.2.5: Motor Pod Replacement Process 5
5.3 Pairing
To pair a new controller with Solo, first power both the controller and Solo. Power off any other Solos or controllers
in the vicinity. Once powered, press the pair button on the underside of Solo to activate pairing mode. To cancel
pairing, press B.
Figure 5.3.1: Solo Pair Button
The controller will automatically detect Solo and prompt you to pair. Hold the A and B buttons on the controller to
start pairing.
Figure 5.3.2: Controller Pairing Process
1
2
SOLO-ARTOO PAIRING V5
User presses “Pair” on Solo
Reaches this screen after pressing “Pair”
User available actions:
A+B: Pair to Solo
B: Cancel pairing
Timeout
If no action is taken, pairing invitation times out after
30,000 milliseconds. (Feedback is shown)
Display when pairing invitation times out after 30 sec
Message timeout after 4000 milliseconds
Display when pairing has failed.
Message timeout after 4000 milliseconds
detected new Solo
to cancel
+
Hold to pair
detected new Solo
to cancel
+
Hold to pair
pairing canceled
Display on B button press. Timeout after 4000 milliseconds
User cancels. Timeout after 4000 milliseconds
pairing timed out
Press pair button on Solo to try again
pairing failed
Press pair button on Solo to try again
Display on pairing success. Timeout after 4000 milliseconds
Solo paired
pairing in progress
pairing canceled
User cancels with B
Haptic: 40 millisecond pulse immediately after A+B press
Message is displayed until following states are triggered.