2524
Quality Control Testing
3. Performing QC testing at regular intervals. See “9.3 QC Testing”.
ǽ For more detailed information about the Quality control options, please refer
to the full User Manual (See chapter 1.4 How to use this manual).
8.1 Editing QC LOT Information
1. Tap Edit QC LOT on the QC options screen to en-
ter the QC Urine Control solution LOT numbers
and the acceptance limits for the solutions.
2. Select the type of control solution (L1, L2, L3) and
tap Next.
3. Enter the solution’s LOT code then tap Next. If
a LOT code is already stored for the current type
of control solution, this will appear in the input
field. The input field is otherwise empty.
ǽ The expiry date of the QC solution LOT can also
be entered. Separate the expiry date from the LOT
number by putting it in parentheses. Use two digits
for both the year and the month data, and separate
the year and the month with a slash (/), a hyphen
(-), a dot (.), or an underscore (_).
Consult the control solution’s instruction of use and
enter the acceptance limits for the type of control solution selected in step 2.
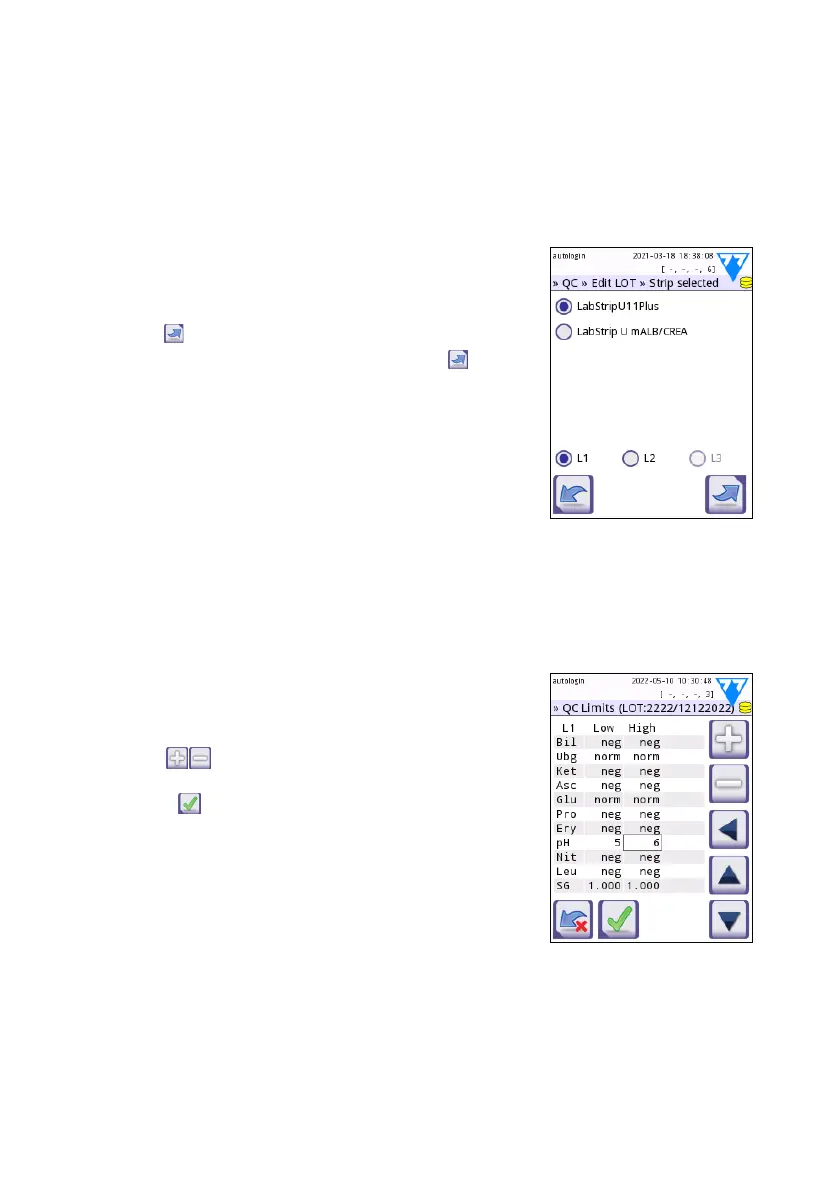
8.2 Setting QC solution acceptance limits
The columns of the table are from left to right: pa-
rameter, lower limit, higher limit, unit. A cursor box
indicates which cell is selected.
Use the arrows to navigate the cells and the plus and
minus buttons to increase or decrease the val-
ues.
Tap OK to store the values. The device will return
to the QC options screen.
Repeat the previous steps for each level of control
solution.
ǽ QC limit definition is not possible for ACR and
ACR interpretation.
The target values can also be entered automatically
with a barcode reader. Access Main » Options » Settings » QC Options, mark L1
and L2, press Edit QC LOT, select “L1”, press Next and scan the barcode of
Level 1, check and confirm with the green tick, press Edit QC LOT, select “L2”,
press Next and scan the barcode of Level 2.
Fig. 14: Select urine test
strip
Fig. 15: The QC limits
screen
 Loading...