TroubleshootingGuide
31|Page
CHECKINGTHEFLOWSENSOR
Ifthetanklessunitisproperlyconnectedtowater,gas,andpowersuppliesbutthefanmotordoesnot
initiatewhenwaterisrunthroughit,theflowsensorismostlikelynotworkingproperlyandnottelling
thePCBoardtoinitiate.
1) TOOLS
‐Gatherthefollowingmaterialstogether:
a. Degreaserinapumpactionbottle
b. #2PhilipsScrewDriver
c. Flashlight
d. OldTowels,atleastthree
2) PREPARETHEUNIT
–
a. Draintheunitbyfollowingtheproceduresonp.21.
b. Disconnectpowertotheunit.
3) FRONTCOVER
‐Removethefrontcover.
4) COMPUTERBOARD
a. Removethescrewholdingthecomputerboardtothe
manifold,andletthecomputerboardhanginfrontoftheunit
b. Disconnecttheflowsensorwire.
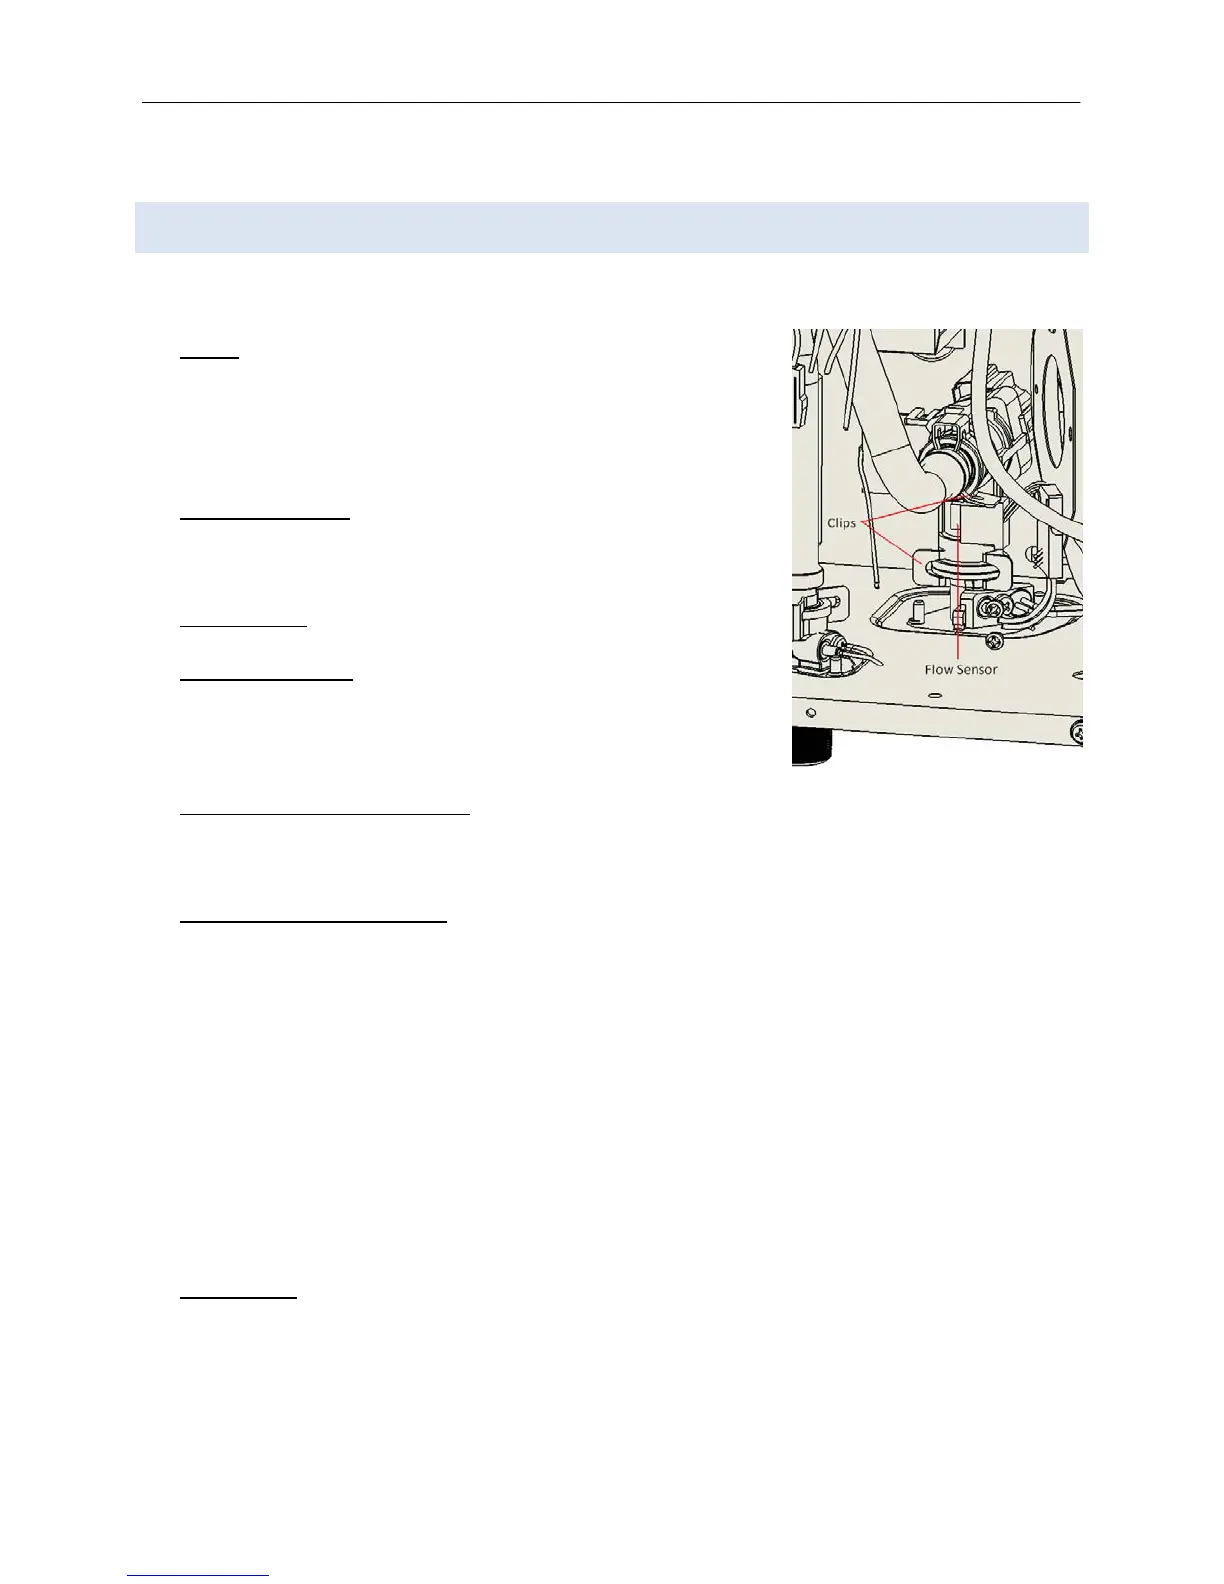
5) DISCONNECTFROMWATERWAY
a. Theflowsensorislocatedbehindthecomputerboard.
b. Removethewaterwayclipsoneachsideoftheflowsensorbypushingonthetabs.
6) CHECKINGTHEFLOWSENSOR
a. Checkforfunctionality .Flow rateisdeterminedbyanimpellerthatspinsasfluidrunsthrough
it.
b. Blowintotheinletoftheflowsensor.Listenforthespinningimpeller;itshouldspinfreelyfora
fewseconds.Ifitcomestorestabruptlyordoesn’tspinatall,itneedstobecleanedor
replaced.
c. Placetheflowsensorintoacon taineroflemonjuiceoranotherdegreaserfor30minutesand
checkthespinningcapabilityagain.
d. Testthecleanedflowsensorby“jumping”thesystem:
i. Reattachtheflowsensorwires.
ii. Turnpowerbackontotheunit.(GASSHOULDSTILLBEOFF)
iii. Blowintotheflowsensor;ifthefaninitiates,theflowsensorsuccessfullyreadthe
airflowandshouldnowworkproperly.
7) REASSEMBLE‐Reassembletheunitinreverseorder.EnsurethattheO‐ringsandwaterwayclipsare
allinplace.
Figure34