28
EN
(Continue to next page)
Do not place objects of any kind on the inverter during operation! Do not touch the heat sink while the inverter is
operating! Some parts may be very hot and could cause burns.
Before proceeding with commissioning, make sure you have carried out all the following checks:
• Check the correct connection and polarity of the DC inputs, and the correct connection of the AC output and earth
cables.
• Check the sealing barrier of the cable ducts and installed quick-fit connectors to prevent accidental disconnec-
tions and/or avoid compromising the IP65 environmental protection rating.
The inverter can be powered with DC sources only; make sure that irradiation is stable and adequate for the inverter
commissioning procedure to be completed.
At the first activation of the inverter the firmware version could syncronized between power module and wiring
box. During this phase the LEDs “Power” “Alarm” and “GFI” blinks together every 1 second. This process is abso-
lutely normal and must be completed without interruption. A switch-off of the system during this process could
cause serious damage to the inverter.
Commissioning could be carried out in two different ways:
• Via ABB Installer for Solar Inverters APP (mobile APP for commissioning a single inverter as well as a multi-inverter solar plant)
• Via Web UI (Integrated Web User Interface enabling setting parameters and performing commissioning of a single inverter).
ABB Installer for Solar Inverters APP is the recommended method to commission the inverters.
Commissioning via ABB Installer for Solar Inverters mobile APP
ABB Installer for Solar Inverters APP is available for Android mobile devices with an Android version of 6.0.1 or greater (for iOS mo-
bile devices will be implemented soon) and could be downloaded and installed from Play Store.
The requirements to complete the procedures are listed below:
- ABB Installer for Solar Inverters APP installed on mobile device.
- Enabled installer account for ABB Installer for Solar Inverters APP (The account could be created in the mobile app directly fol-
lowing the dedicated wizard procedure).
- Manual claiming of the inverters to be commissioned.
The claiming process consist of indicating which inverters are to be commissioned.
Claiming process can be performed by:
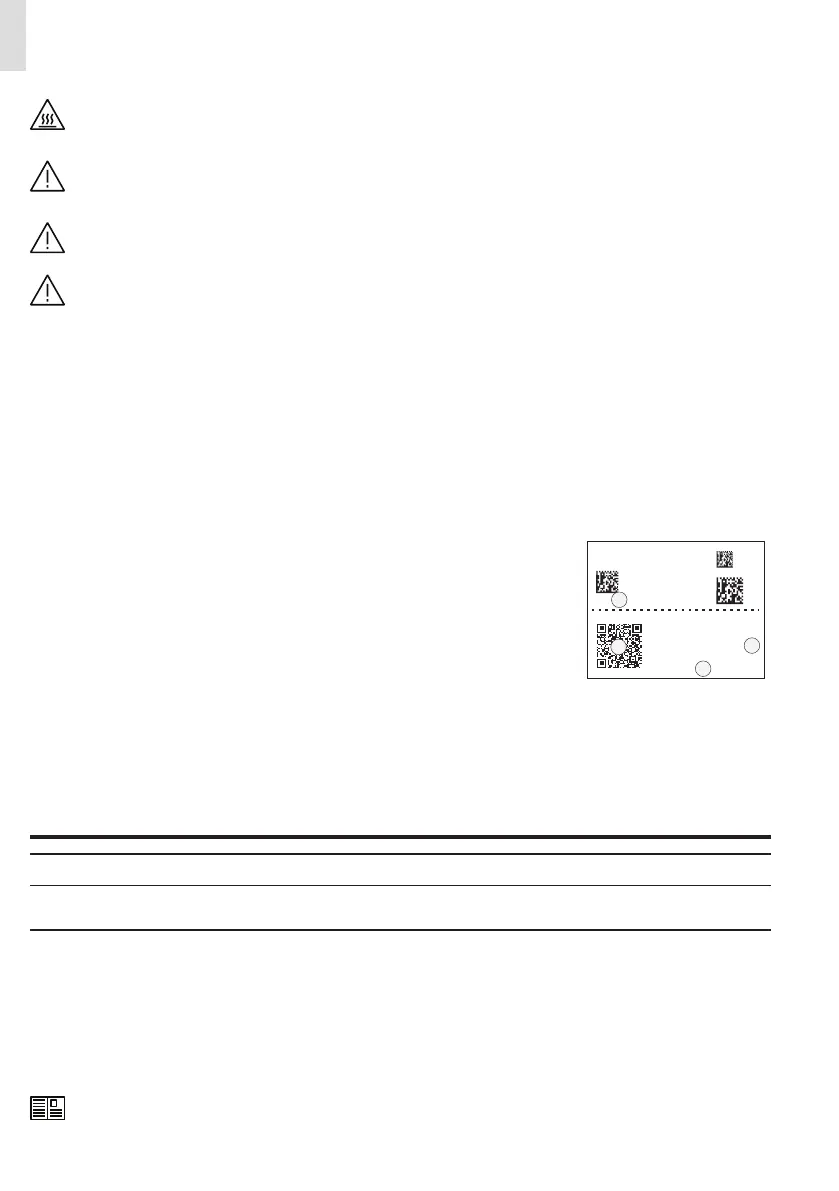
- taking pictures of the QR codes (A) of single inverter units (printed on the Communication
identification label) (recommended).
- manual insertion of the MAC address (B) and related product keys (C) (printed on the
Communication identification label) of all the inverters that shall be commissioned.
SN WLAN: SSSSSSSSSS
PN WLAN: .V2PVKA 53.1
Mac Address:
AA:BB:CC:DD:EE:FF
PK: 0000 - 0000 - 0000- 0000
SN WLAN: SSSSSSSSSS
SN Wiring Box: ZZZZZZZZZZ
Remove and apply on the plant documentation
MAC: AA:BB:CC:DD:EE:FF
B
B
A
C
- scanning and selecting of SSIDs associated to the Wi-Fi networks generated by each inverter to commission.
Follow the procedure below to commission the inverter:
• Close the DC disconnect switches (15) to supply the inverter with input voltage from the photovoltaic generator or close the AC
switch downstream of the inverter (and AC disconnect switch (09) for the -S2, -SX2 wiring box version) to supply the inverter with
AC grid voltage. In the pre-commissioning phase the “Alarm” LED keeps quickly flashing, “Power” and “GFI” LEDs are OFF.
• Perform the installation wizard steps with ABB Installer for Solar Inverters APP enabling the transfering the settings to all the
claimed inverters.
• After the commissioning via ABB Installer for Solar Inverters APP is completed, the inverter changes the behaviour of the “Power”
and “Alarm” LEDs (08), in relation of the input voltage value:
Input voltage LED Status Description
Vin < Vstart
Power = Flashing
Alarm = OFF
The input voltage is not sufficient to enable connection to the grid.
Vin > Vstart
Power = Flashing
Alarm = ON
The input voltage is sufficient to enable connection to the grid: the
inverter waits for the grid voltage to be present to make the con-
nection to the grid.
• Depending of the supply source used to complete the installation wizard steps, close the disconnect switch of missing voltage
sources: In case of missing AC source close the AC switch downstream of the inverter (and AC disconnect switch (09) for the -S2,
-SX2 wiring box version); In case of missing DC source close the DC disconnect switches (15).
• When the input voltage is sufficient to allow the connection to the grid, the inverter will check the grid voltage, measure the isola-
tion resistance of the photovoltaic field with respect to earth and performs other auto-diagnostic checks. During the preliminary
checks on the parallel connection with the grid, the “Power” LED keeps flashing, the “Alarm” and “GFI” LEDs are OFF. The inverter
will ONLY connect to the grid if all parameters fall within the ranges foreseen by current regulations.
• If the outcome of the preliminary checks to grid synchronization are positive, the inverter connects and starts to export power to
the grid. The “Power” LED remains fixed on while the “Alarm” and “GFI” LEDs are OFF.
To address any problems that may occur during the initial stages of operation of the system and to ensure the in-
verter remains fully functional, you are advised to check for any firmware updates in the download area of the web-
site www.abb.com/solarinverters or at https://registration.abbsolarinverters.com (instructions for registering on
the website and updating the firmware are given on the product manual).
—
Commissioning