7. OPERATIONAL CHECK PRIOR TO INSTALLATION
(ELECTRICAL CLOSE/OPEN)
The breaker should be tested for mechanical and electrical operation before delivery to the
installation site. Make the necessary control power connections. Open the door of the low
voltage compartment to observe the mechanical operations. A manual trip handle is provided on
the outside of the cabinet. (see Figure 6 Trip Handle)
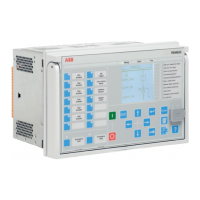
Observe the position-indicator located on the front of the actuator cover plate. If the panel is
green, the breaker is open, and if the panel is red, the breaker is closed (on breakers configured
per IEEE standard). To perform a close or open, ensure the “Ready” light is illuminated above
the Close (1) and Open (0) buttons. Press the appropriate button firmly; keeping hands and
loose clothing clear of operating linkages. If the breaker is already open, nothing will happen
when the open button is pressed. If the breaker is already closed, nothing will happen when the
close button is pressed.
Note: In the event of a malfunction or loss of source voltage, the “Ready” light will not be
illuminated.
8. INSTALLATION
The breaker must be vertical, level and securely fastened. Follow your company guidelines and
codes for setting the height of the breaker, securing the frame to the pole or foundation, and
making connections.
8.1 Mounting
The breaker is normally shipped suitable for substation mounting. The following is the recom-
mended installation procedure.
Substation Mounting:
1. With the lifting brackets mounted to the breaker roof, lift the breaker off the pallet and move
into desired position.
2. Bolt the legs to the pad and raise the upper portion to the desired height.
3. Bolt the legs to the sides of the breaker.
4. Install “X” braces on all sides of breaker.
(see Figure 11 Typical Outline, 1250 A)
5. Make sure all hardware is securely tightened.
8.2 Grounding
The breaker cabinet includes a standard NEMA two-hole stainless steel pad on both side
sheets, legs, and on the roof (optional) for grounding. To ensure proper operation of the
actuator controller, the side sheet where the actuator controller is mounted must be grounded to
 Loading...