What You See on the Display What You Do Comments
6-3
Questions? Refer to Page 10-9 For Technical Support Instructions.
Chapter 6: Proficiency Test
9. Bring prociency survey specimens to
room temperature. Mix each specimen well
according to instructions from the survey
provider. Wipe away any specimen on the
tip of the vial before squeezing the vial and
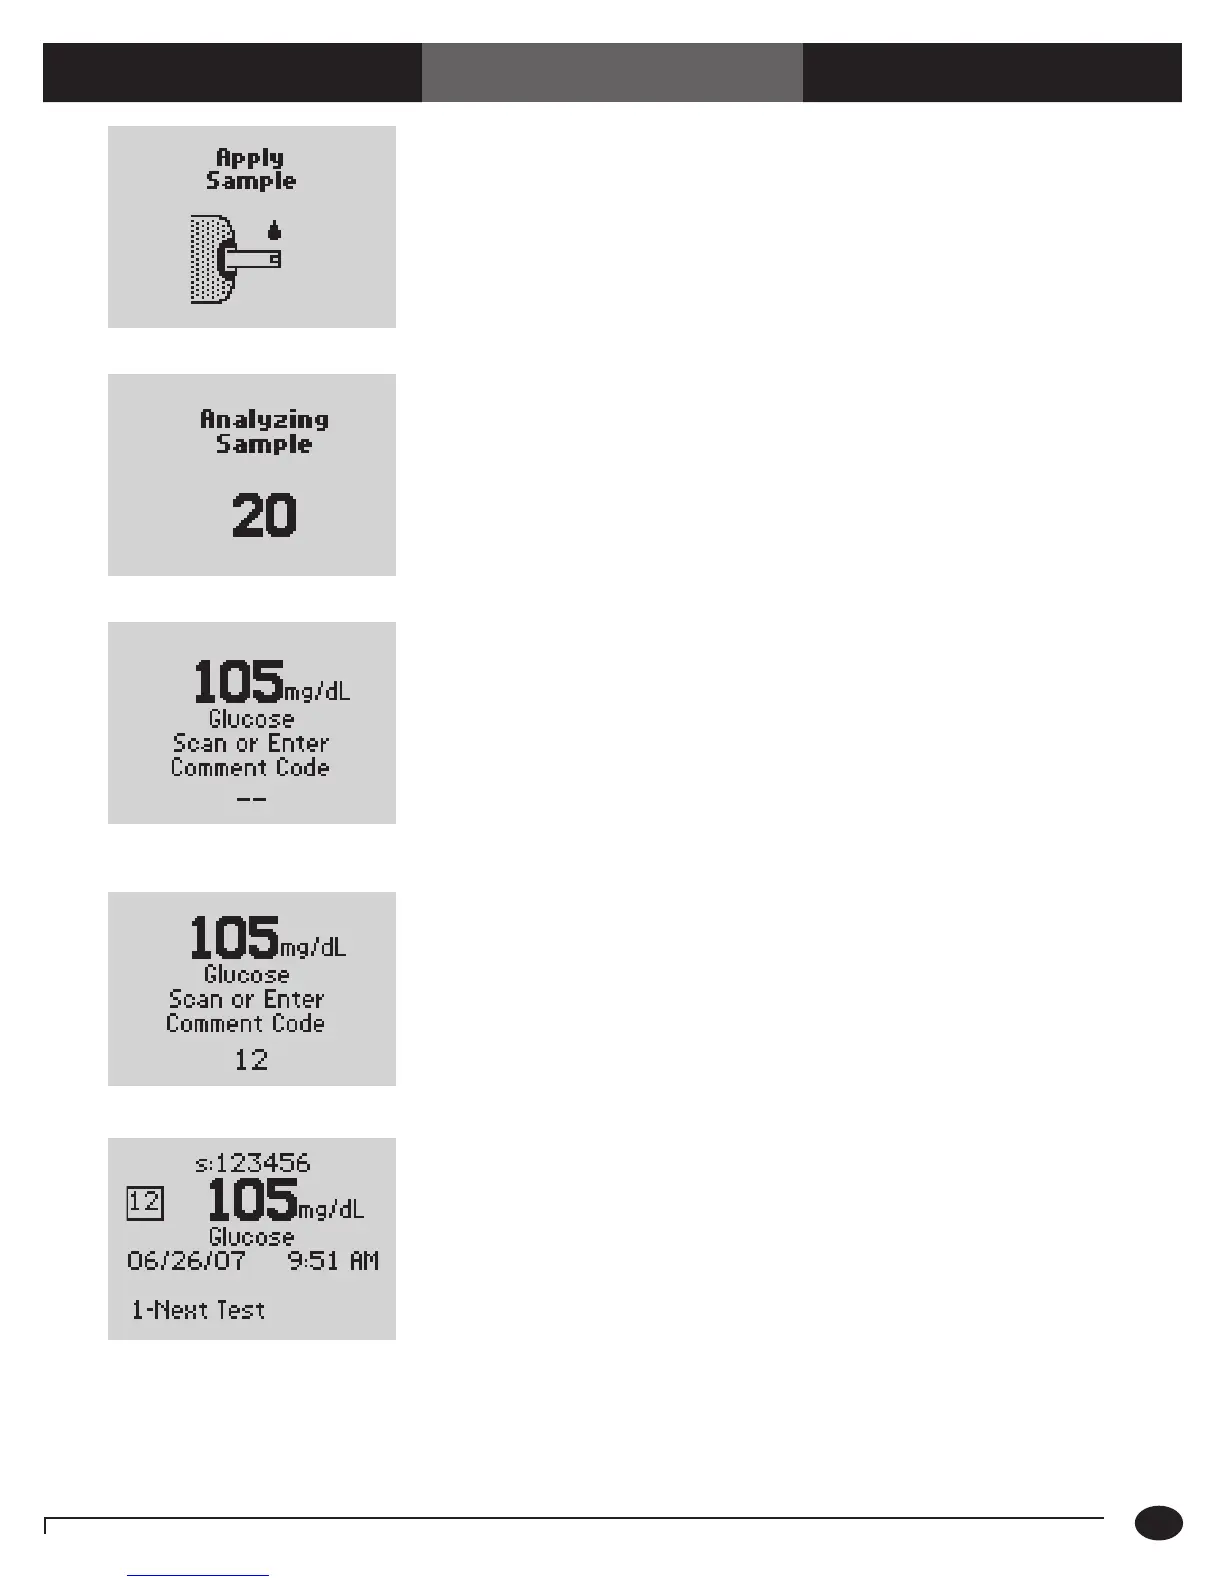
applying a drop to the test strip target area,
covering the entire area. Aer applying the
sample, recap the vial tightly.
When sufficient sample has been applied, the
monitor beeps, displays Sample Accepted
and automatically starts the test. For a detailed
description of the test strip target area, refer to
the Test Strips section of Chapter 1.
10. Wait for the monitor to analyze the
sample and display the test result.
The monitor counts down then displays
the test result. If an error is detected during
the assay, the assay is terminated and no
result is displayed. Once the assay begins,
all key presses are ignored until the assay is
completed.
11. If you are prompted to enter
a comment code, continue to step 12;
otherwise, skip forward to step 13.
12. Scan or manually enter the comment code
via the keypad, then press Enter.
The monitor displays the Results screen. The
comment code number that was entered will
appear in a box to the left of the test result.
13. You may select one of the following
options:
Press 1 – Next Test.
Press Menu to return to the Menu
Mode.
Press On/Off to turn off the monitor.
Remove the test strip from the monitor
and discard it when finished testing.
Follow your facility’s biohazard disposal
policy.
You can refer back to step 5 for the steps to
perform any additional proficiency testing at
this time.
5.8 mmol/L
5.8 mmol/L
5.8 mmol/L