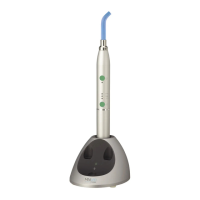
6.3 Connect the accessories.
You will hear a click when the optical guide is correctly inserted.
6.4 Using the medical device
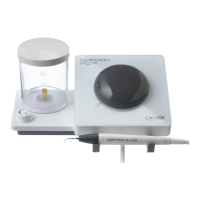
The Mini LED is normally placed on its base. To use it, remove it from its base.
Prior to the day of use, check that you have enough sterilised optical guides and check the power output as indicated in
the chapter page 23.
The patient and the practitioner must wear class II safety goggles when the Mini LED is in operation.
l Remove the Mini LED from the base;
l Press the on/off button.
l Install the rigid protection shield;
l Programme the Mini LED to select the required mode.
l Position the end of the optical guide as close as possible to the surface of the material to be cured;
Do not allow the optical guide to touch the material to be cured.
l Press the on/off button to trigger the selected mode. A beep sound confirms cycle initiation;
l A second beep sound confirms cycle completion.
You can stop the cure cycle at any time by pressing the on/off button.
After three minutes of inactivity, the Mini LED switches to standby.
Depending on the cure material used, repeat the cure cycle as required.
6.5 Switching off the medical device
Press the ON/OFF button to stop a cure cycle.
The Mini LED switches off after three minutes of inactivity. Press the button to restart.
6.6 Disconnecting the medical device
Before a long absence or when not in use, the medical device must be cleaned, its battery must be removed and the
charging base must be disconnected from the mains power.
Page 16/38 - User Manual | Mini LED™ | J02541|V8|(07)| 01/2017|NG13EN010H