~ Quick Reference
Measure a Leak
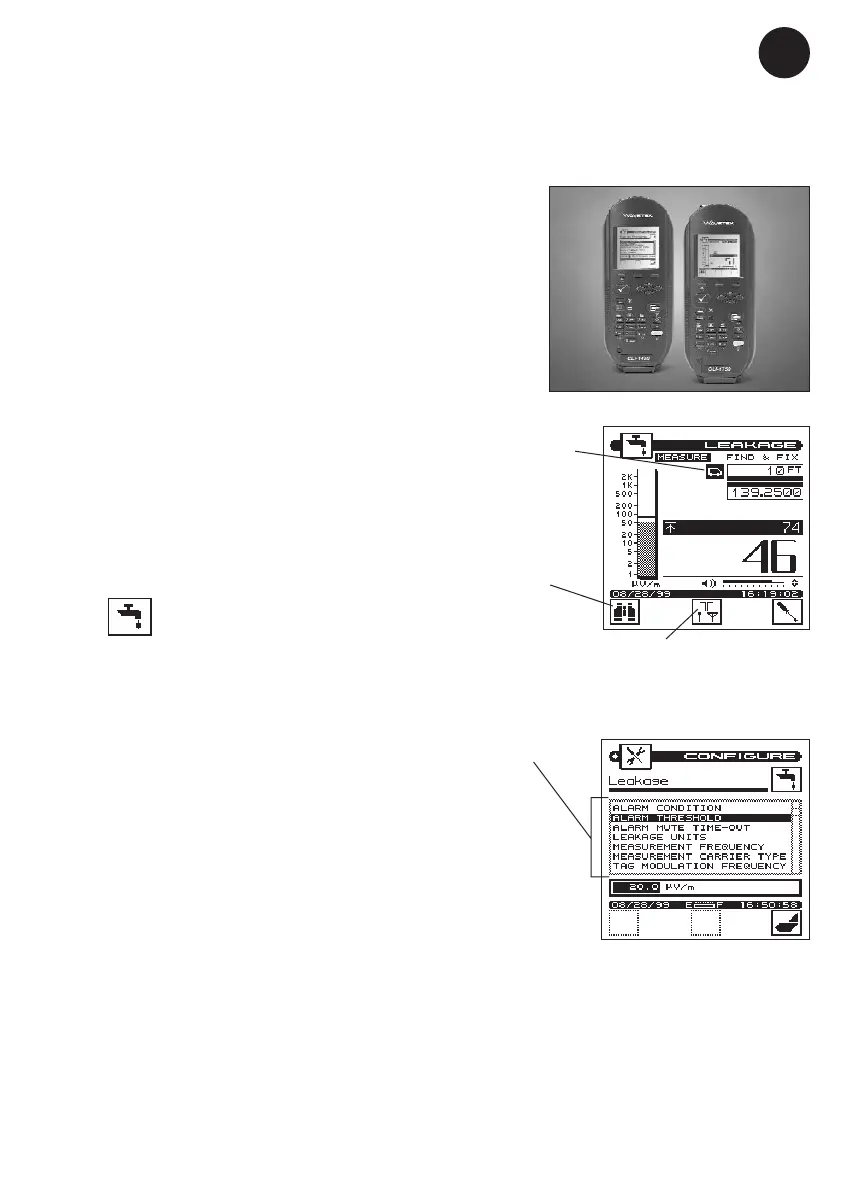
1. Choose Your Weapon: Acterna offers
two leakage detection meters, the CLI-
1450 and the CLI-1750. Both meters
are fully equipped to measure egress
and ingress leakage sources and have
similar features and functions. The
CLI-1750 includes additional options
that can be used for home-wire-testing.
2. Know Your Meter: Turn your meter
“ON”. Press the “SHIFT icon” key and
the Leakage key to access the leakage
screen. Check your meter to see if
you are in the “Measurement” mode.
Check the screen for the vehicle
mount antenna option.
3. Check Your Meter Settings: While in the
leakage screen, press the “SHIFT icon”
key and the Configuration key, check the
default settings for each of the func-
tions. Check the following: alarm condi-
tion, alarm threshold, measurement fre-
quency, and reference distance. Adjust
the defaults on the meter functions that
are not correct for your situation.
(for more detailed information about setting the con-
figuration, see chapter 3 page 8.)
1-1
Introduction to Leakage
1
Vehicle Mounted
Antenna Icon
Leakage settings
Use the up and
down arrow keys
to scroll through
leakage settings.
Press the search
softkey to
toggle between
“Measurement”
and “Find & Fix”
modes
Press the antenna type softkey until the vehicle
mount antenna icon appears on the top of the
screen.