Installation and Commissioning Guide
ICUNO-MOD
13
12
Installation and Commissioning Guide ICUNO-MOD
Doc. No. 9590-3013 Ver. 5 200722
ActronAir is constantly seeking ways to improve the design of its products, therefore specifications are subject to change without notice.
Copyright © 2019 Actron Engineering Pty. Ltd.
04.07.01. Basic BMS Control
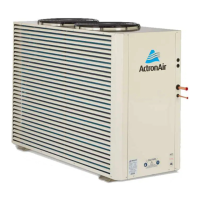
Basic BMS Control is useful for applications looking for a relatively simple BMS solution. This BMS setup allows you to
operate the ActronAir AC unit in the same way our wall controls do.
The system operating logic is controlled by the ActronAir on-board controls, providing a wide range of functions and
features. This removes the need to have to re-write the HVAC or air conditioning logic into your BMS controller, as the
system will take care of it for you.
With this setup, you can use the BMS to:
● Turn the system on/off
● Adjust room setpoint temperature
● Change the mode of operation: Auto/Cool/Heat/Fan Only
● Change the supply fan settings: Low/Medium/High/Auto
● Set the supply air filter notification timer
● Open and Close zones
The ActronAir AC system may be configured to operate in Basic BMS Control, or Basic BMS Control with a Wall Control.
When operating in Basic BMS Control with a Wall Control, all settings changes from the BMS and Wall Control will be
synchronized across the entire system.
Additional information for controlling the unit in Basic BMS Control can be found in Section 05.01.
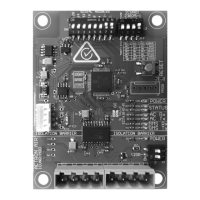
04.07.02. UNO Board Configuration for Basic BMS Control
To configure the ActronAir AC system for Basic BMS Control, follow the procedure using the 7-segment display on the
UNO Board below:
Step 1. Press the MENU button to navigate to SEt (Settings), press the ENTER button to enter sub-menu.
Step 2. Press the MENU button to navigate to CtrS (Control Source), press the ENTER button to enter sub-menu.
Step 3. Press the MENU button to navigate to 2 (Basic BMS), press the ENTER button to accept.
Step 4. Press the BACK button twice to return to Main Screen.
04.07.03. UNO Board Configuration for Basic BMS Control + Wall Control
To configure the ActronAir AC system for Basic BMS Control + Wall Control, follow the procedure using the 7-segment
display on the UNO Board below:
Step 1. Press the MENU button to navigate to SEt (Settings), press the ENTER button to enter sub-menu.
Step 2. Press the MENU button to navigate to CtrS (Control Source), press the ENTER button to enter sub-menu.
Step 3. Press the MENU button to navigate to 3 (Basic BMS + Wall Control), press the ENTER button to accept.
Step 4. Press the BACK button twice to return to Main Screen.
04.07.04. Advanced BMS Control
Advanced BMS control is better suited to more complex or bespoke scenarios. This BMS setup is ideal for those
applications where the air conditioning needs to link with other products, or if you require customized functions not
included in the existing software and logic in the on-board controls.
Even with the highly customizable level of control, the ActronAir software ensures that the safety logics of operations
are still in place to ensure that the ActronAir system will stop to prevent any problems from occurring.
With this setup, you can use the BMS to:
● Turn the system on/off
● Control compressor capacity
● Set supply fan speed
● Control Heat/Cool (reversing valve – on/off)
● Set the supply air filter notification timer
● Open and Close zones